Star Trek Adventures 2E, Incursion Point

Starter Campaign

Dear reader, last week, I created a character for Star Trek Adventures 2E. His name was Mesh and he was an Orion Star Fleet Officer on the command track. The lifepath character generation system was satisfying and sufficiently different from other games that I felt it novel and enjoyable. But, the fact is, I’m unlikely to ever get to play a character in a Star Trek Adventures game, since I’m the one running it.

I picked up the Star Trek Adventures 2E Starter Set and Core Rulebook a couple of months ago when Modiphius was having a sale and I haven’t regretted it. Sometimes, when I buy the core rulebook for a game that I’m interested in along with its Starter Set, I wonder why. The starter set can feel like a waste of money. But, the truth is almost always contrary. The general quality of boxed starter sets recently has been really good. Free League are the masters of producing sets of such high quality and with such a wealth of content that I would generally always advise you to pick it up, even if you’re getting the core rules as well. I have played or run starter set adventures of the One Ring, Tales from the Loop and the Bladerunner RPG. All great quality adventures too! The Bladerunner one sticks out as a real highlight for me. The casefile, Electric Dreams was a brilliant intro to the game and the world but was also an engaging and evocative adventure in its own right. That’s a game you could run without ever reading the core rulebook, as long as you have the starter set and you don’t mind pregenerated PCs. We got four sessions out of that game, and I considered that extremely good value for money.
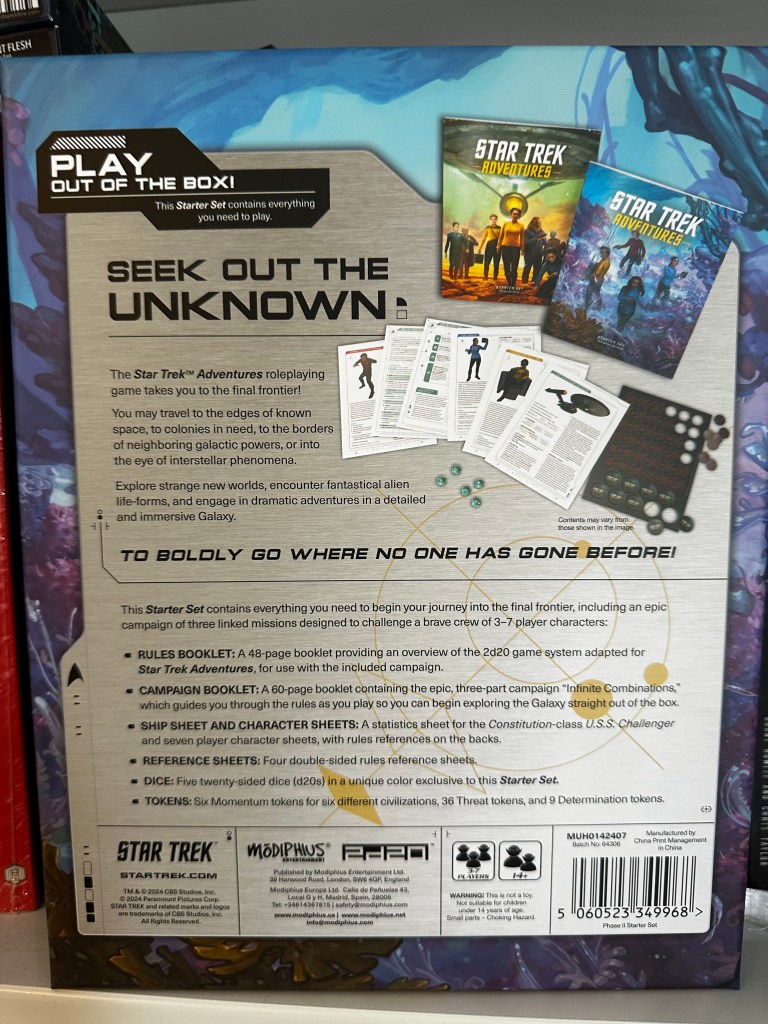
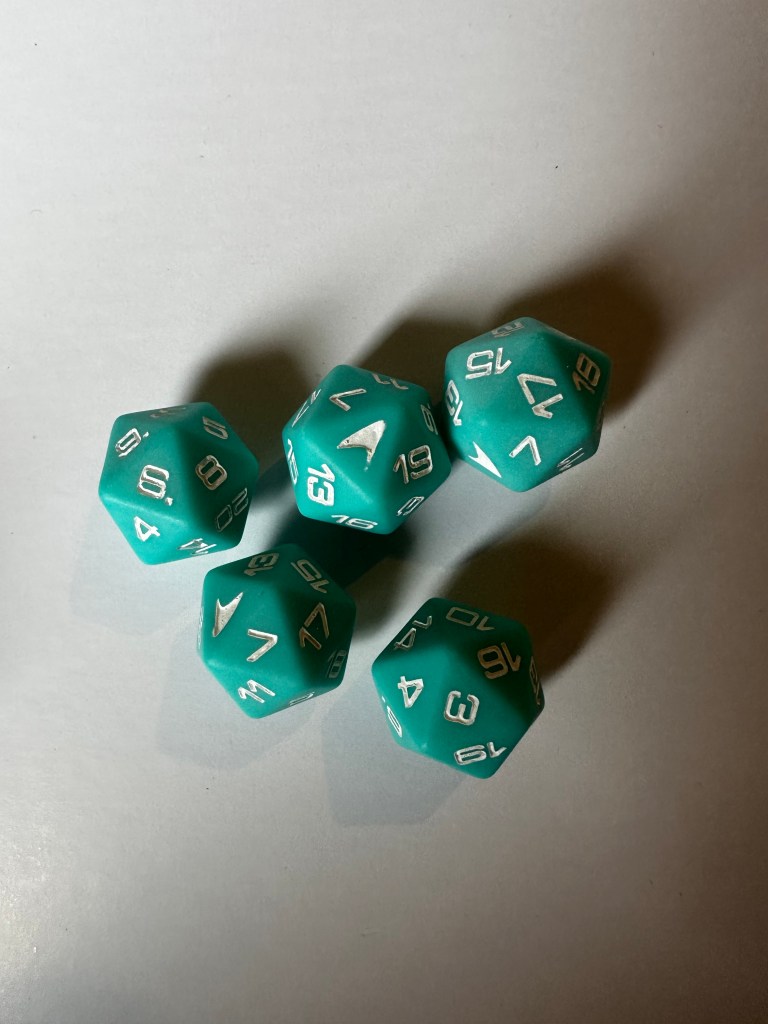
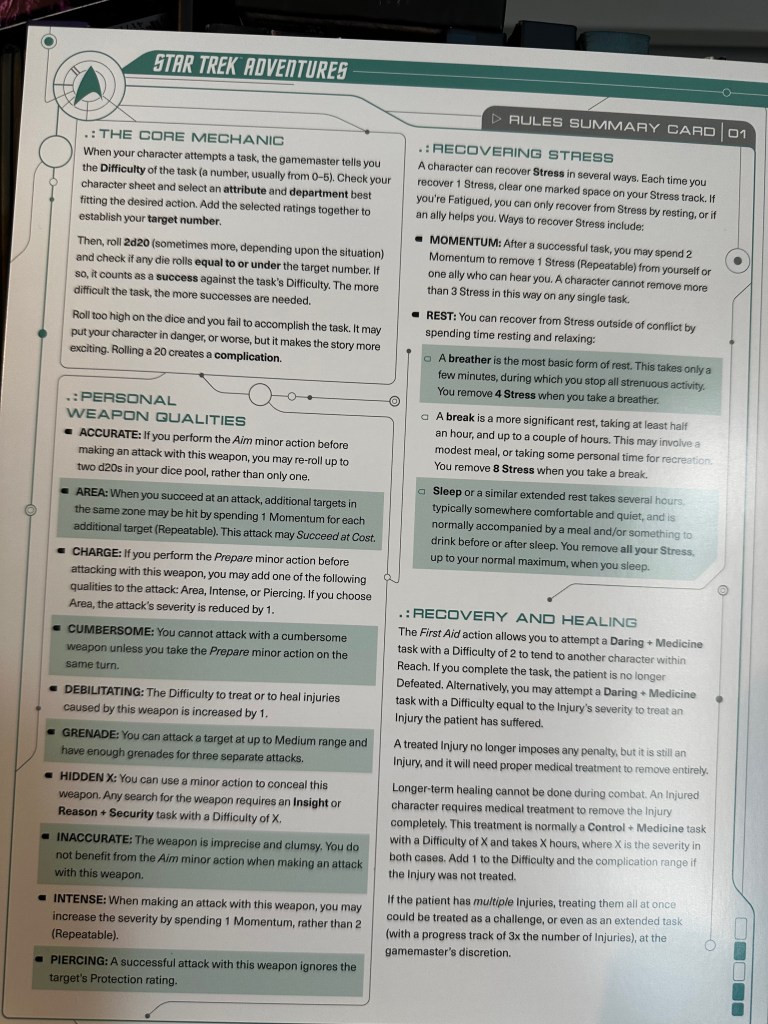
And then we have the Star Trek Adventures 2E Starter Set. In the box, you’ve got a set of five Star Fleet themed d20s, a sheet of tokens, a bunch of handouts which include pregens and rules references and, of course, a rules booklet. This booklet provides you with almost everything to run this game. The biggest omission is, of course, character creation rules. But, as I said above, if you don’t mind the pregens, that’s fine. The campaign booklet is just that: a booklet with a campaign in it. Inside the sixty pages are three interconnected adventures and three mission briefs, which act as adventure frameworks. After three sessions, I can confidently say, the Campaign Booklet, if played in full, is likely to bring you fifteen or sixteen sessions of play in the Star Trek universe. Now that’s making your latinum strips go a long way! Quark would be proud of you, Modiphius!

Rules

Star Trek Adventures 2E uses Modiphius’ own 2d20 system. Despite owning multiple Modiphius games, this is the first time I or, indeed, any of my players have had the pleasure of using it. I was expecting this to be a lot more trad than it is. It is actually really narrative-focused.

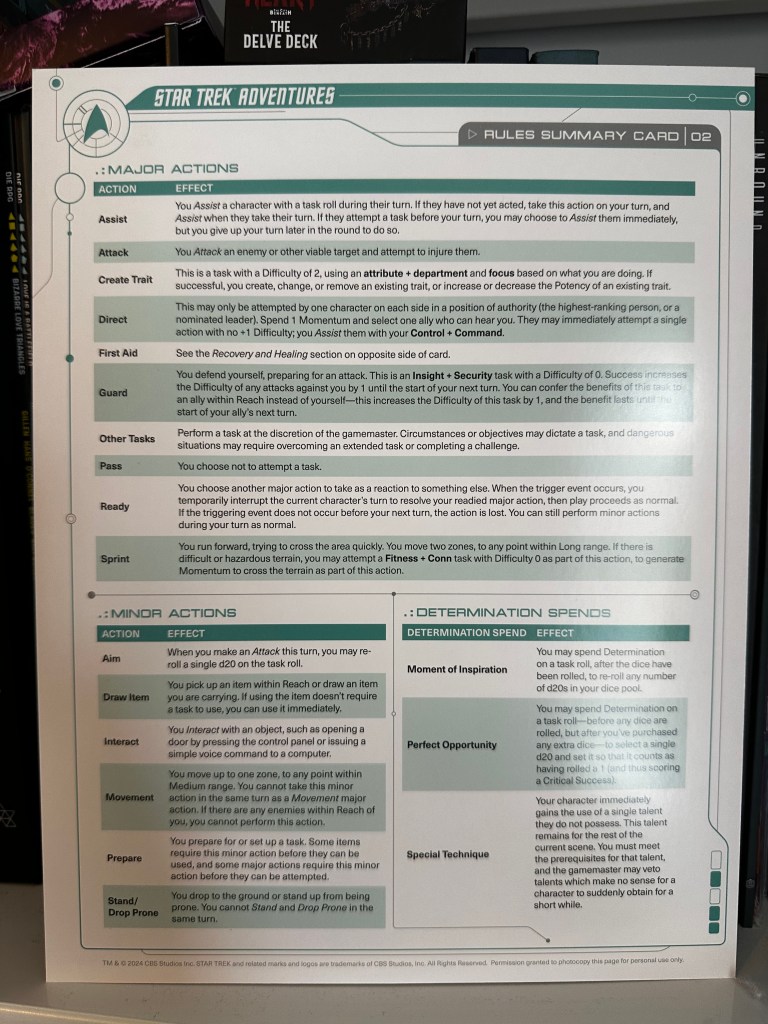
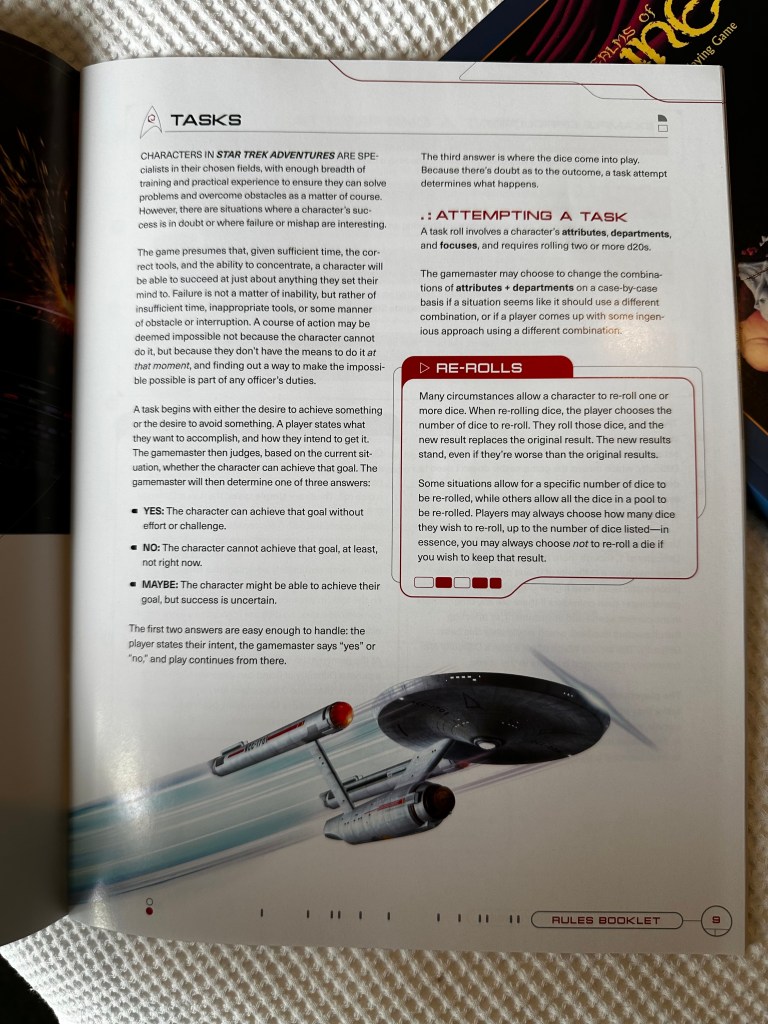
The core mechanic is simple. Every character has six attributes and six departments (see my last post for more detail on these.) When you are asked to perform a task, the GM will tell you which attribute and which department you need to use. So you might be using your Daring attribute of 9 and your Conn department of 3 to chase an enemy craft through an asteroid belt. You add the two scores to give you you target number. In this example, that would be 12. If you roll equal to or below that, that’s a success. You automatically get to roll at least 2d20, but you have various ways to add dice to that pool. A task’s Difficulty rating tells you how many successes you need to complete the task. So, for a Difficulty 3 task, you better get more dice, pray for a crit (a 1 counts as two success) or reduce the Difficulty somehow.

Momentum is a resource that the PCs share. They build it up by scoring more successes on rolls than they need. So, in the example above, if you managed to roll four successes on the Difficulty 3 task, you get to add 1 point of Momentum to your pool. That Momentum pool can’t go above 6 points so you are incentivised to use it up. They can use a point of Momentum to add a die to a pool, three points to add two dice and six points for three dice. There are other ways to spend this resource too, such as to get the GM to give you more info on a particular scene.

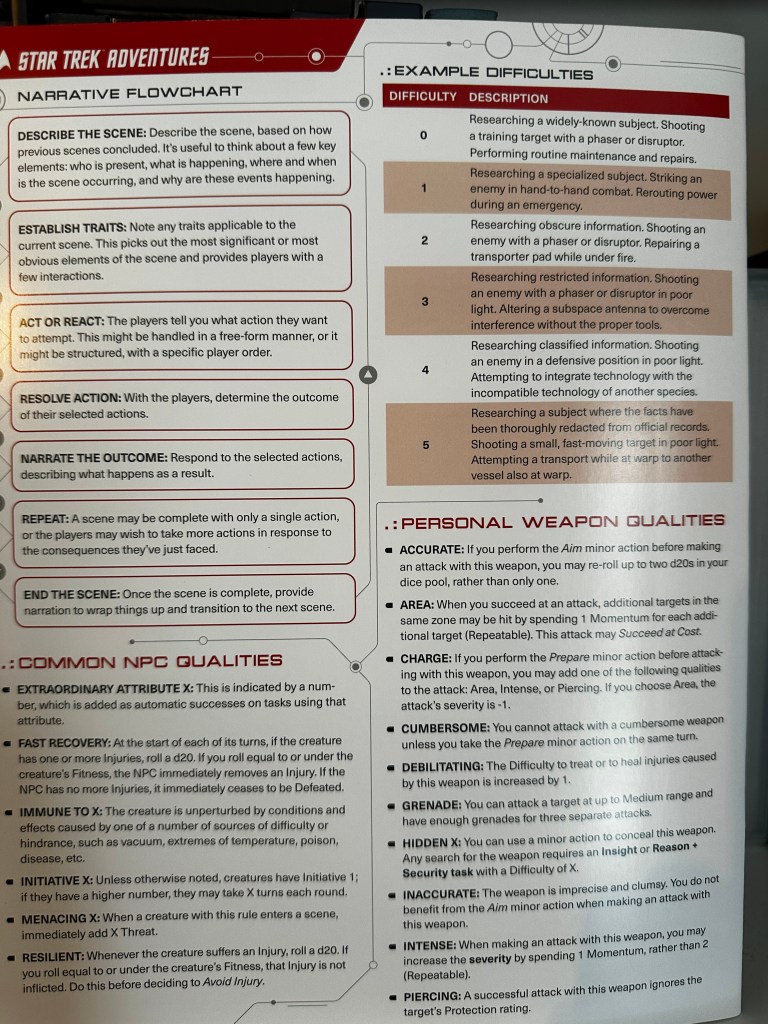
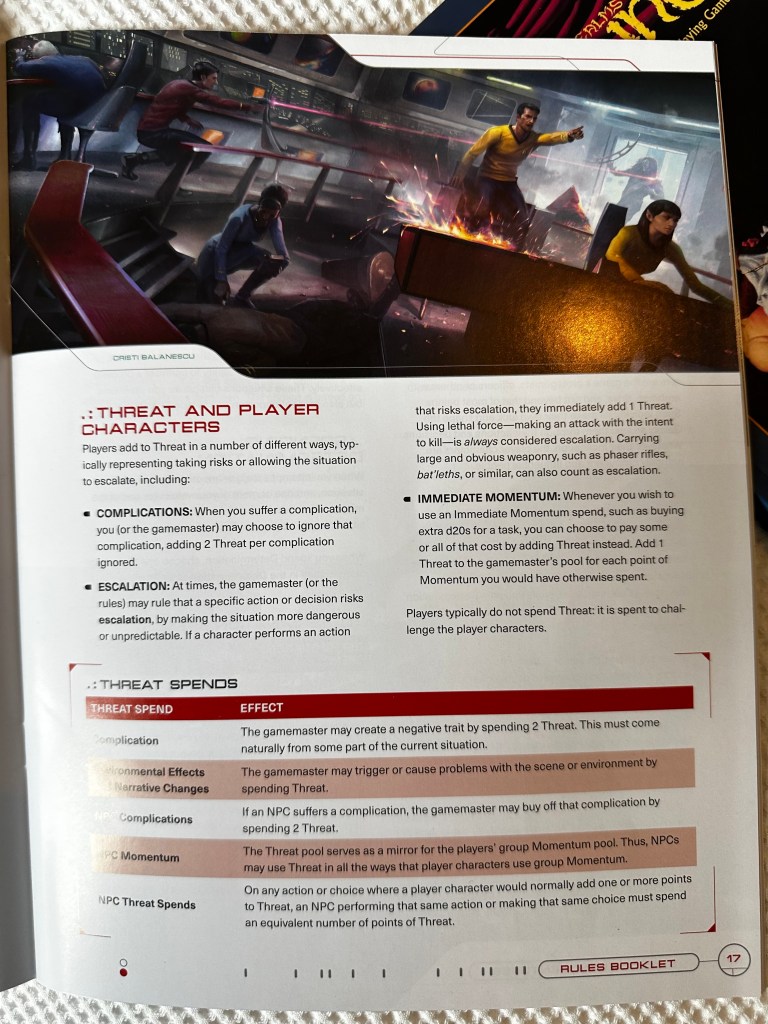
Threat is a resource for the GM to use that mirrors Momentum. The PCs can add a Threat for more dice in the same sort of way as spending Momentum. The GM gets to use threat to increase the likelihood of Complications occurring (this happens on the roll of a 20 usually.) Complications can come in many different forms. They might be a simple and mechanical as causing an injury. But they also might take the form of a massive narrative twist that really sticks spanner on the works of the PCs’ plans. This comes up way more often than I expected.

Those are the basics. There’s other stuff like taking Stress to Avoid Injury, Extended Tasks that use tracks, Resistance on tasks and in conflicts that absorb successes, but we don’t need to go into them here. If you are interested to learn more, check out the free Quickstart guide here.

Part One, Incursion Point
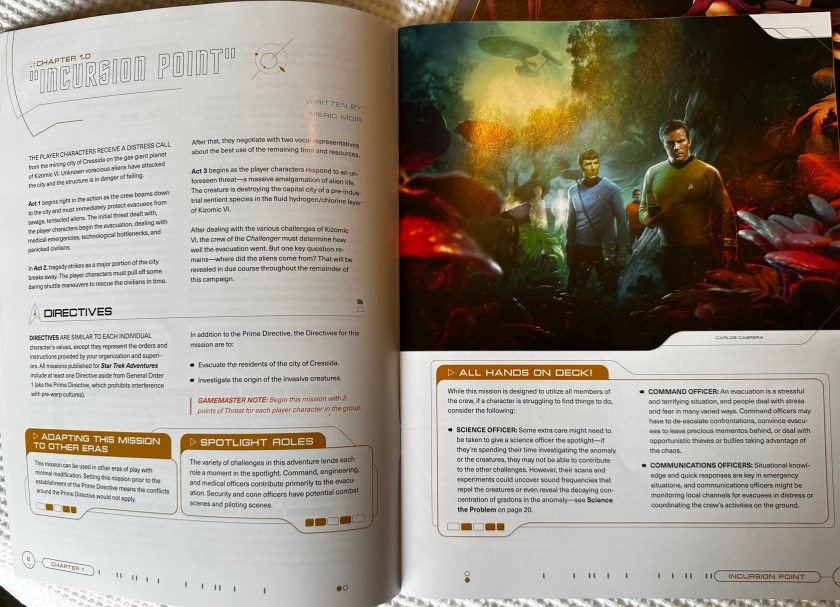
Opening page of the adventure, Incursion Point. Two page spread. One page features and illustration of Kirk and Spock.
Incursion Point

Incursion Point is the first adventure in the campaign contained in the Starter Set. The campaign is entitled “Infinite Combinations,” but the reasons for that are not really obvious from reading or playing this first part of it. It was written by Meric Moir.
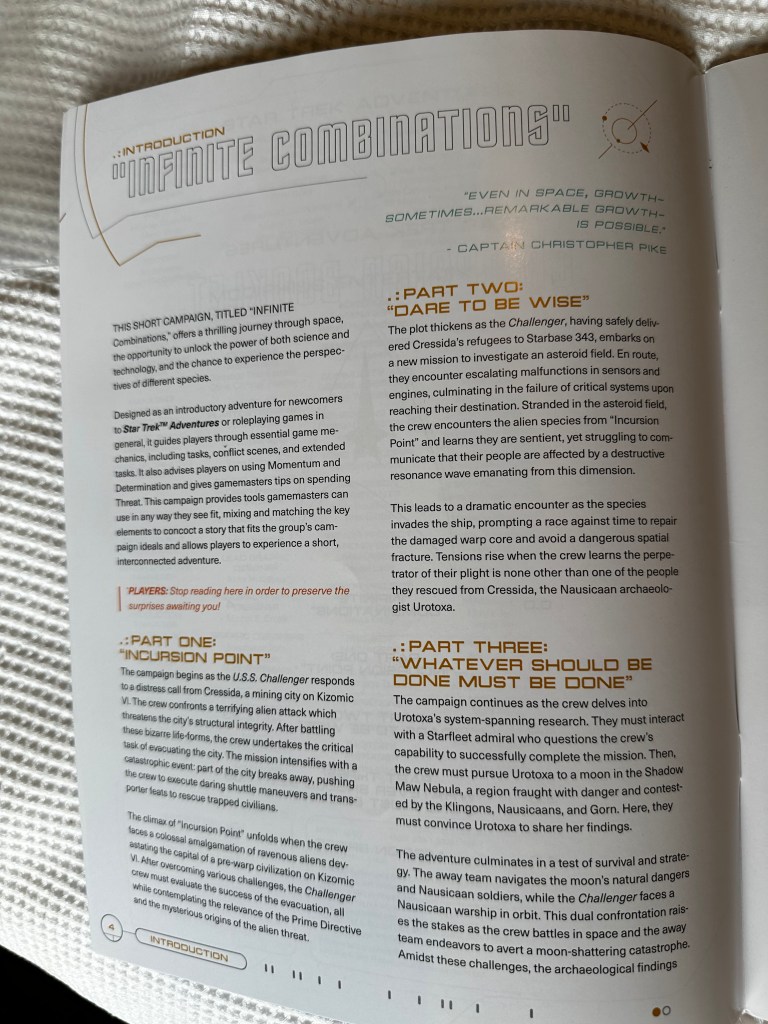
Summaries of each part of the campaign, Inifinite Combinations.

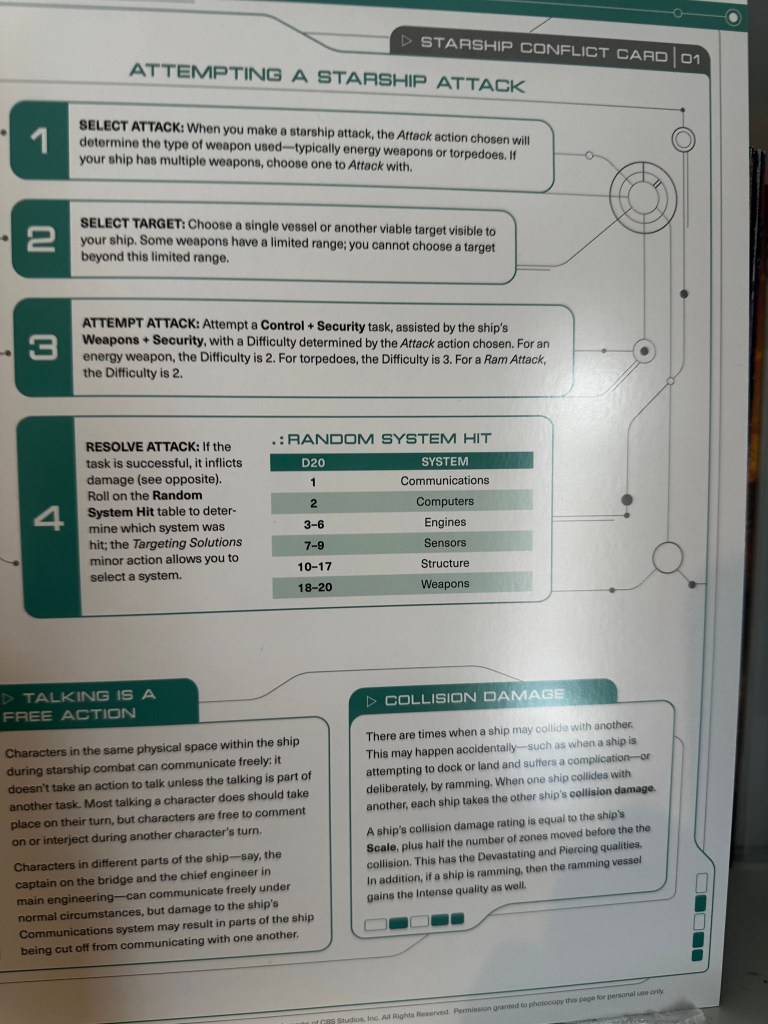
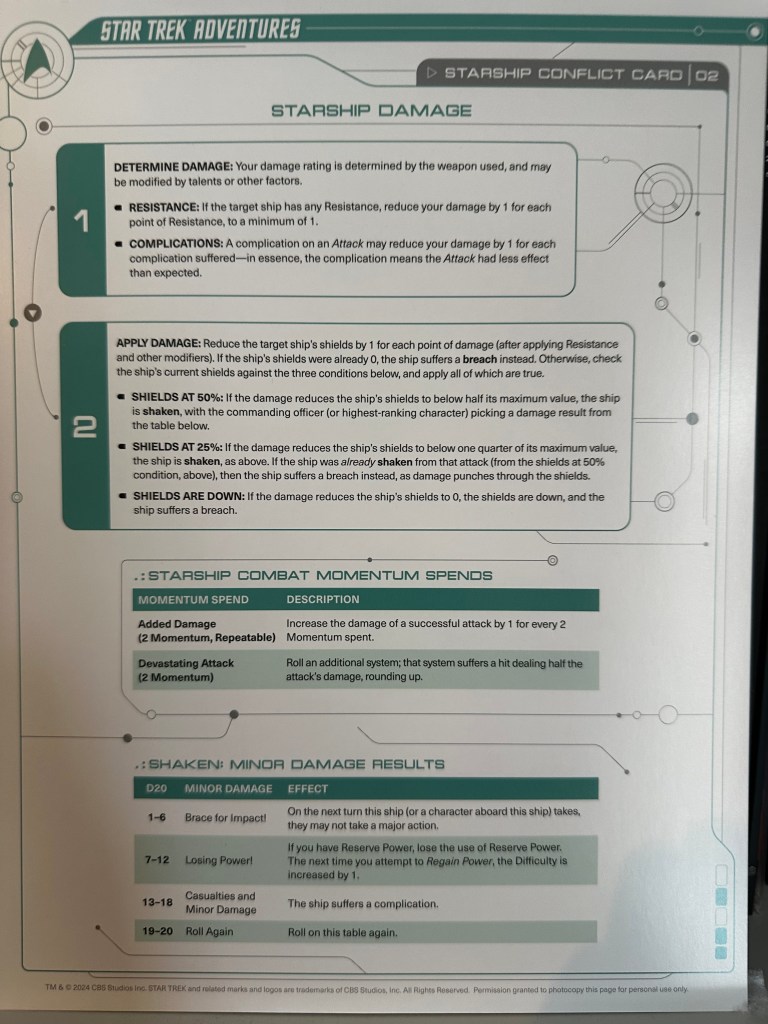
This is quite explicitly a teaching adventure. In fact, the whole campaign is there to teach you how to run and play this game. It has lots of callouts to help out the new GM, from suggestions on what each type of character might do in the current situation, to advice on what to do if your players roll real bad. Much of the text itself is also devoted to explaining how to handle each situation as and when it’s likely to come up. For instance, the first scene has a high likelihood of conflict so the text runs you through how to order actions, resolve and attack and what to do if a PC gets injured. Where necessary, it will direct you to the relevant part of the Rules Booklet. In my experience, it was incredibly effective in teaching me what to do in my first few sessions. Of course, my clever and adaptable players got the hang of it without the need for such hand-holding. Before the first session was over they were stacking and spending Momentum like they’d been doing it all their lives. By session two, the risk of adding more Threat points to my pool was outweighed by their ambition and they were using it to do just oh so much cool shit.

Dear reader, if you think you might be lucky enough to play in this adventure, stop reading now. I’ve got loads of other posts, go and read one of them. There’ll be SPOILERS below.

Stardate 3422.1: We have received an urgent distress call from the independent floating city of Cressida, a resource-gathering collective on the gaseous world Kizomic VI. Creatures of unknown origin have attacked, causing casualties as well as compromising the city’s superstructure. We have responded to the distress call and are proceeding to Kizomic VI at high warp.

When we arrive, we will have only a few short hours to evacuate the city’s 600 inhabitants before the structure fails entirely and sinks into the crushing gravitational depths of the planet. With the number of beings to be evacuated, our first order of business will be to set up pattern enhancers and then direct the locals to the beam-out sites.

The Captain or other commanding officer is supposed to read out this log entry to introduce us to the current situation. We didn’t really have such a PC in our group, so I read it, which was fine. I like the conceit of this as it immediately feels trekkie.
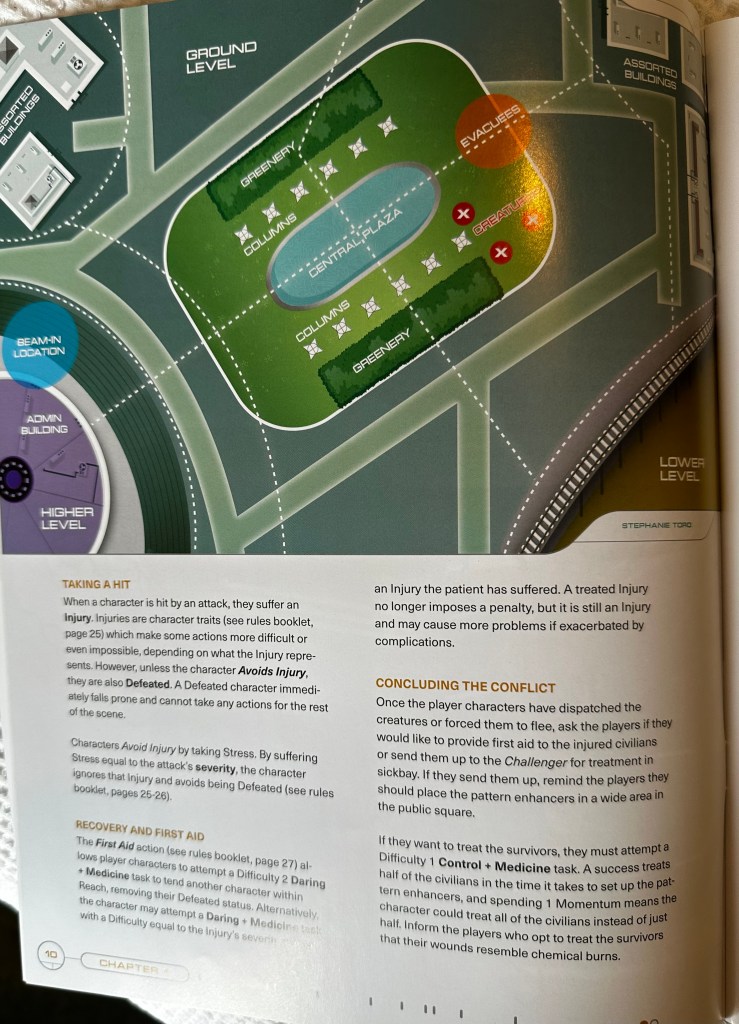
Map of the initial beam in point. Also has details on taking a hit, healing and concluding the conflict with the Bryozoans.
Map of the initial beam in point.

The situation is dire and quickly worsening. The PCs are left to come up with ways to evacuate the citizens as quickly as possible. And that’s when the plant-like aliens they will come to know as Bryozoans seem to attack the evacuees. This is the start of Act 1: Operation Evacuate! In our game, the PCs, Lieutenant Commander Burk ven Jaxa, the Tellarite engineer, Lieutenant Junior Grade Rashid Kemal, our hotshot pilot, and Ensign Laniyar Tennan, Betazoid technician, stunned one Bryyozoan and frightened off the other before quickly moving onto ways they could speed up evacuation. Everything from locating more survivors to constructing elaborate containers to transport more people at a time, (the human cattle container was the term, I believe) were put into practice. With each success, they ate away at an Extended Task track which continued for the rest of the adventure.
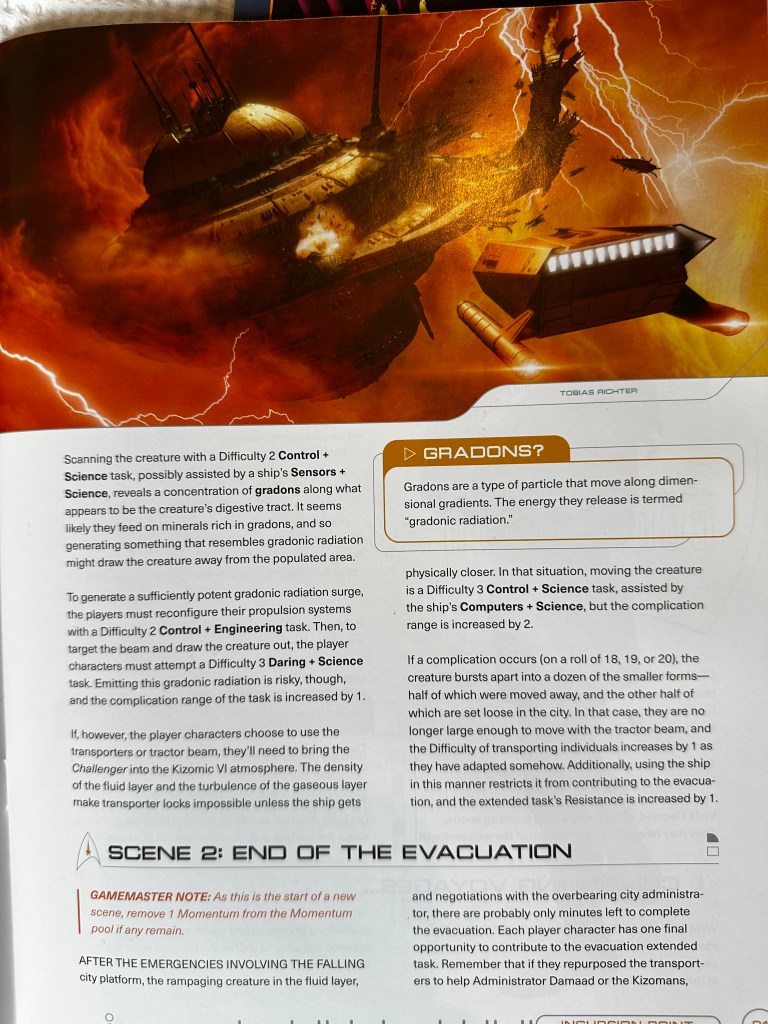
Cressida Falling apart - illustration shows a shuttle pursuing the plummetting dome that broke away from Cressida.
Cressida Falling

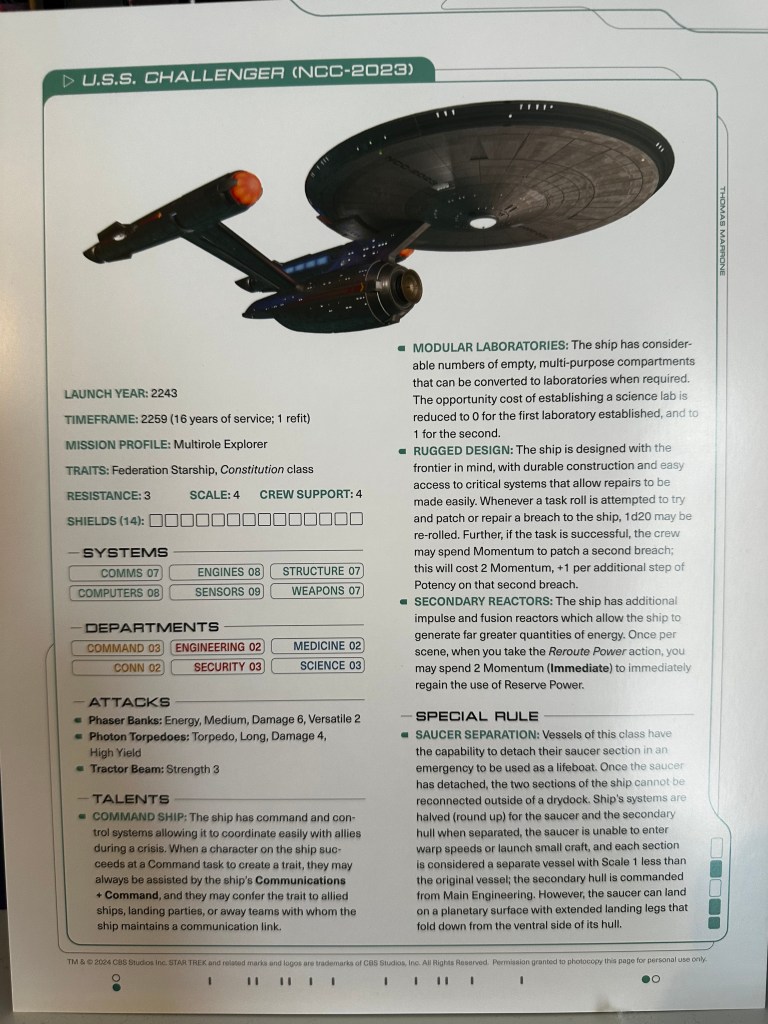
Act 2: The Fall of Cressida started with a huge chunk of city breaking off and falling into the lower atmosphere of the gas giant. The PCs hopped in a shuttle without so much as a call to the bridge of their ship, the USS Challenger. They shot down after the plummeting hunk of city and managed to land almost safely. This is when I started to really spend Threat and introduce Complications. The shuttle door was jammed and they began to be attacked by more Bryzoans. The PCs quickly took steps to uncomplicated matters and save the citizens who had been trapped on the falling district just before it broke up into so much debris. They brought them back to the ship and escorted them to Sick Bay. Here the PCs encountered some NPCs. This was really the first opportunity any of had to do a little roleplaying in this adventure, and this was session two. It’s a high-speed scenario that demands quick action and decisive play.

Anyway, a well-dressed Orion woman, Administrator Demaad wanted use of the transporters to beam up valuable trade goods. Meanwhile, Urotoxa, an older Nausiccan academic, wanted them to help the humanoid inhabitants of the planet’s fluidic layer far below by bringing them a shipment of phasers. She was sure they would be decimated by the Bryozoans, and, as she had been in communication with them, she wanted to help them.

During this three-sided interaction, they discovered a lot through the use of Tennant’s Betazoid telepathy. They found out that Demaad had an underhanded ulterior motive and that Urotoxa was probably the cause of the entire disaster befalling the planet and its inhabitants. Despite neither woman coming out of the conversation smelling like roses, the PCs decided to try to convince the Captain of the Challenger to let them help the Kizomans, although, perhaps not by breaking the Prime Directive to furnish them with advanced weapons.

In Act 3: The Fate of Kizomic VI, we saw our heroes contending with the Bryozoan Terror, a massive amalgamation of smaller aliens that they had detected swimming towards the main population centre of the Kizoman people in the fluidic layer. They boarded the shuttle Galileo with a probe ripe for jury-rigging and a trio of EVA suits. While Tennan and Burk worked to modify the probe to emit a high-level of gradonic radiation, (they had figured out earlier that that’s what the Bryozoans fed on, destroying the inanimate objects that contained it in the process) Kemal piloted the shuttle down, down, down until it became a submarine. In modifying the probe, they were too successful, as it turned out. It drew the Terror to them before they had even had a chance to launch the probe towards one of the few remaining rifts that the creatures had emerged through in the first place. The shuttle took corrosive damage that left it immobile and losing structural integrity. They eventually managed to launch the probe to draw the Terror away, but two of them had to exit the craft to effect repairs. They managed it with only moments to spare before their suits ruptured. Kemal got them to the gaseous layer before the hull gave out, just in time to be transported back to the ship. Whew! That was quite the finale! Except there was more.

Here’s where the PCs get one final opportunity to make some headway on that Evacuation Extended Task. They had to each take actions to try to help save some more citizens of Cressida. And they did fine, managing to rescue most of the inhabitants before the city crumbled away to nothing in the atmosphere of Kizomic VI. This felt anticlimactic, though, I won’t lie. I should have taken this part of the adventure and moved it to a point before they went to deal with the Bryozoan Terror.

Conclusion

This was a very well put together adventure. As I mentioned above, the teaching elements worked very well, at least when I got to use them. Actually the most gratifying part of it was that the players avoided doing most things the adventure expected of them. Generally, they avoided violence whenever possible, which felt very Star Trek, and this was great because it got me to engage fully with the mechanics and think on my feet as a GM too.

But also, each Act lasted exactly one session. No overlap, no worries about not getting it finished on the night. Nothing but net. They clearly play-tested the hell out of it.

It could maybe have done with a few more opportunities for role-play, but then again, that’s just not the type of adventure it was. In Act 2, there was that interaction between the PCs, Demaad and Urotoxa, which highlighted social conflict and it worked really well.

Honestly, the only real issue was that ending. The adventure directs you to ask the PCs for more tasks to help complete the evacuation once the finale had already occurred in my opinion. It was an anti-climax and the players agreed. If I had it to do over, I would have taken this and placed it before the Bryozoan Terror encounter.

We are looking forward to continuing the campaign! The players are looking for a bit more of a chance to role-play so I think we’ll have a Starbase episode next!
Star Trek Adventures 2E Character Creation

Boldly Going

Dear reader, if you have been around here for a while, you might be aware that I have an interest in Star Trek. I don’t know if I’m what you would call hardcore, but I am currently in the process of watching every episode of every Star Trek series I can get my hands on. I started more than a year ago on Star Trek The Next Generation and never intended to branch out of the TNG era. I continued watching Deep Space 9 and Voyager. As I approach the end of that series, I have found myself unwilling to give up just yet, so I’ve gone back to the Original Series as well. I’d seen a lot of them before. TOS was required watching in my house when I was a kid and I can vividly remember rushing home to watch TNG after school as a teenager. Anyway, I have more than a passing knowledge of the TV shows and movies, the universe, the tropes and the types of stories that Star Trek tackles. And yet, I had never played a Star Trek RPG! Since I have been on this marathon rewatch recently and because I picked up Modiphius’ Star Trek Adventure 2E in their Summer sale, I thought it was high time I rectified that.

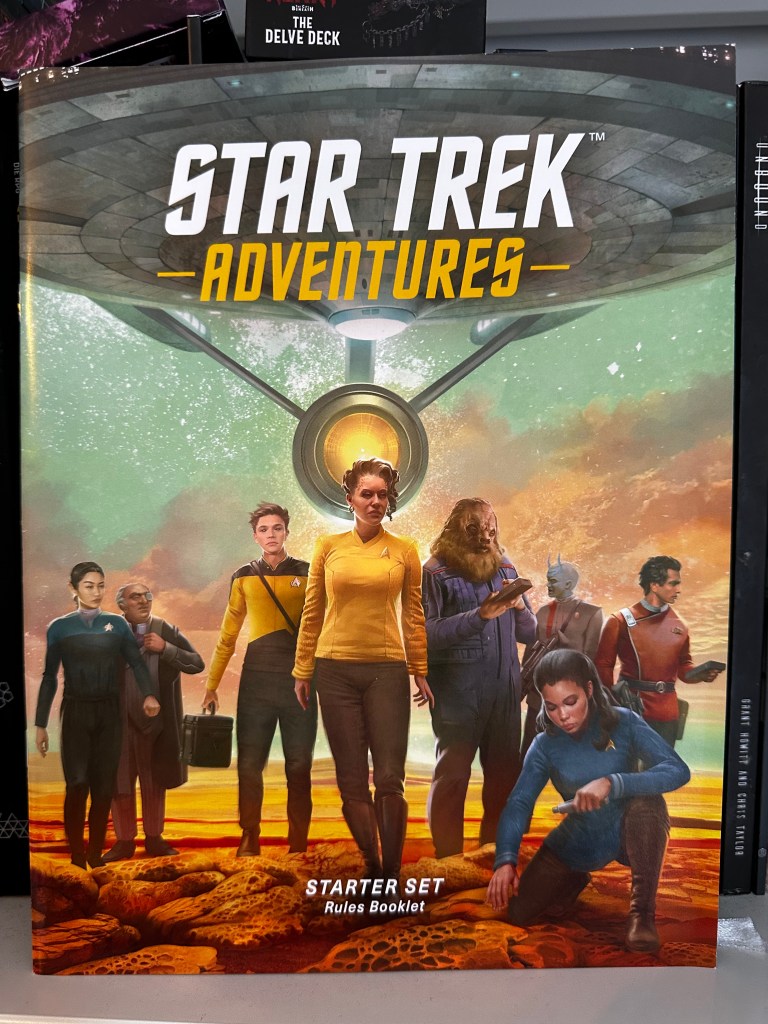
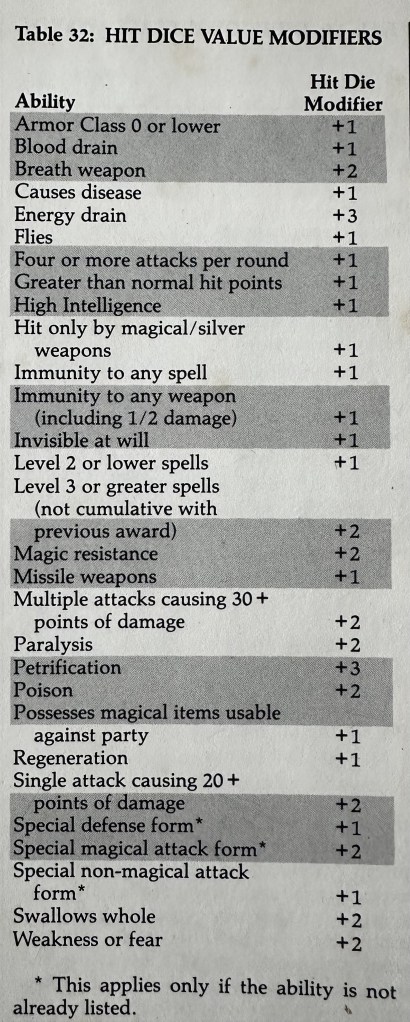
The cover of the Star Trek Adventures 2E Start Set Campaign Book. A variety of TOS era characters are gathered performing investigative tasks on a planet's surface.
Star Trek Adventures 2E Starter Set

A review of the system, the game, and our campaign will follow in the future. We have only had two sessions so far, so I don’t want to jump the gun. Today, instead, I thought I would do a character creation post. Haven’t had one of them in a while, and they always prove quite popular. Also, since we are playing the campaign from the Starter Set, we are using pregenerated characters from that. The pregens are great, but, using them means I have not experienced the joys of character creation in this system. It always teaches me a lot about a game, so I think this will be a worth-while exercise.

Player Characters

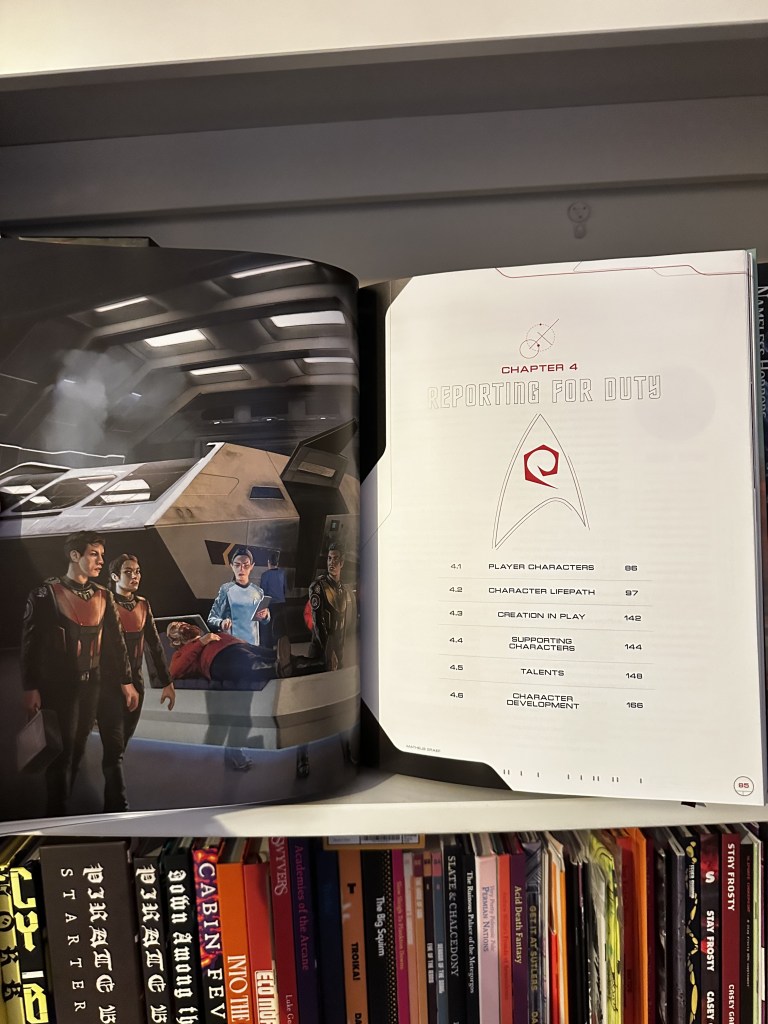
Reporting For Duty Chapter two-page spread.  Illustration of a number of crewmembers escorting an injured crewmember on a gurney through a shuttle bay.
Reporting for Duty

Chapter 4.1 begins with an explanation of the types of player characters in Star Trek Adventures. These are split between Main Characters and Supporting Characters. Imagine the Main Character as being your regular PC, a member of the Starship’s bridge crew. Someone like Mr Sulu or Commander Riker, Supporting Characters, on the other hand, are created when needed. They might be a relatively random red-shirt who the players need to march off to investigate a suspicious crater on an alien moon or a transporter chief who needs to modify the transporter to beam back the away team full of Main Characters on the planet’s surface.

Next we have a look at the building blocks that go together to construct a character in this game:

  • Traits – a word or phrase that describes the essence of the character. Generally these would be things like Vulcan and Star Fleet Officer
  • Values – a few brief sentences that describe what your character believes, treasures, and thinks. They should guide roleplaying more than any other aspect of the character
  • Attributes – In this game these are:
    • Control
    • Daring
    • Fitness
    • Insight
    • Presence
    • Reason
  • Departments – These represent the general roles that Star Fleet officers might encompass. They are the areas they would be trained in. You add an Attribute value to a Department value to come up with the Target Number for you to roll equal to or under on 2d20 to complete tasks. That’s the core mechanic for this and other Modiphius games, Here’s the list of Departments:
    • Command
    • Conn
    • Engineering
    • Security
    • Medicine
    • Science
  • Stress – Like in Blades in the Dark, this is a Star Trek Adventures character’s super-power. If they ever want to avoid an injury, they can choose to take the equivalent amount of Stress instead and keep going. This is particularly important in a system where gaining an injury leads to the PC being Defeated, and essentially out of play.
  • Focuses – these are your character’s specialisms. A Main character has 6 of these
  • Talents and Special Rules – These are special benefits that are often selectable by members of particular species or by characters with certain departments above a specific rating. They can bestow bonuses of several kinds. Other special abilities are Species or Role specific.

Lifepath or Creation in Play

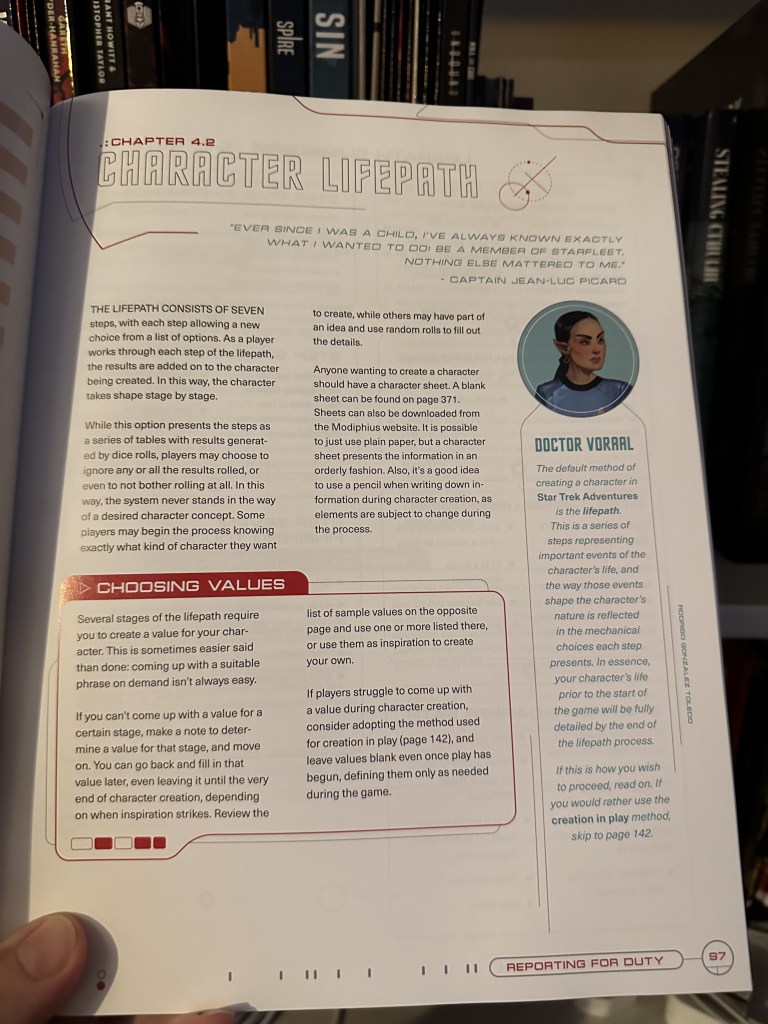
Star Trek Adventures presents the player with two options for character creation. The first, and most detailed, is the Lifepath method. It’s difficult not to think of the Traveller character creation method as a major influence on the choice of the designers to include this as the default option. It’s highly detailed, provides a wealth of tables to roll on or choose from and allows for the creation of the type of character you didn’t know you always wanted. Traveller, the OG space exploration sci-fi game, was doing doing this decades before anyone else, of course.

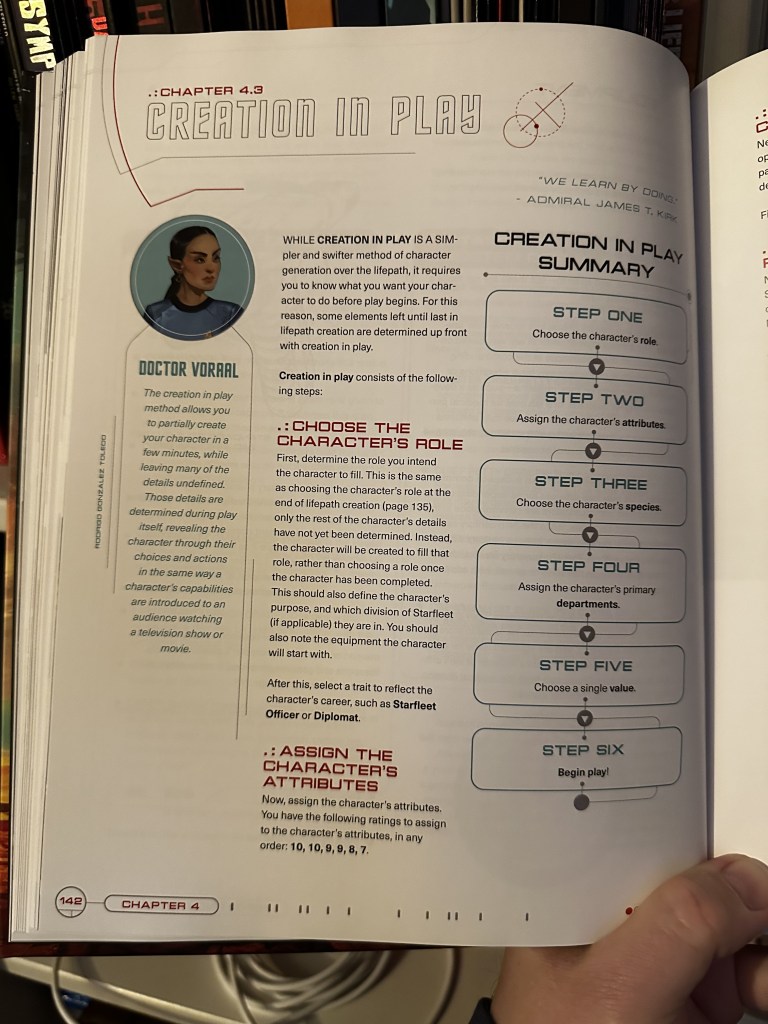
The other option is called Creation in Play. This simplifies the character generation system for those who already have a clear idea of the character they want to play and just need to construct them with stats etc.

It’s my habit is to create characters in as random a method as possible. As such, I have no choice but to go Lifepath here.

The Game of Life(path)

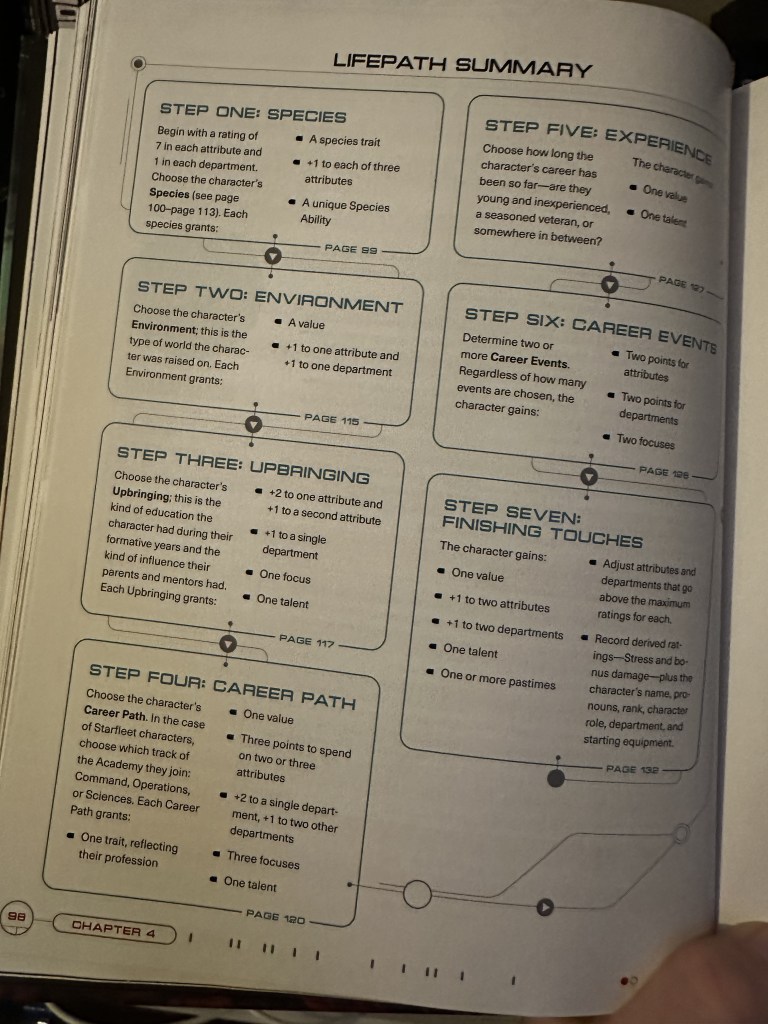
This is split handily into seven steps.

The steps of the Lifepath Creation method.

Step One: Species

You can ostensibly choose any species you can think of from the Star Trek universe, bearing in mind the species who have been contacted by Star Fleet during the era you want to set your game in. So, no Jem’Hadar in the TOS era, for instance. But, they have provided a one-pager on each of the major species from across multiple Star Trek shows, so I think it would be crazy not to choose one of those. Now, since the game I’m currently playing is set in the time of Captain Kirk’s famous five-year mission across the galaxy, I think I will choose to go for a TNG/DS9/Voyager era character. I have a much deeper knowledge of that time anyway. Also, it allows for far more options since many of the species listed are enemies of the Federation during that TOS era. There are 14 species to choose from so I’ll roll my DCC d14 for this:

  1. Andorian
  2. Aenar
  3. Bajoran
  4. Betazoid
  5. Cardassian
  6. Denobulan
  7. Ferengi
  8. Human
  9. Klingon
  10. Orion
  11. Romulan
  12. Tellarite
  13. Trill
  14. Vulcan

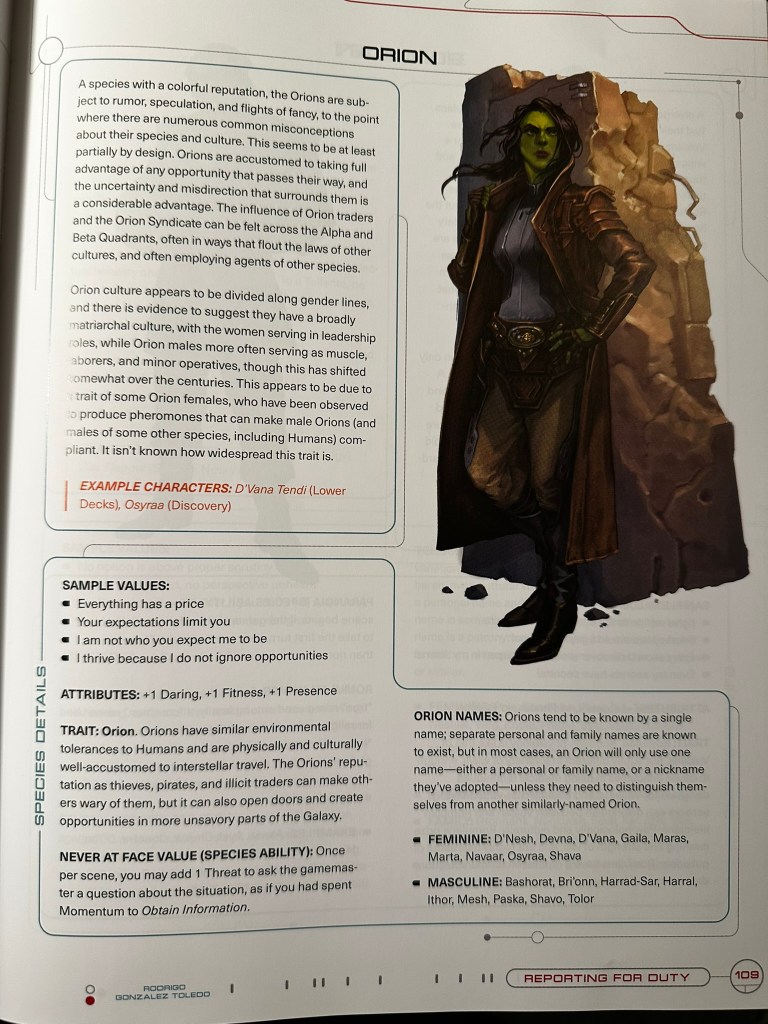
I got a 10! That’s Orion. An Orion appeared in the very first pilot of the the Original Star Trek show, but they have had more prominent roles in more recent ones like Discovery and Lower Decks.

They are green-skinned humanoids who are known as traders. The Orion Syndicate is an infamous criminal organisation that spans half the galaxy, also, so they come with some baggage.

Orion Page
Orion Page

Now that I know the Species I can start building my character

Every PC starts with a rating of 7 in each attribute and a rating of 1 in each department. But an Orion character starts with a +1 in Daring, Fitness and Presence. So here are my attributes at this stage:

- Control - 7
- Daring - 8
- Fitness - 8
- Insight - 7
- Presence - 8
- Reason - 7

They also gain the following trait:

Trait: Orion – Orions have similar environmental tolerances to Humans and are physically and culturally well-accustomed to interstellar travel. The Orions’ reputation as thieves, pirates, and illicit traders can make others wary of them, but it can also open doors and create opportunities in more unsavory parts of the Galaxy.

And the following Species Ability:

NEVER AT FACE VALUE (SPECIES ABILITY): Once per scene, you may add 1 Threat to ask the gamemaster a question about the situation, as if you had spent Momentum to Obtain Information.

That’s a handy little ability.

Step Two: Environment

There’s a table for the environment your character grew up in:

D20 ENVIRONMENT
1–3 Another Species’ World
4–6 Busy Colony
7–9 Frontier Colony
10–12 Homeworld
13–15 Isolated Colony
16–18 Starship or Starbase
19–20 Roll Again or Choose

The text of the section provides a short description of each of the options in the table, but it’s fairly self-explanatory, I think.

Anyway, I rolled a 12, which gives me “Homeworld.”

I need to choose a Value at this stage. Since several sample Values were provided in the description of the Orions as a Species, it seems right to take one of those for a personal from the Orion homeworld.

First Value – I thrive because I do not ignore opportunities.

On top of that, I get to add 1 to one of the attributes I improved when I settled on Orion as a species. I’ll add to Presence, making it a 9.

Finally, in the Environment step, I can add 1 to Command, Security or Science departments. I am beginning to see a potential role for this character so I will choose to add it to Command, making that a 2.

Step 3: Upbringing

It is interesting here that you can choose to either accept or rebel against your upbringing, and this will have a material effect on the character.

Here’s the table:

D20 UPBRINGING
1–3 Agriculture or Rural
4–6 Artistic and Creative
7–9 Business or Trade
10–12 Diplomacy and Politics
13–15 Science and Technology
16–18 Starfleet or Military
19–20 Roll Again or Choose

That’s a 1. Agricultural or rural. I think there is no doubt that this character rebelled against the life of a hydroponics farmer in the hinterlands of the Orion homeworld. They fled to the cities and the stars at the first opportunity.

Given that choice, they get to increase their Presence by 1 point again, making it 10. They also get to add 2 to Reason, bringing it to 9.

Next, they can increase one of the following departments by 1: Conn, Security or Medicine. I think they should be a good pilot. So Conn increases to 2.

I get to choose a Focus at this stage as well. They provide several examples that suit the upbringing. I’m going to choose Navigation as my first Focus.

This step also provides access to a talent. But you are given the option to wait until the end of character creation to choose it, so I’m going to do that since many of the talents have strict attribute requirements that this character cannot fulfil at this stage.

Step Four: Career Path

This is the most important step in building a character for Star Trek Adventures.
So, normally, I would make a roll for every aspect of a character I make on the blog, but, I have a clear idea of this PC being a Command track Star Fleet Officer. It is possible to roll for this. Here are the tables, if you’re interested in what else is available:

D20 CAREER PATH
1–4 Starfleet (Officer)
5–8 Starfleet (Enlisted)
9–10 Starfleet (Intelligence)
11–12 Diplomatic Corps
13–14 Civilian (Physician)
15–16 Civilian (Scientist)
17–18 Civilian (Official)
19–20 Civilian (Trader)

D20 TRACK
1–6 Command
7–12 Operations
13–18 Sciences
19–20 Roll Again or Choose

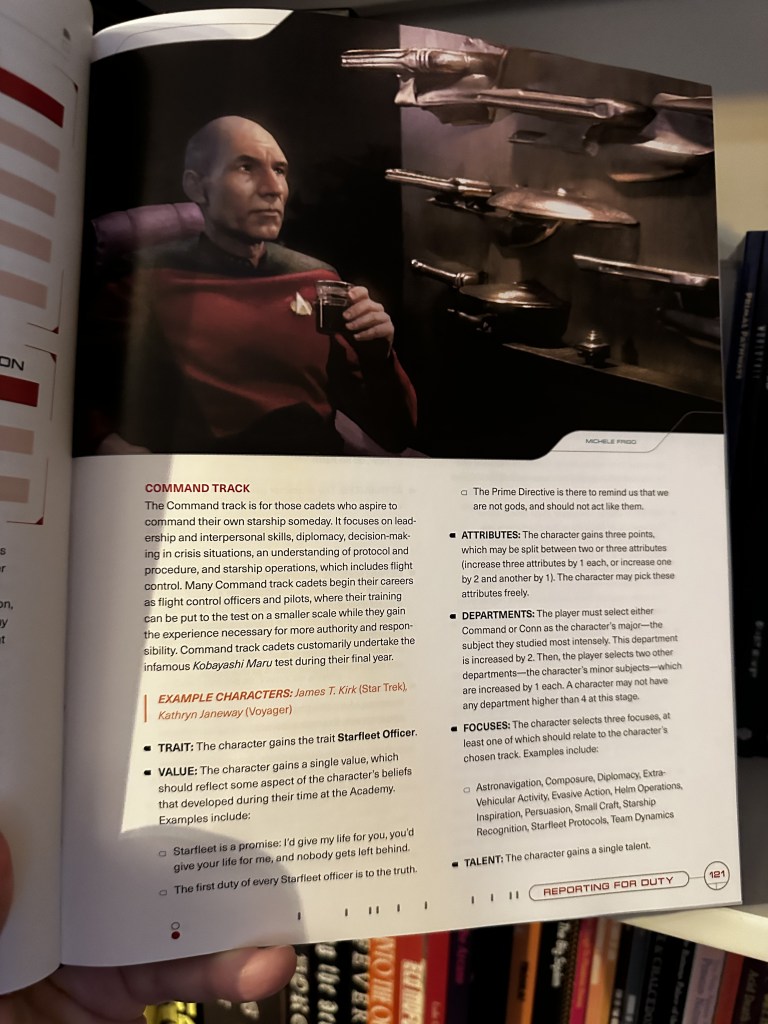
But, as I mentioned, I have already made the choice. Here’s what I get for my Orion character on the Star Fleet Command track Career Path:

  • Trait: Starfleet Officer
  • Value: The Prime Directive is there to remind us we are not gods and should not act like them. (This is one of several examples provided here. I like it as a stepping stone for the PC.)
  • Attributes: 3 points to be split between two or three attributes. I am choosing to add 2 to Control (now 9) and 1 to Daring (now 9.)
  • Departments: +2 to either Command or Conn and +1 to any two others. Can’t have any department over 4 at this stage. I’m going to top out Conn at 4, and I am going to make Command 3 and Security 2.
  • Focuses: These should reflect the Command track. I’m going to choose Inspiration, Persuasion and Helm Operations
  • Talent: another talent. Still saving these up till the end

Step Five: Experience

There is no table to roll on this time. I must choose Novice, Experienced or Veteran. I think my Orion is a brash young go-getter, so I will choose Novice.
Here’s what the Novice gets:

  • Value: I must prove myself (once again, chosen from some examples)
  • Talent: I receive the Talent, Untapped Potential
    • This means I can’t have any attribute above 11 or any department above 4 but when it has the potential to gain you extra Momentum during play whenever you succeed at a task.

Step Six: Career Events

Captain Picard overseas the Command Track.

You get two major career events that are likely to have shaped the character. There is a table for this that I can roll on twice. Here’s the table:

D20 CAREER EVENT
1 Betrayed Ideals for a Superior
2 Breakthrough or Invention
3 Called Out a Superior
4 Conflict with a Hostile Culture
5 Dealt with a Plague
6 Death of a Friend
7 Discovered an Artifact
8 Encountered a Truly Alien Being
9 First Contact
10 Lauded by Another Culture
11 Learned Unique Language
12 Mentored
13 Negotiated a Treaty
14 New Battle Strategy
15 Required to Take Command
16 Serious Injury
17 Ship Destroyed
18 Solved an Engineering Crisis
19 Special Commendation
20 Transporter Accident

I got a 15 – Required to Take Command for my first one.
In this case, since my PC is a novice, I am imagining a scenario in which their instructor at the academy was gravely injured in a shuttle crash during a training exercise. My PC was the first to get the situation under control and co-ordinate the efforts of the other cadets to repair the ship, call for rescue and stabilise their instructor.

Gains:
Attribute: +1 Daring (now 10)
Department: +1 Command (now 4)
Focus: Composure

Second roll, 10 – Lauded by Another Culture.
On their first mission, my Orion was involved in the rescue of a Ferengi trading vessel. On board the drifting ship, they managed to restore power, save the lives of the Damon and his crew and even brokered a profitable deal between them and the Federation.

Attribute: +1 Presence (Now 11)
Department: +1 Science (Now 2)
Focus: Ferengi Culture
Trait: Ferengi Trading Partner

Step Seven: Finishing Touches

Almost done. This step provides a little bit of everything and the necessary personal details that round out any character.

Value: Your expectations limit you (one of the Orion examples. They are still an Orion at heart, even if they are a Star Fleet Officer now)
Attributes: +1 to Daring (Now 9) and +1 to Fitness (Now 9)
Here are the final attribute scores:
– Control – 9
– Daring – 10
– Fitness – 9
– Insight – 7
– Presence – 11
– Reason – 9
Departments: +1 to Security (now 3) and +1 to Science (Now 3)
Here are the final department scores:
– Command – 4
– Conn – 4
– Engineering – 1
– Security – 3
– Medicine – 1
– Science – 3
Focuses: Got all 6, Navigation, Ferengi Culture, Composure, Inspiration, Persuasion and Helm Operations
Talents: Time to choose these. I should have two more in addition to Untapped Potential

  • Bargain: REQUIREMENT: Command 3+
    When you use Negotiation to make an offer to someone during social conflict, you may re-roll a single d20 on your next Persuade task to convince that person. If the social conflict with that person involves an extended task, your Impact is increased by 1.
  • Follow My Lead: REQUIREMENT: Command 3+
    When you succeed at a task during combat or another perilous situation, you may spend Determination. If you do, choose a single ally who can hear you. The next task that ally attempts counts as having assistance from you, using your Presence + Command. On this task, do not roll your assistance die: it counts as having already rolled a 1.
  • Final Details:
    Mesh is this character’s name and he uses the pronouns he/him.
    He is 22 years old.
    His passtime is Parisi Squares (a dangerous sport.)
    Mesh’s role is that of the Executive Officer. He gets:
  • ROLE BENEFIT: When an allied character in communication
    with you spends Determination, you may spend 3 Momentum (Immediate) to enable that character to regain the spent point of Determination.
    His rank is Lieutenant Junior Grade.
    Equipment is not important to this exercise so I’ll skip it.

Conclusion

This has taken a lot longer than I expected when I set out to make the character. My advice would be to leave a whole session for several players to make their characters, tweak them, decide on their relationships to the other PCs etc.

But it was fun. I enjoyed delving into the Star Trekness of it all and I think I would actually like to play Mesh, my Orion Lieutenant Junior Grade who dreams one day of commanding a ship of his own.

One More Shot to the Heart

Dear Reader, I was away on holidays in the scorched and parched East of England again last week. I enjoyed the break but it has left me with no enough time to write up a new post for this week. I have one in the works but it is far from ready, I’m afraid. Instead, I thought I would share with you again a post from this time last year. Here is my advice for running Heart: The City Beneath as a one-shot. Hope you enjoy it!

DCC Day 2026 Part 2

A Case of Mistaken Death

Below, you will find some spoilers for DCC adventure #109 Beneath the Isle of Serpents, just so you know, dear reader.

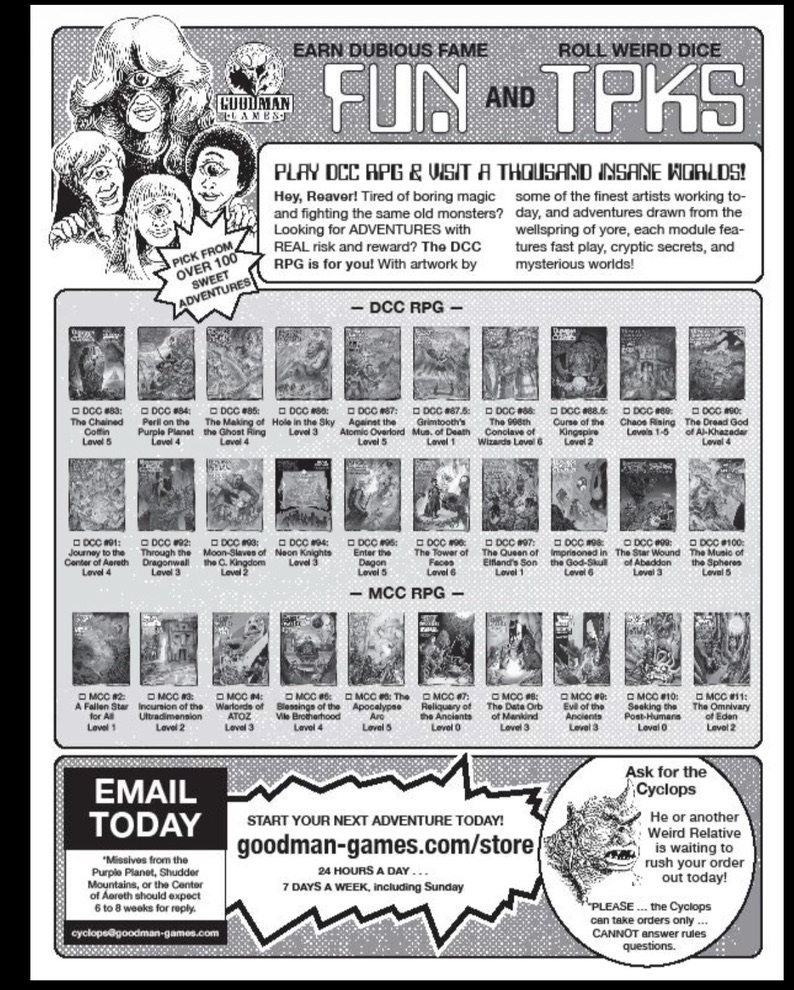
Fun & TPKs ad in the back of the adventure booklet. Shows a lot of black and white covers of other DCC adventures. Reminiscent of old ads in the '80s and '90s era of RPG magazines.
Fun & TPKs

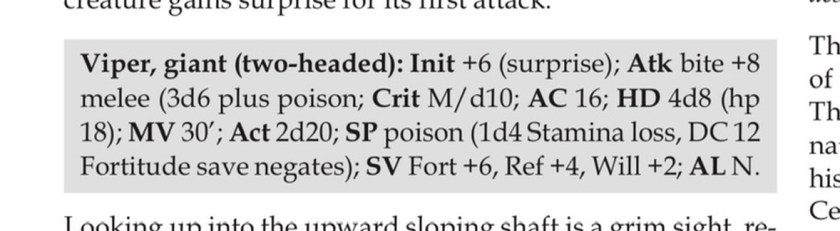
At this point, I don’t think any of us are going into a DCC game thinking, you know what? This is going to be a piece of cake. You expect to be challenged by lethal traps, dangerous surprises, gonzo monsters and a general air of lethality. But there’s one encounter in Beneath the Isle of the Serpents that has the potential to tip the scales so far from balanced that you could be looking at a one or two round TPK. It almost did in our third session of this adventure. There’s a giant, two-headed viper hiding to one side of a door in one room. It’s given a +6 to initiative to account for surprise. Then, once it probably gets the initiative, it’s got two bite attacks at a +8 to hit. That’s not the worst of it, once it inevitably hits, it’s got 3d6 damage for each bite! Now, please bear in mind that this is an adventure for 1st level DCC characters. Few, if any, will have hit points matching even an average roll of those damage dice. But then, there’s a DCC ad in the back of this adventure entitled “Fun & TPKs.” So, that’s what you’re up against, I suppose. Don’t get me wrong; I actually do enjoy knowing that the dungeon is genuinely scary, that characters can and will die, that the stakes are high. That makes their actions to overcome the dangers all the more significant. It creates an aura of tension that is hard to synthesise in any way other than the players knowing that their characters could be walking to their deaths. We had already had 2.5 deaths by the point they got to this encounter after all. But those deaths were a little more acceptable. The PCs had done everything they could to prevent them up to the point they didn’t, up to the point when I got luckier in my rolls than they did. Not only that, each death was poetic and emotional and caused by a hypnotised member of their own party. You couldn’t write a better death.

Viper, giant (two-headed): Init +6 (surprise); Atk bite +8 melee (3d6 plus poison; Crit M/d10; AC 16; HD 4d8 (hp 18); MV 30’; Act 2d20; SP poison (1d4 Stamina loss, DC 12 Fortitude save negates); SV Fort +6, Ref +4, Will +2; AL N.
Giant Two-headed Viper stats

But this giant two-headed viper? It had the cards stacked in its favour by the stats, the map, the circumstances. Even then, despite that initiative bonus, it still went after three of the party members. The players got a little bit lucky with that, but it was all fair and square. So they attacked, two hits out of three and the snake was down two thirds of its hit points. But then it had its attacks; two heads = two attacks. It hit one PC with one attack, killed her outright, and then hit the second PC because it had a + frikkin’ 8 to hit, so, of course it did, and killed him outright too. Half the party was dead in a single round. And, you know, I’ll be honest here, I thought 3d6 damage for a single attack on a first level character? That’s insane, so I reduced it to 2d6 and it still killed ‘em both… The players looked upon the ruin of their party. Rember, dear reader, there were only two players in this adventure. One had only one of two PCs left and one had none. That last suriving PC was ready to run, but then remembered that the Wizard’s familiar was supposed to go on her turn. The dice were rolled and that dog ripped out at least one of the viper’s throats! We retconned the deaths and were able to finish out the dungeon.

And look, this was dramatic and all, they scraped through when they probably should have died, but it was so ridiculously overpowered as an encounter that we questioned how well this adventure could have been play-tested. Combine this with a couple of other strangenesses and errors and I am not sure, honestly, if I can recommend it without the Judge spending a fair bit of time preparing things and making a few necessary changes.

Mapping Errors

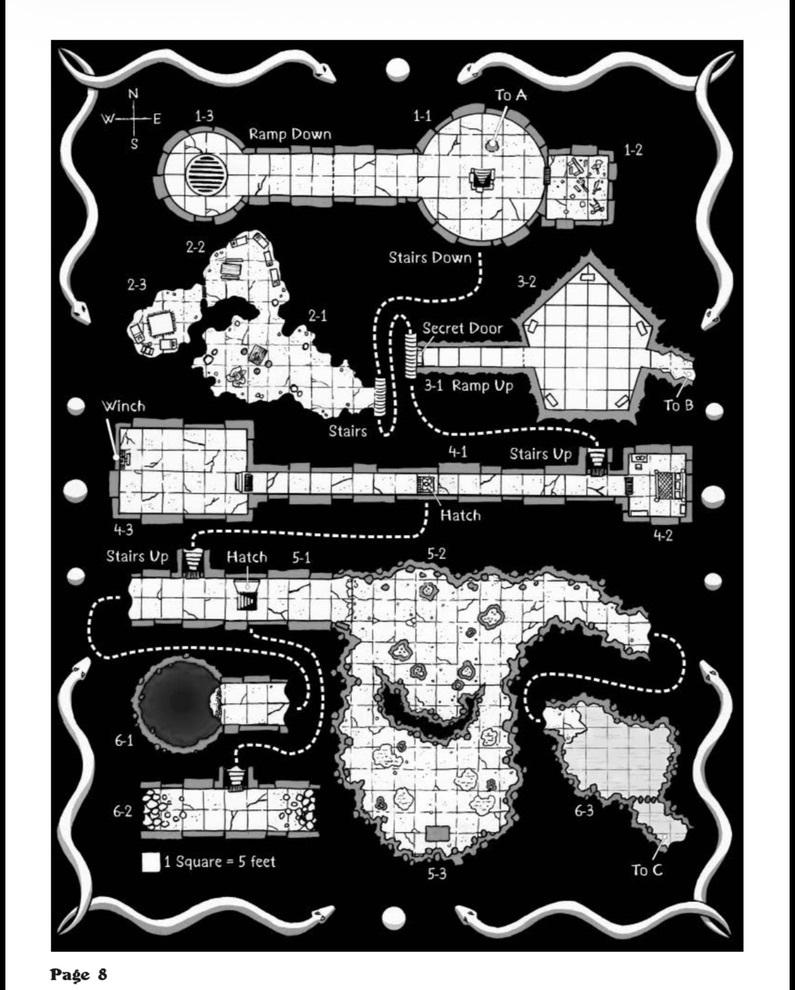
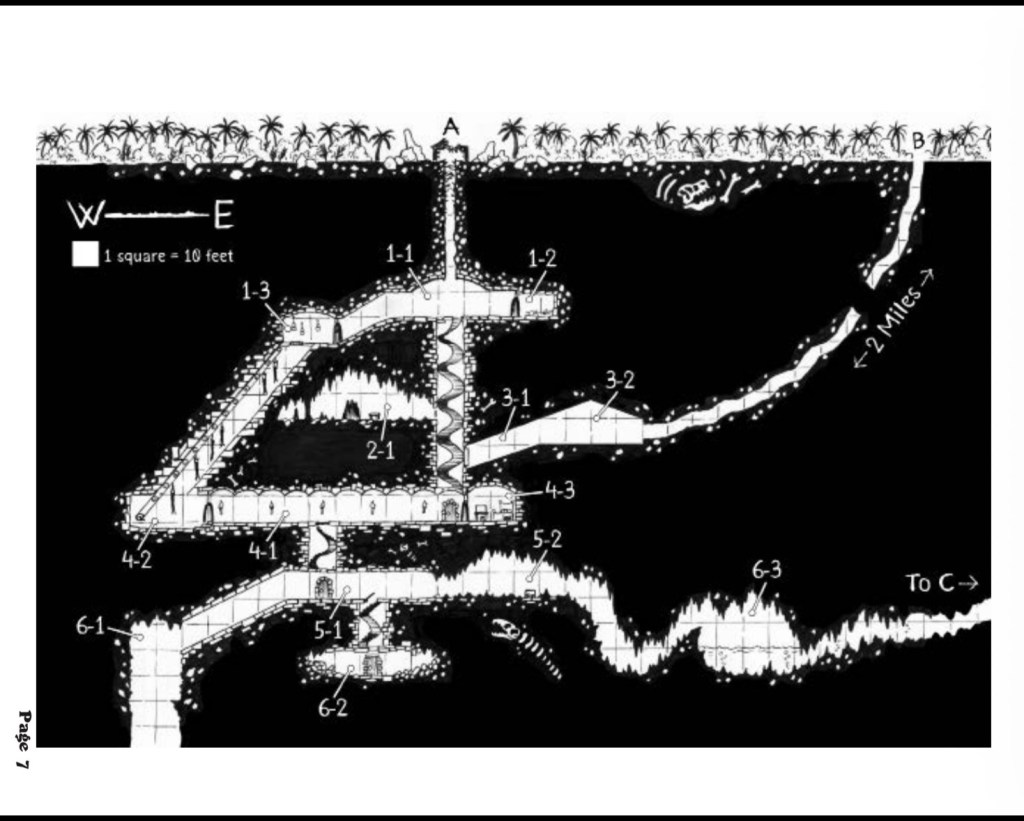
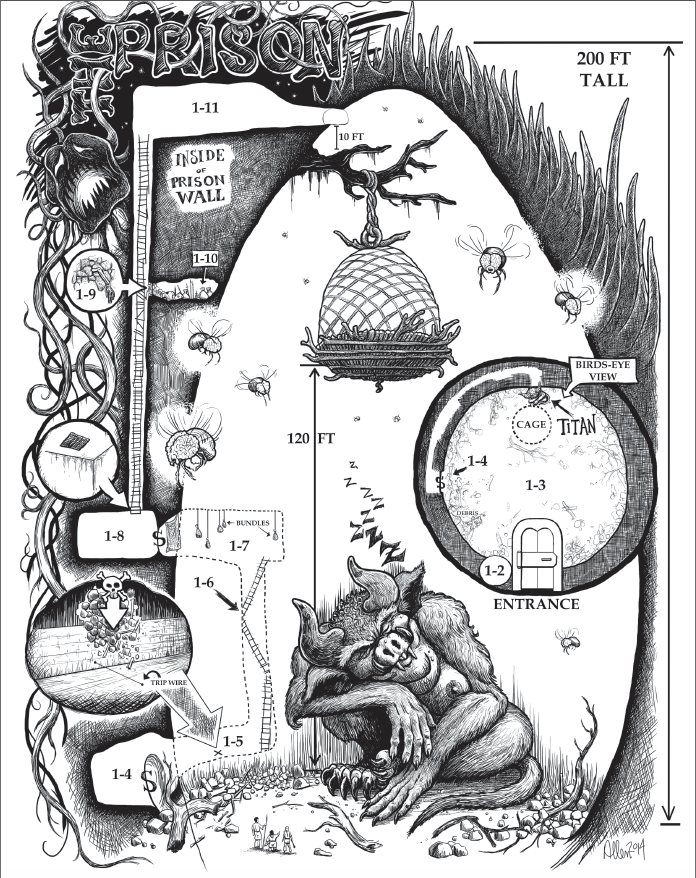
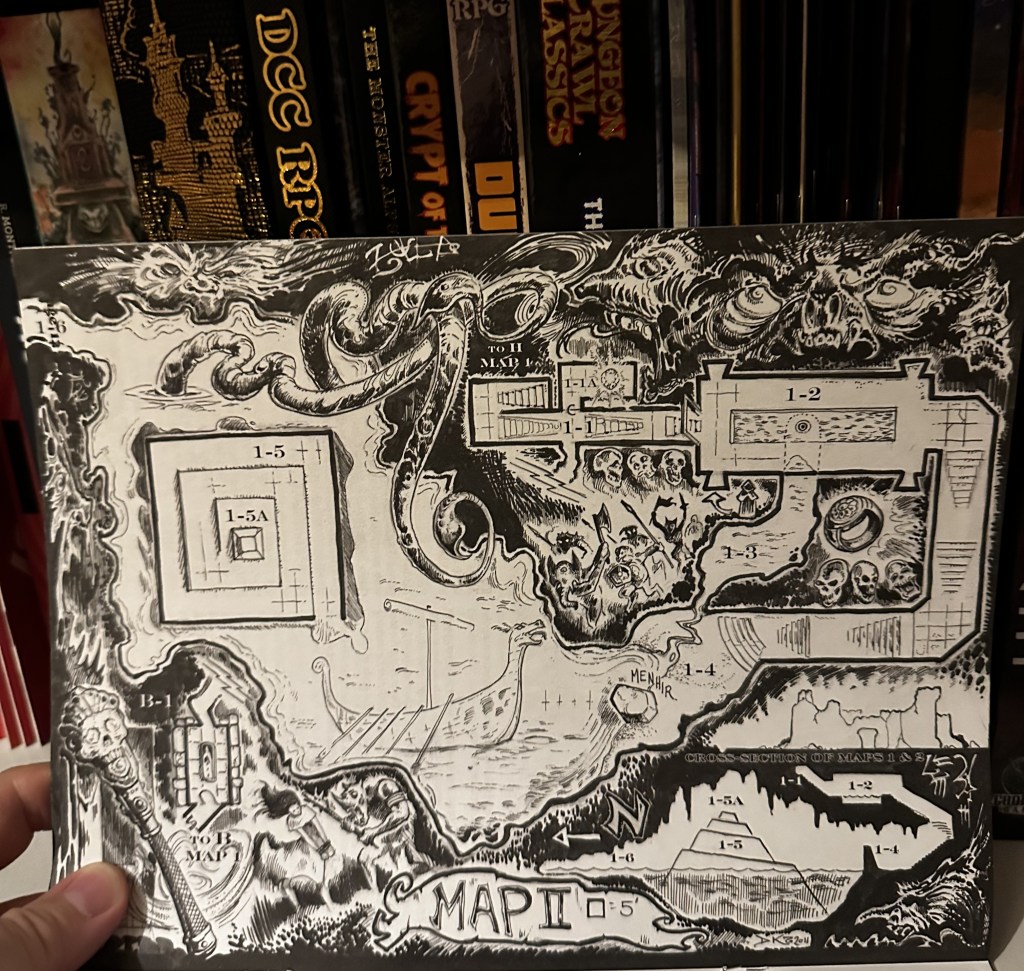
I love DCC maps. They’re almost always beautiful and functional and genuine pieces of art in their own right. That can be said for the maps in this adventure too, in fact. They are, perhaps, not quite as memorable or gnarly as an Doug Kovacs map from, say, Sailors on the Starless Sea, or the Mark Allen one from Hole in the Sky but they are functional and effective. You can compare for yourself:

But there is a very small problem with the dungeon map/key that left me scratching my head and cursing the adventure for wasting my time at the table. If you look closely, dear reader, you will see that Room 4-2 and Room 4-3 are labelled differently on the plan compared to the cross-section. Now, as the PCs explored Level 4, I was really just looking at the plan map so I didn’t notice this error. The problem is, it’s the plan map that’s wrong. 4-2 is where 4-3 should be and vice versa. This might seem like a small issue, and perhaps I’m making too big a deal of it, but when you only encounter it for the first time at the table? Confusion, frustration, struggle. It’s a waste of time and mental energy that could better be spent on building atmosphere, answering player questions or, like, role-playing.

And if this was the only map problem in the module, I might be a bit more forgiving, but I mentioned in the last DCC Day 2026 post, that the island map should have hexes to allow you to calculate how often to roll on the overland encounter table, but it doesn’t so, once again, the Judge is just left to guess at the table, when they are already juggling a lot.

I will say this is not the only potentially bad labelling in this adventure. On the cover, it defines it as an adventure for Level 1 PCs, but on the inside, it says it’s for Level 2 PCs. This could actually explain the extra lethality. Maybe my party were just too wee?

So

Here’s what happened at the end of the adventure (if you want to catch up, go check out my first post about it here.)

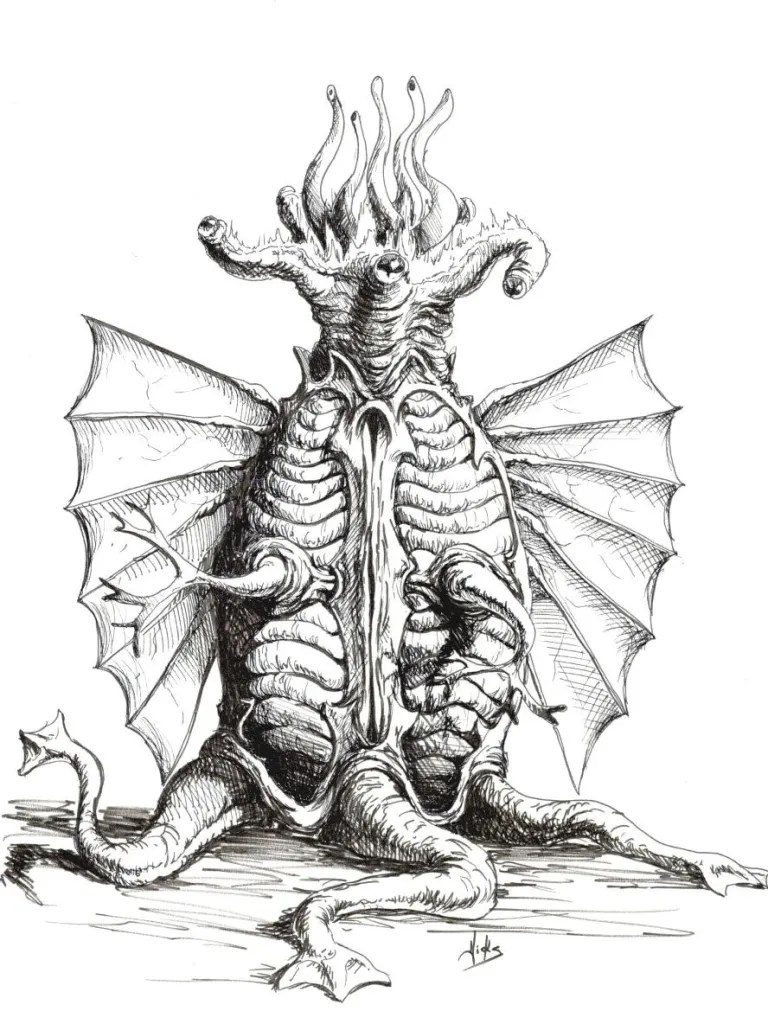
The party, now three-strong since Hilda the Wizard met up with them back on the beach, returned to the point they left off in the dungeon. They picked up some of the weapons and armour belonging to the Serpent-men and continued down the winding, narrow stairway until they discovered a secret door in the wall. Cleverly, they decided to treat it with some care, stepping to either side of it when it opened, thus avoiding the burning oil trap. There is a high probability that this trap was not going to ignite but, ignite it did, to no effect of course. They continued into an uncanny corridor that seemed to have been wrought in a strange way. It was as if the rock had been disintegrated to create this corridor and the pentagonal chamber beyond. In that chamber, by the way, was an Elder Thing. It had come here to observe the Serpent-men and the Cobra-men, apparently, but that does not particularly describe the reason for it to appear in the adventure, if I’m honest. It had a deleterious effect on a couple of the PCs. There’s a table to tell you what happens if you fail a Willpower save upon seeing this Cthulhu-Mythos-ass creature. Anyway, one of the PCs froze and one fled. I’m just glad none of them rolled “fight” because that would have surely been the end of the adventure. The other one found she was able to communicate with it in a rudimentary telepathic way. It was able to tell her there was another exit from its chamber to the surface, and that there was some sort of conflict between the Serpent-men and another sect who worshipped Sett. It then began packing up its things. Now that the PCs had uncovered its ingenious hiding place, it had no choice but to leave, apparently. So they left it to its business.

The Elder Thing: This ancient race has inhabited the earth for many millions of years and may have created life on earth as it appears today. Older creatures prefer water as their habitat, but can also move effortlessly on land and even fly.

The appearance resembles a cylindrical shape a good two meters high, the ends of each tapering slightly, so that an Elder Thing resembles almost a barrel. Furrows and ridges cover the body with strange growths, and the wings and strange head, shaped like a five-pointed starfish, give the creature characteristics of both animal and plant life.

The Elder Things established at least one major city in Antarctica and created the Shoggoths there who used them as slaves. During the millions of years of their existence on Earth, the Elder Things fought many conflicts, but now seem to have retired. From: https://cthulhueternal.com/creatures/elder-thing/
https://cthulhueternal.com/creatures/elder-thing/

I have several questions about this encounter. The main one is just why? Why is it in this dungeon? It lends nothing to the otherwise decidedly snake-based vibe. If the PCs end up attacking either because the players think its a good idea or because they failed their save and rolled “fight” on the reaction table, they would be killed quicker than you could say “Beyond the Mountains of Madness.” Another why. Why is it watching the Serpent-men? Not really explained. Still whying. Why is is the trap protecting its lair so shitty? This unfathomable monstrosity has the power to disintegrate a lair for itself in the rock, and observe the inhabitants of the dungeon without their knowledge through the walls, but it can’t put a decent security system in? The trap is the kind of thing you might find in an incompetent bandit’s lair. Here’s a what. What use is the other exit? It’s difficult to climb and leads to a part of the island that is much more dangerous than the main entrance. Admittedly, the players did make use of the Elder Thing again later, though.

Once they descended the stairs they came to level 4. This is where I ran into the trouble with the mislabeled rooms and where they ran into decidedly more trouble with the Giant Two-headed Viper. Anyway, once we got past all that, they were able to explore the chamber where the viper was hiding. If you look at the map, you can see that the sluice they discovered beneath the grating on level 1 leads down to that room. There were humanoids manacled and hanging from the ceiling of that sluice. They had been unable to get to them from above. They were able to use the winch here to bring them all down. Some were already dead, but those that could be saved, they brought to the Elder Thing. It agreed to heal them as long as they covered their eyes. With a little healing, one of them even turned out to be an Elf who was happy to join the party and aid them in discovering the evil that imprisoned, enslaved and devoured them. This became our latest PC, replacing Helfgott the Cleric. The rest of the prisoners were sent back to the fishing boat with strict instructions not to let Kamay try to leave again on the off-chance he woke up.

Back to full strength, the party went to investigate the other room on this level. This proved to be the apartment of the leader of this breakaway sect. As at least one of the PCs had the Serpent-man language skill, they were able to discover a plot when they searched through her correspondence. Human and Demi-human adherents of the demonic god, Nehebkau, were worming their way into positions of power and influence across the nations in and bordering Thracia. What their ultimate goal was? Unclear, except that they were to sow chaos and division to leave opportunities open for the Serpent-men. They also found some loot in here, which was nice. Then they opened a hatch in the corridor and went down even deeper.

They skipped Level 5 at first and went down again to Level 6. This level proved to consist only a single tunnel which was collapsed on either end. Slaves were working to dig it out, guarded by a couple of Serpent-man. When the PCs attacked the slaves immediately revolted and with their help, the guards were quickly dispatched. The prisoners are started out in the adventure as a swarm. Only AoE attacks could do any more than a single point of damage, but a single point of damage was also enough to kill one member of the swarm of ten so they were only going to last so long. Still, they were happy to come along and help the PCs in their fight.

They returned to Level 5 and proceeded into the Temple of Nehebkau. This is the finale to this adventure and it didn’t disappoint. The setup coming from the room alone was cool. There are pools of magma dotting the floor and lava domes casting their eerie glow. On top of that, there are drips of acid coming from the roof, ready to burn anyone who goes prone. This happens a lot in the ensuing battle. The PCs entered from the north-west and there is a ritual happening in the southern part of the chamber, which is accessible only through a short passage not he east and west sides. The ritual involves the sect’s leader ritually murdering prisoners by pouring molten magma into their chest cavities. Yup. If she and her three flunkies get to finish it, a demonic Magma viper will be summoned. Added complication? Sure, there are also four Serpent-man guards stationed to stop anyone who tries to interfere.

The PCs ruthlessly sacrificed the prisoner swarm in a full frontal assault on the guards while they attempted to deal with the leader and the cultists. There were some dicey moments, like when one of them got hypnotised again, when they got down to the last sacrifice and just managed to defeat the last remaining cultist before they could kill her and when their swarm was reduced to just two members. But they persisted and played it clever, using the spells and abilities they had to their greatest advantage. Sleep was the best spell in their arsenal to be honest. There were a lot of fun moments provided not only by the rolls on the individual spell tables but also on the mercurial magic tables, grit tables and fumble tables. DCC is all about the tables, isn’t it? It brings new meaning to the word random. You are never quite sure what will happen, especially when you cast a spell. It might work just fine and achieve the goal you intended. It could even result in a far more powerful effect than you could have imagined. But it could also fizzle out and mean you can’t cast it again that day. Or worse…

Conclusion

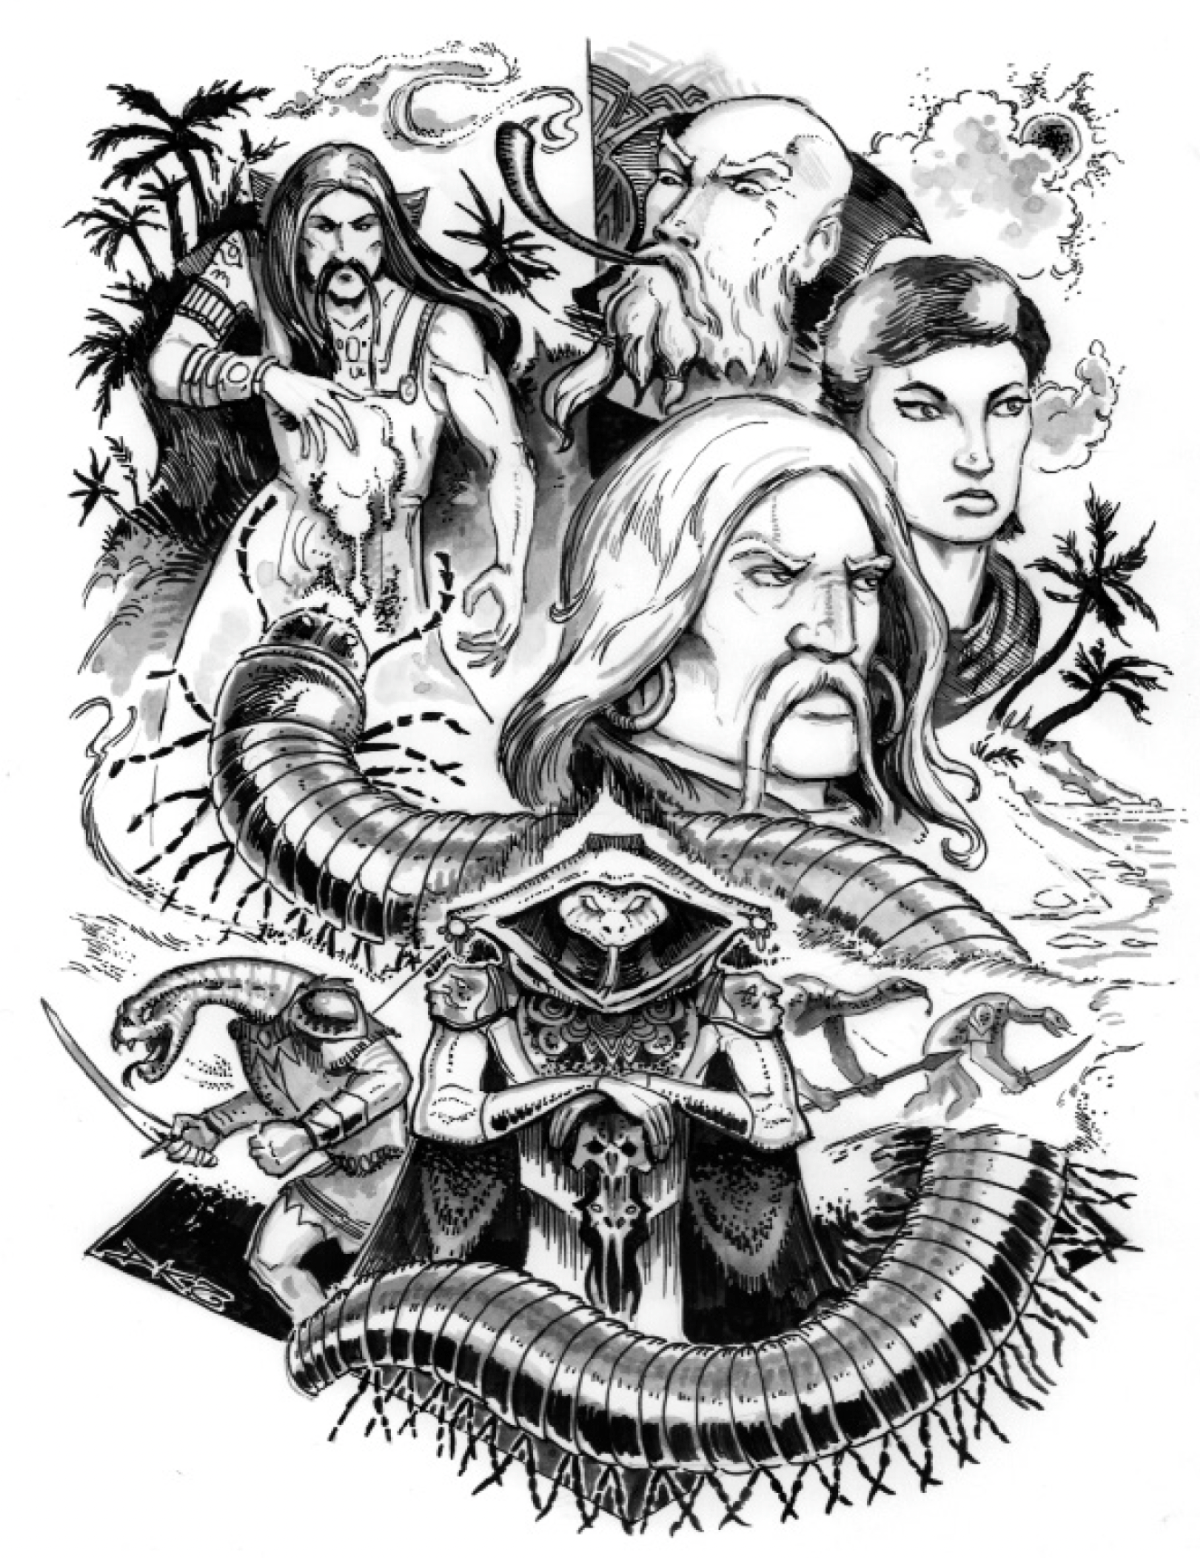
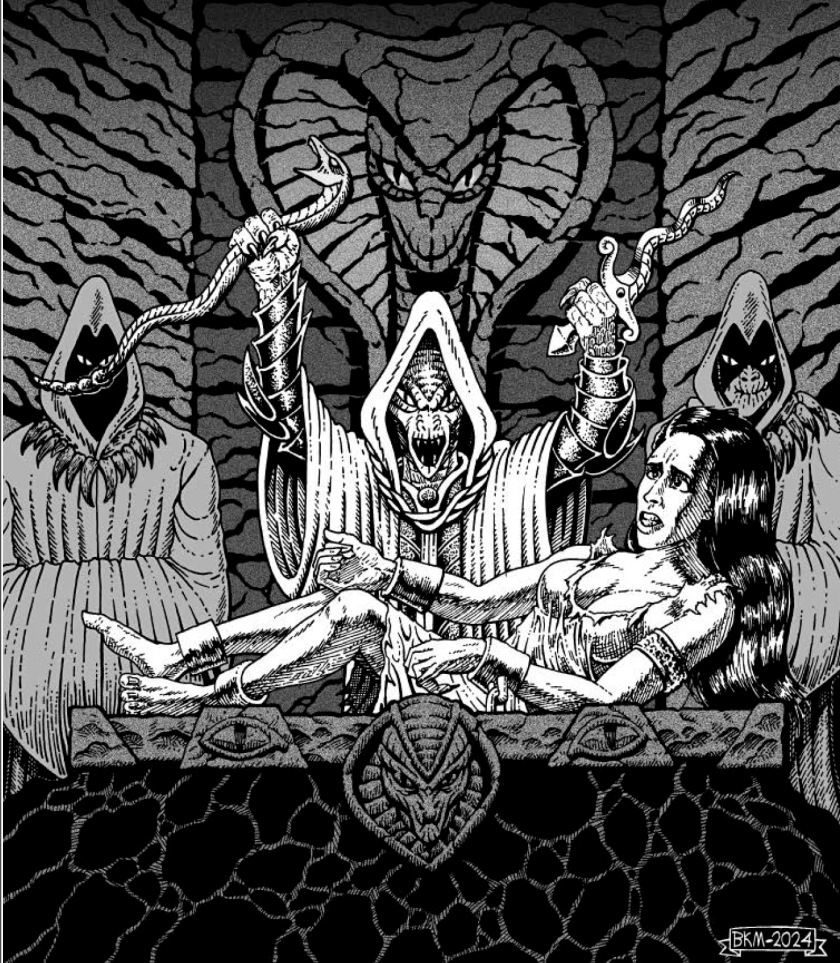
Three Serpent-folk performing a sacrifice of a human woman chained to an altar.

This is the joy of playing DCC with PCs of more than 0-Level. The funnels are fun and all, but access to magic and other special abilities really elevates this game, if you ask me.

There were a couple of other beats once they defeated the cult leader and prevented the performance of the ritual but they were not worth mentioning, to be honest. They went back to the boat and returned to the mainland with all the freed prisoners that survived. It was a bitter-sweet ending, however, considering how many they lost along the way.

I think, if I were to run it again, I would prepare a few things. I’d pop some hexes on the map of the island to make the random encounter table useful. I’d probably remove the Elder Thing encounter and replace the Giant Two-headed Viper encounter with something a little less lethal. I’d also seed some more information about what’s going on in the dungeon, throughout the actual dungeon, because, as it stands, there’s no way the PCs could know that the finale ritual is actually going on. They just happen to stumble across it whenever they decide to show up at the Temple chamber.

In the end, though, we all enjoyed the adventure, despite its flaws. I would definitely consider running the main Caverns of Thracia campaign at some point too. Probably once this whole Editioning Business is behind us.

The Editioning, AD&D 2nd Edition, Part 4

Investigations

I wrote a post a couple of years ago comparing a D&D mystery/investigation-based scenario to one for the Blade Runner RPG. D&D didn’t come out of that head-to-head too well. It was unsatisfying to create powerful, combat oriented characters only to be stuck questioning party-goers and looking for clues when your abilities were not really suited for that.

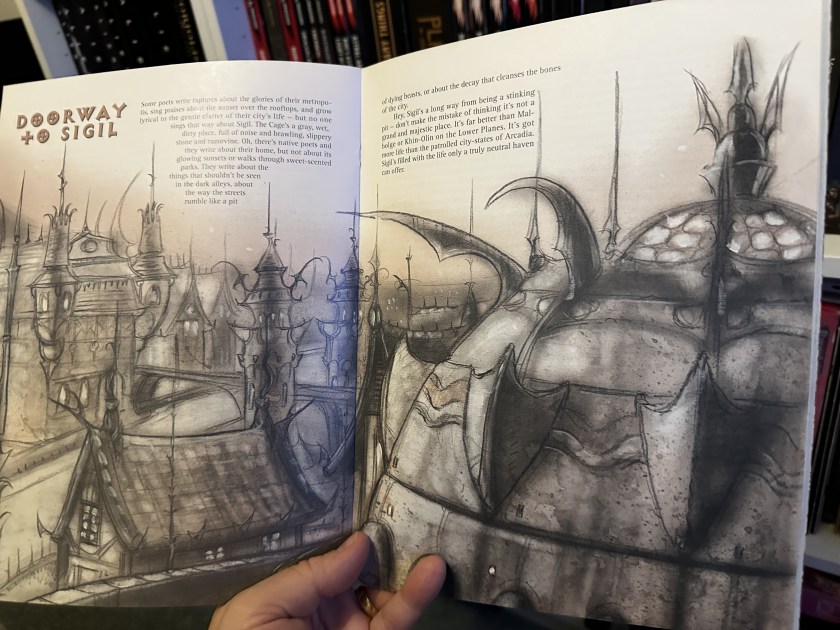
Sigil Skyline in sepia tones

So, I suppose it’s a wonder that I chose an adventure like The Eternal Boundary for the AD&D 2nd Edition portion of the Editioning. But let me tell you the difference: the Eternal Boundary has a little bit of everything you could want as an introductory module to a Planescape campaign. Yes, the theme of the adventure is one of clues, schmoozing and sleuthing, at least in the first couple of acts. But, underneath all that, the players are discovering the dark of Sigil, its razor vine-choked alleyways, its legendary landmarks, its numberless portals and its ineffable nature. They’re hearing the chant on the streets of the Hive, from the barmies and the bubbers, out of the mouths of dour Dustmen, hopeless Bleakers and frenetic Chaosmen. As they try to find out what happened to poor Eliath, they visit the Mortuary, where they learn about the morbid philosophy of the Dead, they come into conflict with the Xaositects and discover they have no respect even for the order of sentences, never mind the universe. They hear that they should never cross the Lady of Pain and that even the gods have no direct influence on the City of Doors. They hear a lot and, as they get more involved and feel more like they belong to this bizarre place, they start to contribute their own two coppers to the philosophical undercurrent of the city’s discourse. Every session, our Dustman and our Sensate get into a blazing row about whose thinking is right. What a genuine joy.

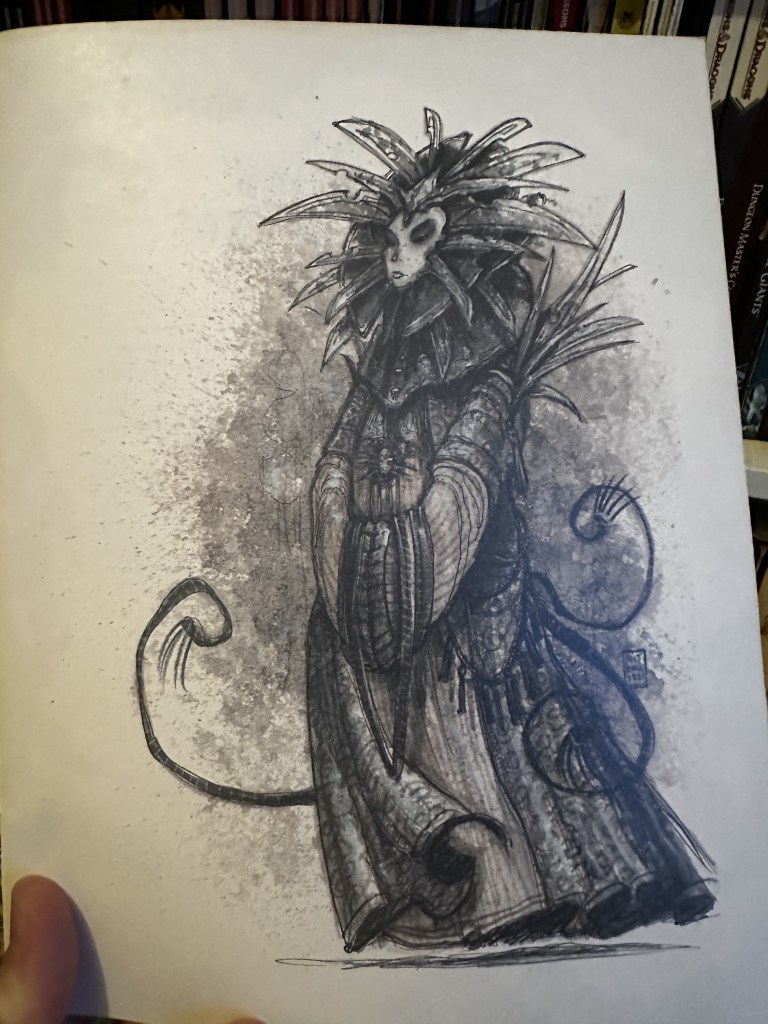
The Lady of Pain - line drawing. The masked woman stands on her own in long robes with blades ringing her face.
The Lady of Pain – line drawing. Tony di Terlizzi.

Even though most of the adventure has taken place only in the Hive Ward, the PCs have been exposed to the bones of this city, and the major themes of the setting. The investigation is incidental.

Also, the investigation can be handled in any one of a dozen ways. So far the PCs have utilised deception, bribery, intimidation, local knowledge, ambush, kidnapping, false imprisonment, and they’ve done a “Weekend at Bernie’s.” And many of these instances could have been fights but they wisely avoided violence in most cases. The point is, they were presented with a mystery and were asked to solve it. They were never told they couldn’t do it the way they wanted to. That’s proper old school. And that’s where it differs most from An Unexpected Wedding Invitation (from that Investigations post,) which went out of its way to proscribe certain actions, avenues of investigation and even the freedom of PCs to go to certain places at certain times.

So, although their investigations are meeting with varying levels of success I think I can say with some confidence that the players are having fun anyway.

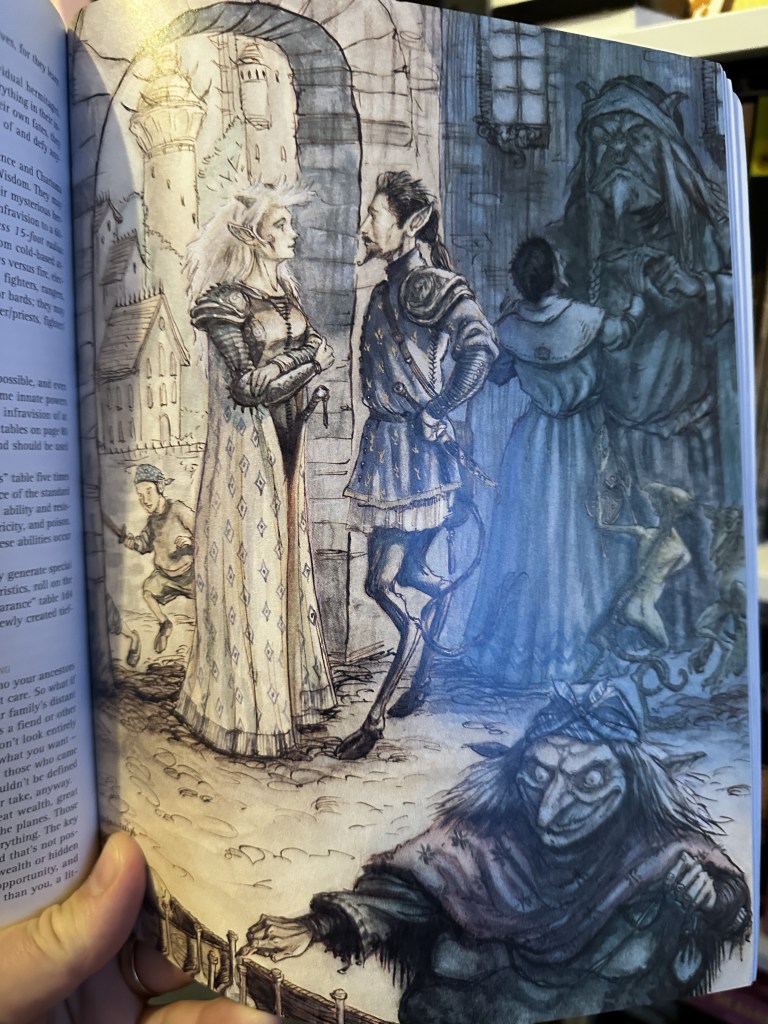
A meeting on the streets of Sigil

Finding Eliath

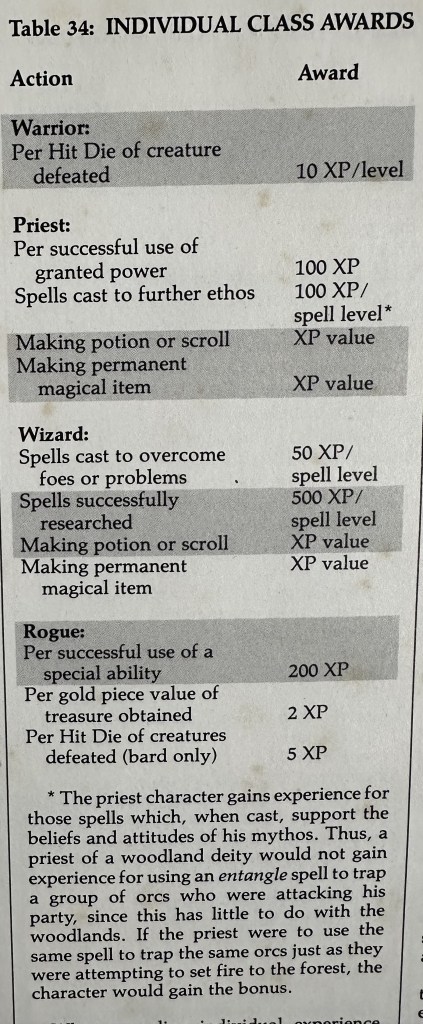
Class-based XP awards table

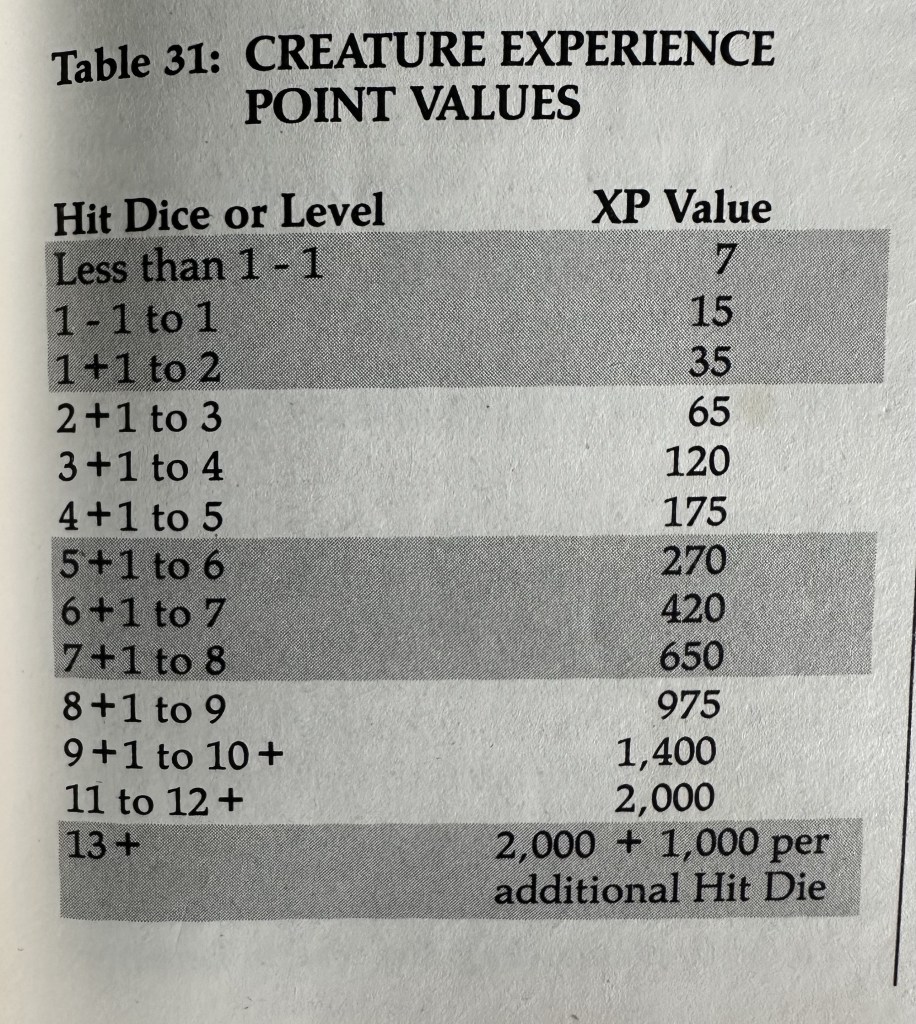
Before getting into our latest session, I had some admin to do. I realised that I had not been handing out XP at all. The poor PCs were not getting their rewards for all their clever little actions. I had to really stretch my memory muscles on this one, as we were talking about two sessions over the course of six weeks. The AD&D 2nd Edition Dungeon Master’s Guide recommends that you award XP at the end of every session, because, otherwise, you’re likely to forget what happened. The XP system in this game is extremely granular, with warriors, wizards, priests and rogues all getting XP for doing different things. For instance, warriors (fighters, paladins and rangers) get an extra 10XP per hit dice of creature defeated per warrior level. However, priests (clerics and druids) don’t get that. Instead they get an extra 100XP per spell cast to further their ethos and even more if they use one of their granted powers like Turn Undead. Rogues (bards and thieves) have it pretty easy since they get 2XP for every gold piece worth of treasure they obtain. But Wizards (Magic Users and Specialists) have it toughest in my opinion, they get a mere 50XP per spell cast or 500XP per spell researched. Now, sure, they can cast spells but only when the occasion arises, and as for researching spells, that is a time-consuming and expensive activity that there is not much space for in a short adventure. Anyway, they all also got some common awards for their investigations and a combat encounter. The combat XP is calculated in a fairly logical way using these tables from the DMG:

Dear reader, if you can’t remember what went before, frankly, I don’t blame you, so here are a few links to the other posts in this series:
AD&D 2nd Ed Part 1
AD&D 2nd Ed Part 2
AD&D 2nd Ed Part 3

Last we left our intrepid heroes, they were staking out the pub in the hopes they would run into their target, Eliath. They had rented a room and even stayed there for the night without the man in question showing his face. The second day, they decided to split up. Trance and Aurora would return to the Butcher’s Block, the Hive’s diviest dive, where Trundfeld Three-teeth, its stinking Ogre proprietor would hopefully have some information for them. Meanwhile, Devansh, the Cleric and Glaermond, the Paladin continued the riveting stakeout.

After only moments back in the Hive, the first group heard sounds of a yet another attack in yet another alleyway. Aurora sent her goat familiar to scope it out. He is a very sneaky goat, ok? Kid spotted a group of men standing over another after, seemingly, killing him. They talked about leaving the poor bubber for the Collectors to find before scarpering. The goat got a good look at the ring-leader, a half-elf in a dark leather hood. Aurora, our Witch, examined the body and even cast Detect Magic on it. The man seemed completely dead, but was also emanating magic. They decided to take him to the Mortuary, where Aurora’s Dustmen buddies were sure to know what to do with him. So, she and Trance slung the body between them and pretended he was dead drunk, and not just dead, as they “escorted” him through the Hive. Unfortunately, their ruse was not sufficient to fool the Bleak Cabal gang that turned up. Turns out they were out looking for the berks who were putting their barmies in the dead book, and it looked like they’d just found their suspects. Some fast talking from Trance convinced the Bleakers that they were not the bashers they were looking for, by telling them almost the whole truth. Still, Derioch Ysarl, the mage in charge, demanded that, if anyone was going to take the body anywhere, it would be them. Derioch also used detect magic, and, at a higher level was able to figure out that the spell cast on the man was necromantic in nature.

Back to the Black Sail Tavern. Devansh and Glaermond ordered some cranberry juice and watered down wine and a couple of bowls of forever stew from Salja, the tiefling serving maid. They also purchased a hot bowl of information. She was able to tell them that, not only was Eliath in the bar right at that moment at another table, but also, that he had a room in the Black Sail. Rather than confront Eliath in the pub while he sat with a group of his fellow Doomguard, they decided to keep an eye on him and wait for the others to come back, when they would corner him on his own.

Meanwhile, Trance and Aurora were talking to Trundfeld. He gave them a bit of a run around, more-or-less telling them only things that they already knew. They didn’t trust him but they had little choice but to accept what he told them. So they went back to the Black Sail to meet up with the other party members.

That night, Trance took it upon herself to use the skeleton key Salja had kindly provided for the low low price of 1GP and enter Eliath’s room. She hid there under the bed for an hour or so before he returned. When he did, she leapt up and threatened to kill him if he didn’t co-operate. The others then helped her to kidnap him and take him back to their own room. Finally! They had found the barmy they were looking for! But he wasn’t barmy no more. He tried to tell them that he was a Clueless prime, only recently arrived from Toril when he was immediately recruited by the Doomguard. But when they pushed him he confessed that he had been in Sigil for fifteen years, most of which he spent insane on the streets of the Hive. He said that he had died there, a raving loon, but rather than being brought into he arms of his loving god, Lathander instead returned him to life, claiming that for Eliath to join the Doomguard would be all he would need to do to fulfil his god’s wishes. He had no memory of a key to the portal they were looking for, though he did direct them to a wizard’s tower in the Lady’s Ward, which might contain the Rhaunades Collection, a library that may house the information they’re looking for.

The PCs felt they had run into a major roadblock in their investigations. Despite finding the man they were looking for, they were no closer to the information they needed, the key to the portal to the Isle of Black Trees was still a mystery and the Rhaunades Collection seemed like a long shot since there were a thousand towers in the Lady’s Ward and they didn’t know where to start. So they returned to their patron in the Society of Sensation, Bendon Mawl, for advice. On the way to the Civic Festhall to see him, they ran into another familiar figure, the Dancing Man who Aurora had encountered in the Hive. Another barmy turned sane. This time, they questioned him and when he tried out his cover story, one very similar to Eliath’s they found out that he remembered dying and being greeted Saint Cuthbert, who sent him back with the divine command to seek out and join the Society of Sensation to fulfil his wishes. The party began to make some connections. And when they went to see Bendon Mawl, he was very concerned about the possibility of some conspiracy between the Dustmen and the Doomguard, possibly at the expense of the Senates. He promised them some help if they would go and investigate this new threat. Even the Dustman on the team, Aurora found herself wondering if her own higher ups might have some nefarious plans she was unaware of.

They went back to their decrepit church to rest for the night and think about what they were going to do next but were rudely awoken by armed men busting down the door and attacking them!

Conclusion

The mystery has been preserved even after they discovered Eliath. They have unwound a part of it, of course, in finding him and the Dancing Man alive, but they don’t know the purpose of these “resurrections” or who is really behind it. Meanwhile, there are several factions in play and list of NPCs with their own agendas as well. It’s been low on action, but high on intrigue and that is suiting us just fine after the highly lethal, combat heavy OD&D and Basic.

Can’t wait to get further down this rabbit hole but I’m going to have to. I have holiday coming up so our next session won’t happen for a month! I’ll be back in the meantime with musings on other RPG-related things dear reader.