Time-loop

Spell Jammin’

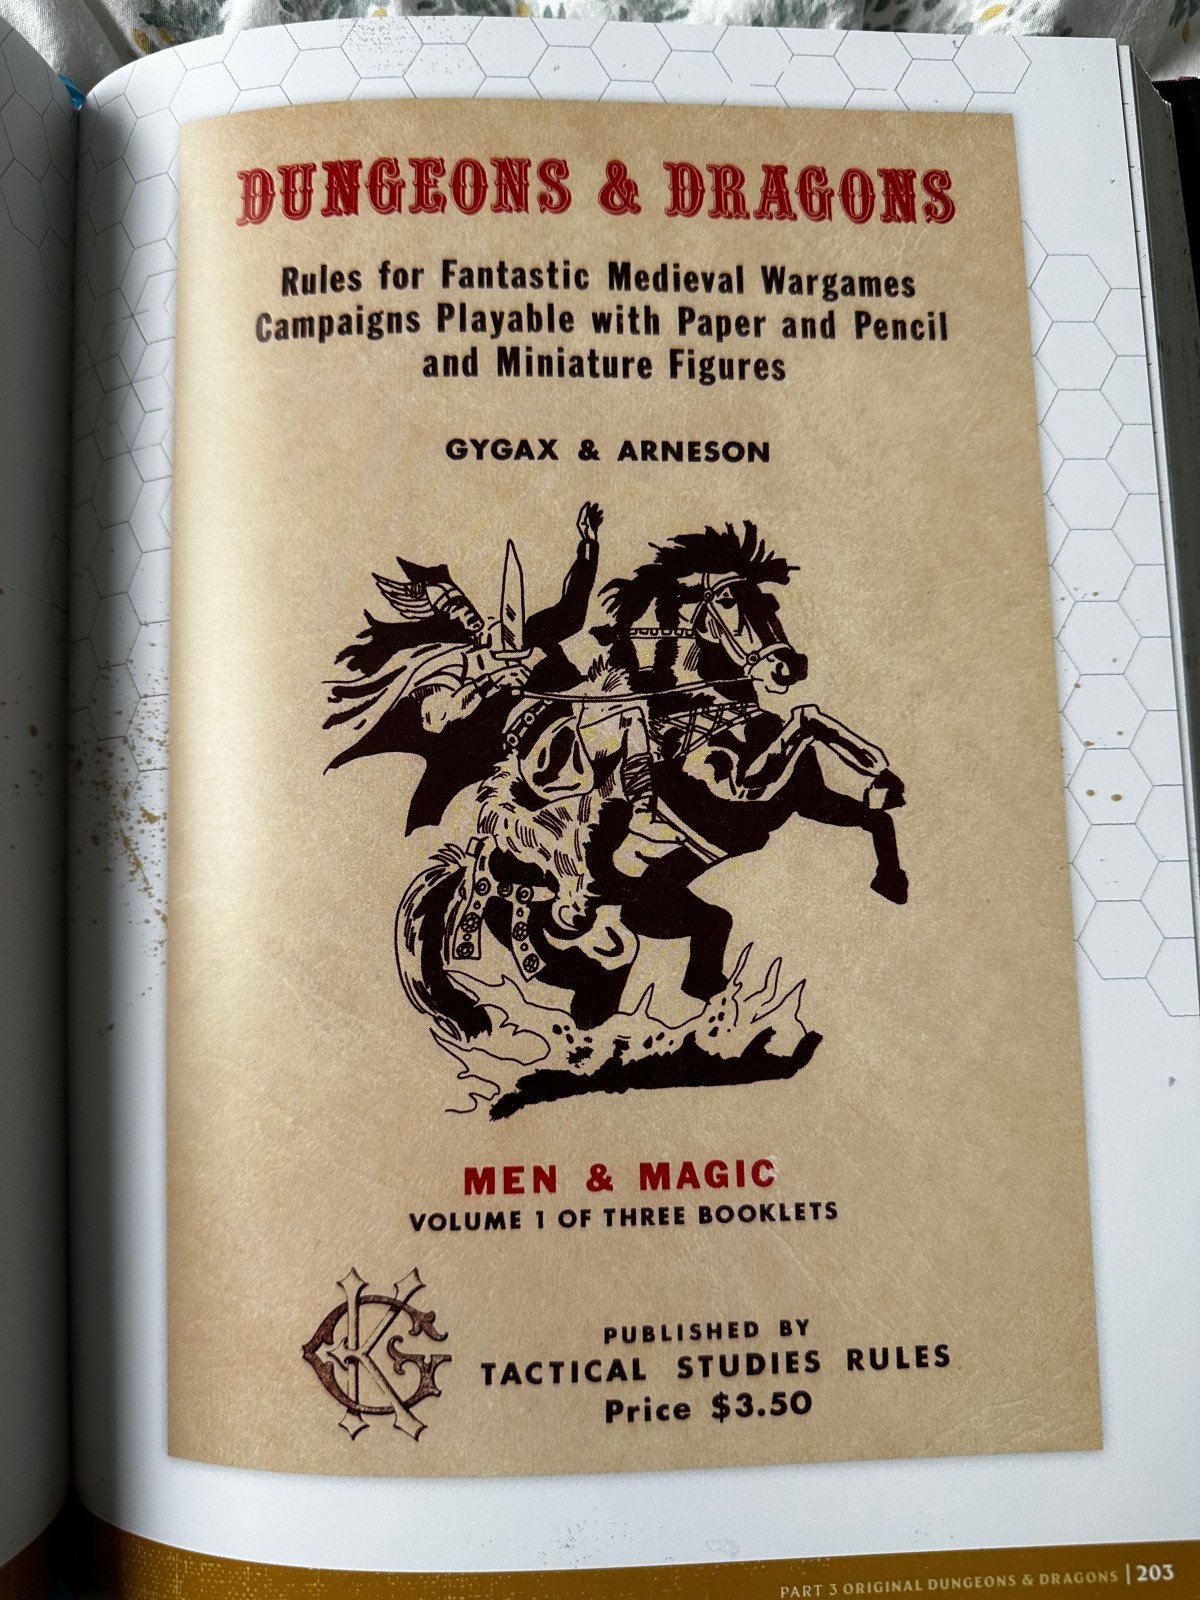
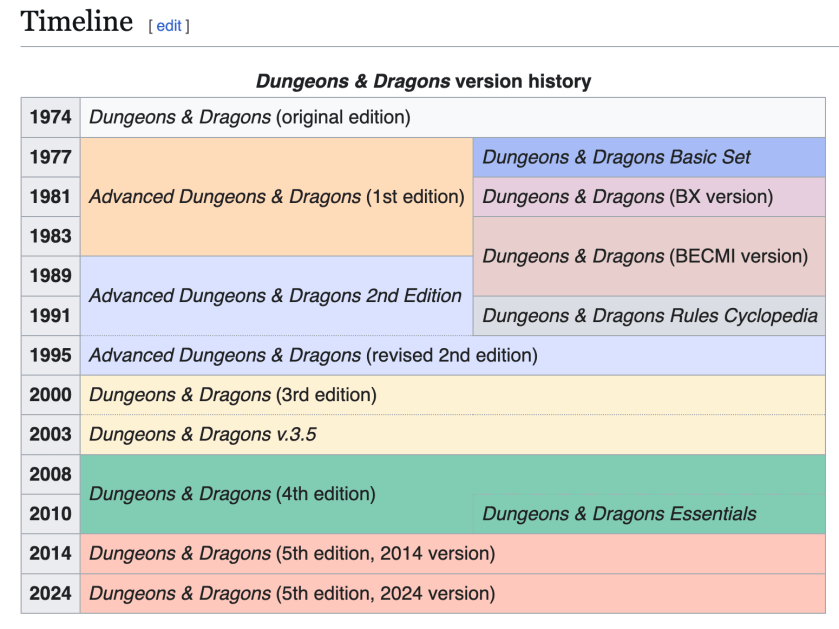
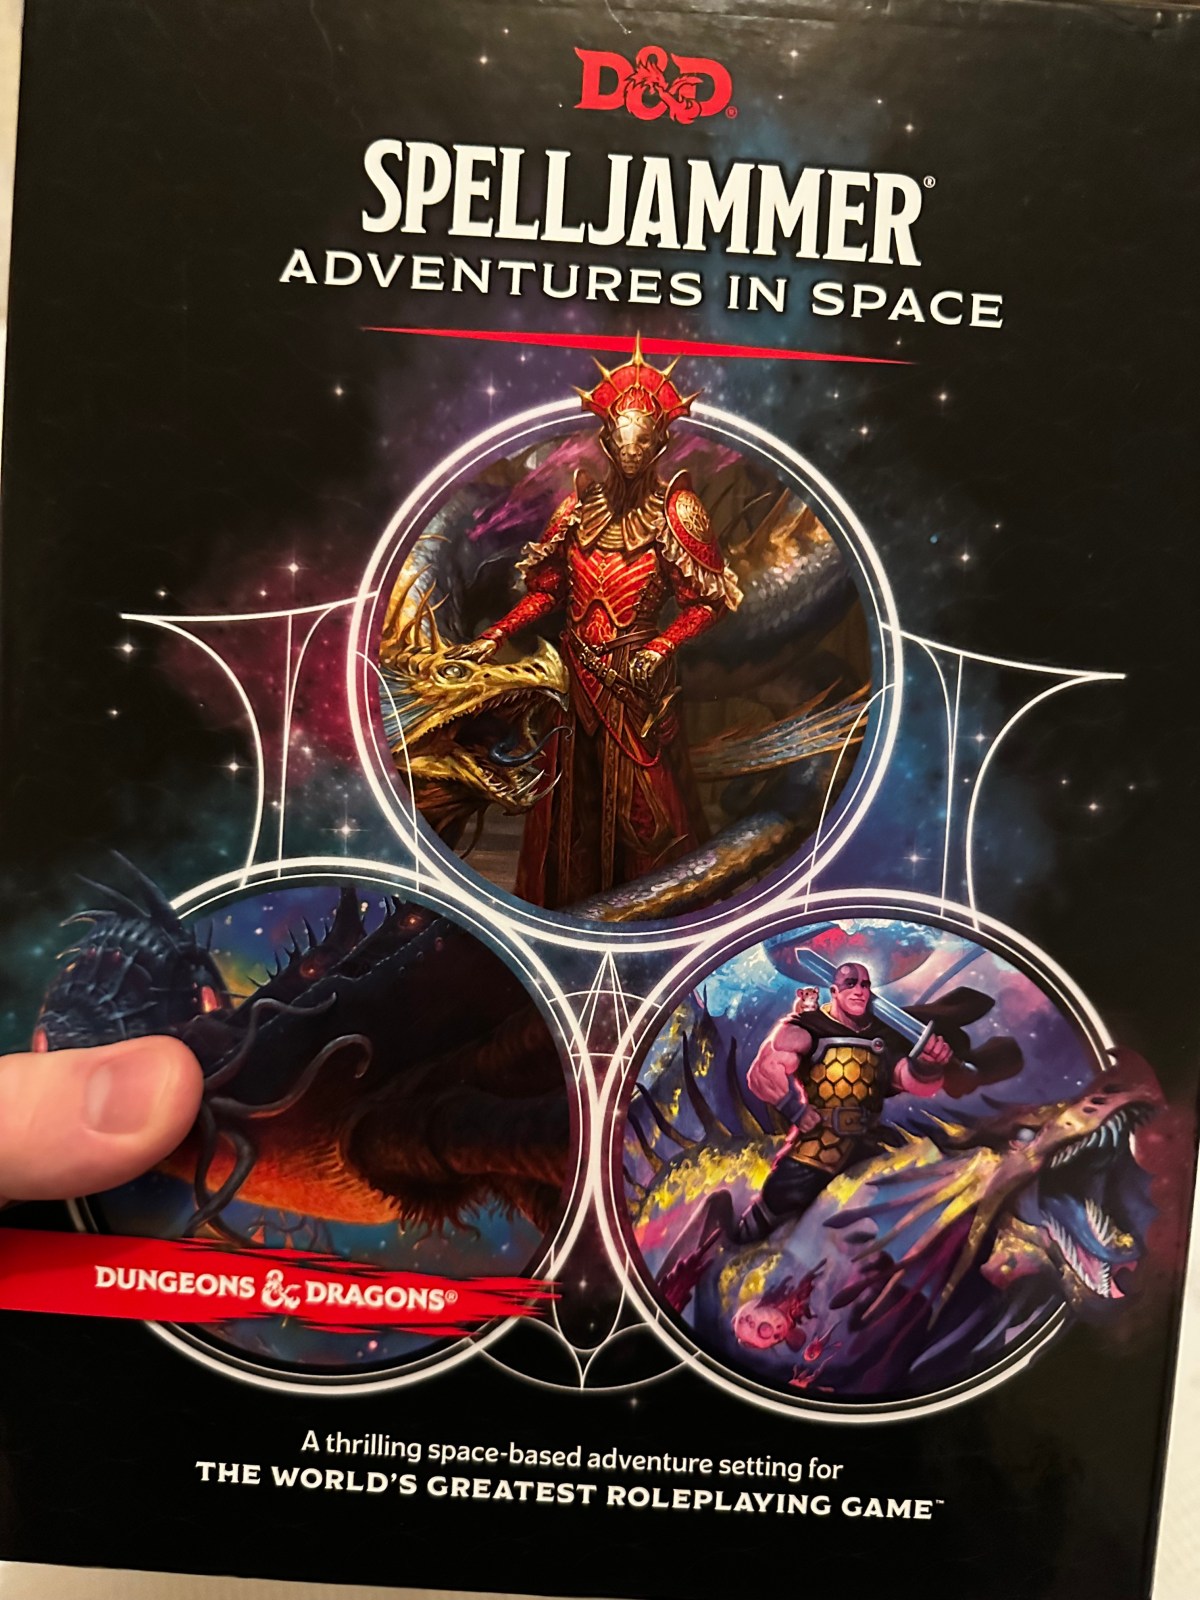
The Editioning has started. We made some characters for OD&D the other night. We have one Fighting Man, one Magic User, one Cleric and one Thief, just as Gygax (or maybe Arneson) intended. But today, I want to write about a mini 5E campaign we just ended.

I have been running a Spelljammer campaign on and off for the last three years or so. The main campaign is, I guess, nearing a conclusion. I had always envisioned a particular timeline for it, factored in major plot beats, character moments, significant locations and events, but underestimated exactly how long a lot of that would take and, of course, where the PCs would take the game in some cases. So, last year, I decided to take a break from it. But, some months before the break, one of our number was launched into the IRL adventure of welcoming his second child into the world. When he and the rest of us came back to Spelljammer, I wanted to play something that would explain where his character had been in the interim.

The Wild-spacer Giff, Azimuth, is our resident Charisma Fighter. Or, he was. Now, he’s a Fighter/Paladin. He used his charm to get the group out of a couple of tight spots and himself into a couple of hot dates. He had a troubled back-story. The rest of the crew picked him up after he had been left stranded in Wildspace when some disaster befell his own ship, captained by his father, Parallax, also known as “the Admiral.” He didn’t know what had happened and he was driven to find out. When their adventures took them to the Rock of Bral, he did some investigation and discovered that something was happening to ships in a region of space known as the Amos Expanse. This struck a chord with Azimuth. So he put a crew of his own together while his erstwhile companions pursued their own goals, and he set off into the Expanse to find his dad. We called it, “The Search for the Admiral,” or “Dad-quest” for short.

Side Quest

This is how I handled it. We took another extended break from the main campaign and I got the other players to create new characters to act as the crew for Azimuth’s own ship. They all had a connection of some sort to the Admiral so it made sense that they would want to help find him. The players really got into this! They loved the opportunity to play new PCs in the same world, and even, in a way, the same campaign as their older characters had been in for a couple of years. They came up with some incredibly different characters compared to their original ones. My wife was playing a gnomish artificer in the main campaign and decided to create an Astral Elf Circle of Stars Druid who talked like Jennifer Coolidge (like many of the people I play with, my wife is a fully paid up member of the funny voice club.) I wrote, last summer, about the idea of allowing the players to use their two characters interchangeably from now on.

Giff! He's a hippo in a victorian military uniform holding a blunderbuss
Giff! He’s a hippo in a victorian military uniform holding a blunderbuss

The bulk of the seven session campaign was spent searching and investigating the Amos Expanse. I handled this as described in this post. TL;DR they rolled on a few encounter tables and they marked progress points when they rolled a 6. In the end, they rolled on those encounter tables quite a few times. What I enjoyed most about this part was that they found a through-line of a plot in the random encounters that I had never intended. There were a number of different hazards, problems and encounters that involved Kindori, the whale analogues in Spelljammer. There was an encounter with some space-vikings who were hunting them. Another involved the corpse of a Kindori that was being mined for space-ambergris and another was an encounter with a Kindori ghost. I had come up with these by using the spark-tabes in Between the Skies but never saw them as connected. And they wouldn’t have been if it hadn’t been for the order they were rolled up by the players during their journey. Anyway, on 5 progress points, they found what they were looking for.

Loop

It just so happened that the last encounter they rolled up before the finale was a big one. They encountered a Void-frost Elemental that was holding open an anomalous portal from the Elemental Place of Frost into Wildspace and it was spreading out from there. The PCs’ ship got caught in the ice (along with another Kindori who ended up helping them) They were forced to trudge across the space-ice-floe and defeat the elemental to close the portal and release their ship. It was a tough fight and they took a lot of damage to achieve their goals, but they won out in the end. When they did, of course, the enormous portal popped out of existence. This event drew the Crimson Cloud they had been hearing about to that spot, to fill the “void” it had left. It also trapped the PCs inside the cloud!

It turns out this was a fortuitous happenstance since this is also where Azimuth’s Da had been all this time. He, along with all his crew and a whole other ship had been trapped in a time loop inside the cloud ever since the disaster that had left Azimuth stranded at the start of the campaign!

Here’s what happened. Azimuth’s Dad, Captain Parallax, had been commanding his ship through the expanse when it encountered the Crimson Cloud. The Cloud was a temporal anomaly that allowed beings and objects to travel in time. Inside the anomaly, they got hit by another ship that had also been caught in it. This other ship also bore Azimuth’s Dad, just a much younger version of him. And it was a mercenary ship from decades earlier. The mercs rammed into the Admiral’s innocent merchant ship, assuming they were their target. And that’s when they got stuck in the time-loop. A device aboard the Admiral’s ship, a sort of Portable Dungeon, meant to trap whole armies in a prison demi-plane, interacted with the temporal anomaly and trapped them in the time-loop.

The way I planned it, the loop would last only about 15 minutes. As such, the two crews and the two versions of Azimuth’s Dad had done this over and over again, hundreds or thousands of times. But none of them were aware until the PCs also got sucked in, half way through a loop.

This is what I did to handle the loop. I established the events that would happen without the intervention of any outside influence such as the PCs. Here is the basic set of events:

  1. The ships enter the cloud/loop after colliding – The Mastodon’s Breath (Parallax Senior’s ship) is damaged but not completely wrecked. It has a great hole near the prow. The Jackpot (Parallax Junior’s ship) has only taken minor damage, but, unknown to them, it is enough to cause a massive blowback effect when they fire the cannon into the Mastodon’s Breath. It will be enough to destroy both ships in a cataclysmic explosion.
  2. Xenotermination giff marines get together to make an assault on the Mastodon’s Breath. Lieutenant Parallax is cheering them on from the spelljamming helm. The assault is met with surprising opposition from the elves in Lord Faewynd’s retinue (these guys were being transported by Parallax along with their cargo) and the crew of the Mastodon’s Breath, not to mention the distraught Captain Parallax himself. The fighting is bloody and results in the marines retreating, badly hurt.
  3. Fearing the worst, Lord Faewynd and a bodyguard escape the MB on a small tender with the spelljammer helm from the ship and the Astral Dungeon on board. Meanwhile, both crews take the time to rest and heal.
  4. Just as the Jackpot’s captain, Captain Lagrange orders the firing of the main cannon, Lieutenant Parallax and Captain Parallax finally see each other from opposite decks. That’s when both ships explode in a fiery blaze.
  5. Not long afterwards, the Astral Dungeon will reset, taking everything back to the starting point, just after the two ships collided.

Live. Die. Repeat.

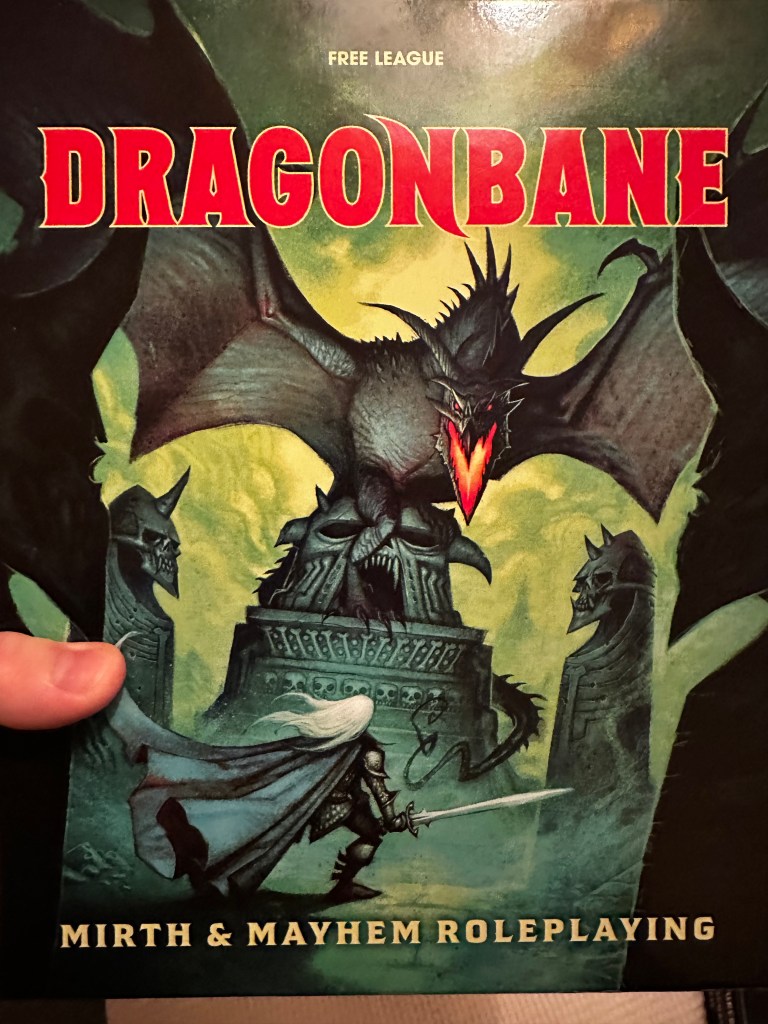
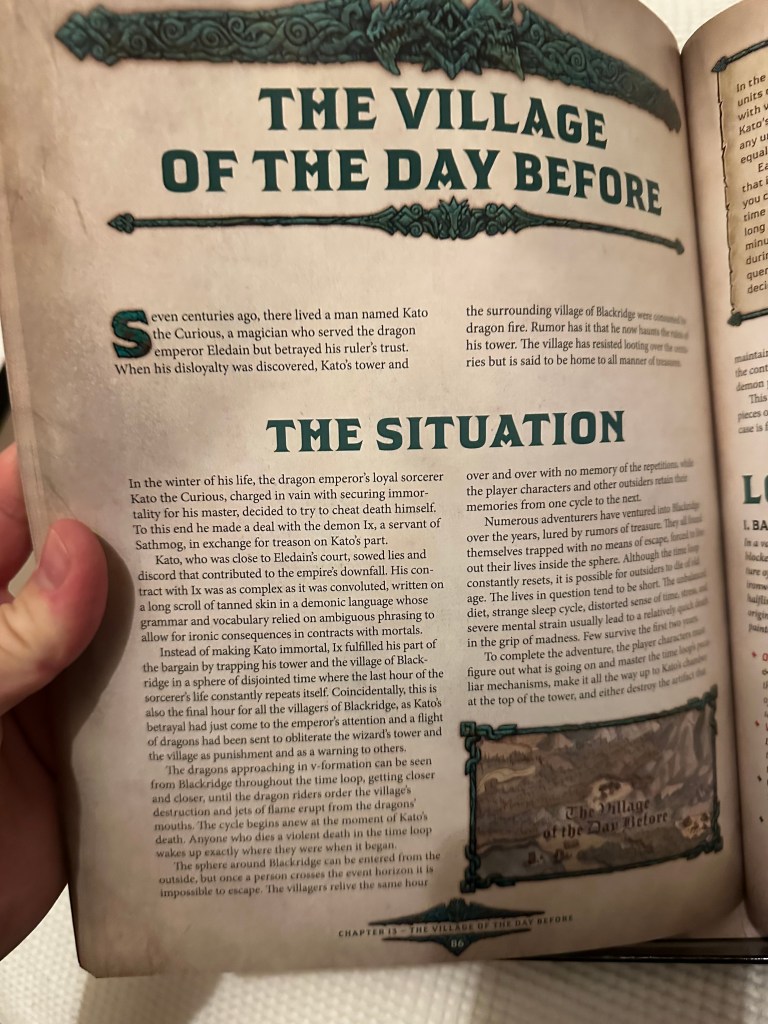
I got the idea to do this, partly because my wife is a big fan of time-loop movies like Groundhog Day and Edge of Tomorrow and I wanted to give her that experience. But also, I had read a clever adventure in the Dragonbane boxed set that showed me it was possible to create an adventure like this. In fact, it made it seem relatively easy. It hinged on the series of events, of course, but “The Village of the Day Before” was far more complicated, in many ways than what I had planned. It had a lot of NPCs you had to locate and keep track of, for one thing. I didn’t need to do that so much since everyone was restricted to one of two ships. In fact, it was surprisingly easy to run, is what I found, as long as I kept the timeline in mind.

The PCs experienced three iterations of the time-loop. On the first two times, they got blown to smithereens along with everything else trapped in the anomaly when the merc ship fired their enormous cannon and blew up the Astral Dungeon. They reappeared on the edge of the map each time. On the second go, they noticed the interaction between the explosion from the cannon and the Astral Dungeon in the middle of a pitched battle with the giff marines. By the third one, they had figured out they had to prevent the cannon from blowing that thing up and they had to get to it and find out some way to shut it off to free themselves. And that’s what they did. They had to kill the mercenary captain and fight the marines to a standstill while they figured it out, but they managed it.

Conclusion

In the end, there was no “big bad” to fight to end the adventure. There was just a puzzle to solve and some chances to take. The players did that and they escaped the time trap. It was exactly what I wanted and the players seemed to enjoy it too.

If you’re thinking about running a time-loop adventure, DMs out there, do it! But let me warn you, it’s hard to keep it to yourself when you’re planning it!

The Editioning: How to OD&D

The Editioning Begins

The first session for our Tables & Tales OD&D game is set for next Friday. I think it’s just going to be a session 0 to introduce the game to the players and have them create characters. Part of the reason for this is the way I’m approaching it. It’s going to take a little longer to complete my preparations than I thought it might. Today, I’m taking you on the start of that prep journey with me. Click this link to check out all the posts on the Editioning, our challenge to play all the major editions of D&D in the next twelve months or so.

Step 1: the Map

I have made an important decision, dear reader. I’m not going to run a published adventure for OD&D in the Editioning. For one thing, there are precious few of them. For another, they are not very attractive. I considered running the adventure contained in the Blackmoor supplement, the Temple of the Frog. But then I listened to this review of it on the Between two Cairns podcast and I decided against it (yes, I know they were reviewing the 1986 version made for the D&D Expert Set, but I’m assuming a sufficient similarity that will allow me to make assumptions about the older version.)

Instead, I thought to myself, I thought, “you should just do what the OD&D core books assume you’re going to do, create your own dungeon, your own wilderness, your own NPCs and monsters and treasures. That’s the real OD&D experience, you idiot!” I then apologised to myself for calling me an idiot and got out some graph paper and a pencil, because Gary and Dave told me to start with a map.

Dungeons & Dragons, Book III, The Underworld & Wilderness Adventures by Gary Gaygax and Dave Arneson starts with a section entitled, “The Underworld.” Here’s the first page of that:

Sample side elevation of a dungeon from the Underworld section of OD&D volume III

OK, I don’t have a lot of time, and am only willing to expend a moderate amount of effort but I have a decent imagination. So, hopefully that’ll see me through. One advantage I have here is that I know I only want this game to last about six sessions, so I doubt I need to make anything very large.

Since I’m starting with this map, I’m hoping it will inspire me to come up with a theme for the adventure/dungeon. Let’s see.

If you are one of my players, TURN BACK NOW! SPOILERS AHEAD!

Levelling

My dungeon - six levels including the ruined tower on the surface and the sea cave at the bottom with the flyig saucer crashed in it.
My dungeon – six levels including the ruined tower on the surface and the sea cave at the bottom with the flyig saucer crashed in it.

I’ve started by planning out six and a half levels of dungeon. My pen did provide some inspiration immediately by drawing the whole side elevation with a cliffside on the left. I hadn’t meant to do this, but a slight mistake led to it and then, it just felt right. I placed the ruined lower floor of a tower on the surface, near the cliff’s edge and drew a shaft dropping from the floor down to a subterranean level. That level also has an entrance on a ledge poking out from the cliffside.

At the book’s urging, I decided to mix up the methods by which an adventurer might move between each of the levels. The bare shaft between levels one and two gives way to a simple stairway between two and three. From three to four and from three to five there are lifts and you can only safely traverse the gap between levels four and five if you can fly. From level five, you can get to level six by the use of a rocky slide or a teleportation pad. You might also get to level six by descending from the ledge at level 2 above, although you would need a lot of rope and a swimming proficiency badge. I like this! It seems fun and means the players won’t always know what to be on the look out for when they decide it’s time to descend.

For the craic, level six is a submarine cavern, inside which is a crashed flying saucer. Well, looks like a theme is definitely coming together, although, it hasn’t fully crystallised yet.

Level One

The ruins of the tower currently play host to a group of Dwarven mercenaries in need of shelter. There are four rooms, including the Dwarves’ camp. One room contains nothing of interest but a handle to the trapdoor that leads down to Level Two. Another has a riddling raven who keeps its hoard of shinies here. If they answer a riddle, they’ll get a prize but if they attack the bird, they’re getting cursed. The last room has the trapdoor to the next level and a Gray Ooze resting on top of it.

I’m having immense fun with this so far. I’m doing it all by hand; drawing the maps in a notebook and writing out descriptions on the opposite pages. I normally do session prep on my computer and I haven’t built a dungeon from scratch in maybe eight or nine years. It’s a real breath of fresh air!

Level Two

My thinking behind this level is that it is there to dissuade potential dungeon delvers. It will present wave after wave of undead, who will regularly appear, as if from nowhere, in the room adjacent to the one the adventurers emerge into from the level above, trying to force them back. The undead are not real. Rather, they are like characters generated by the holodeck in Star Trek. If the PCs explore other ares of the level, they will probably find the hidden control room which will allow them to turn off the hardlight illusion generator. Then they’ll be able to get through to the stairway leading to the next level down.

I am quite excited about this idea, especially as there is an alternative to fighting the undead or figuring out the illusion generator. They can escape to the ledge on the cliffside from this level, although the only option is to descend into the sea from there…

Levelled Out

A crude line drawing of a dragon with a bird flying at its face
Dragon

That’s as far as I have gotten so far. I need to knuckle down and expand on what I’ve done so far. So I’m going to leave this post here for now. I’ll keep you posted on my progress in a few days.

The Editioning: From OD&D to 5E 2024

Bloggies Inspiration

I have read a lot of TTRPG blogs in the last few weeks, dear reader. I imagine the chances are good that you have too, if you’ve been following the Bloggies awards over on Explorer’s Design. There have been so many wonderful reads, I really did find it hard to choose between many of them. What a I liked most of all were the posts that expressed their enthusiasm for the hobby in one way or another. You can feel it shine from a d66 table of carefully curated results as much as you can from the effusive prose of some bloggers. And there were blogs about every aspect of this weird pastime from story-telling to initiative methods and everything in between. So often, what I found is that writers went back to the source material for inspiration, those historical tomes that defined the RPG scene and continue to play an outsized part in it, whether we like it or not. Most of these we were OSR bloggers with a keen interest in the original D&D from 1974. But you would occasionally see other editions get a shout out. On top of this, I get a newsletter from the Shop on the Borderlands that tempts me weekly with a lot of old dragon game shit I don’t need… Unless, what if I did need it?

The Editioning

Now, I have some to lots of experience with most of the editions of the game, and I already have a bookshelf full of D&D, mostly AD&D 2nd Ed and 5E, but also several 4E books, a smattering of 3rd Ed and a couple of 1st Edition tomes. So, I figured, if I undertook a challenge to play a full adventure in every edition of D&D during the next twelve months, I wouldn’t need to supplement my collection too much to make it possible.

So, that’s where we are now. The Editioning is coming to pass. The plan is to play every edition of the D&D game, in order (although there may be some overlap) in our gaming community, Tables and Tales, between now and February next year. Isaac has agreed to take up DM duties for several editions. I will run OD&D, AD&D 2nd Ed, 3rd Edition and 3.5 and Isaac has said he would like to run B/X D&D, Ad&D 1st Edition and 4E. Someone else in the community might run 5E 2014 and 2024, but if not, I’ll probably do those too.

Pre-loved

The covers of the AD&D 1st Edition Dungoen Master's Guide and the D&D 3.5 E DMG.
Just arrived!

I’m trying to source second-hand copies of the main rule books of each edition where possible. It seems more like a real history project when you have relics, primary sources, legendary tomes. It’s part of the adventure. I like to think about others using the books to play their own campaigns twenty, thirty, forty years ago. It puts me in touch with my own teenaged self and allows me to tap into the enthusiasm I had for the game back in the day. Also, its just cool to have them.

I’ve been surprised to find that you can get most of them for prices that I don’t consider extortionate, either on Shop on the Borderland or Ebay. I started shopping for them last week and a couple of DMGs showed up on Friday, AD&D 1st Edition and D&D 3.5E. They’re in good condition considering how much I paid for them. But before we get to those editions, we need to take a look at OD&D and D&D Basic/Expert.

The Educationing

This undertaking has taken me to school. I had to figure out which editions were really distinct enough to deserve to be a part of it. I started by looking up the full list of editions here. I found this useful table:

A table nicked from the Wikipedia entry for Editions of Dungeons and Dragons. it shows all the versions from OD&D to 5E 2024.
From Wikipedia

You can see that it clearly shows the parallel evolution of Dungeons & Dragons and Advanced Dungeons & Dragons. I remember, as a young DM being quite dismissive of the non-Advanced version of the game. I had cut my teeth on the Basic Set but felt as though I had graduated past it to AD&D after a year or two. Never-the-less, I did play it in the nineties. A friend DMed it for us using the Rules Cyclopedia and the Hollow World campaign setting. Looking back at it now, I wish I had had more of an interest in it. Above any other version of the game, except, perhaps OD&D, it seems to have had the greatest influence on the modern OSR. Hindsight is 20/20 I suppose.

I have seen the terms B/X and BECMI and Blueholme and The Red Box and whatnot, for a long time. But this was the first time I bothered my arse to figure out the differences between them. This despite having actually played the using the Basic Set myself. I did not know that the confusing “abbreviation,” B/X referred to the first two boxed sets of the D&D rules, Basic and Expert, which allowed play from level 1 to level 14. I also had not known that the initialism, BECMI, referred to the full set of five rule-books, Basic, Expert (why is Expert shortened to ‘X’ in B/X but ‘E’ in BECMI? Make it make sense!) Companion, Master and Immortal. BECMI supported advancement all the way from 1st level to 36th!

Anyway, I made the executive decision to collapse all these versions into one, and just refer to it as B/X, since the main difference seems to be the extension of level caps with each successive book and we will not be playing long enough for that to be an issue. Nonetheless I have ordered both the Basic Set rule book and the Rules Cyclopedia, just to make sure we have all our bases covered.

Whither Adventure?

The cover of the Making of the Original Dungeons and Dragons. It has a red cover with a big gold ampersand on it.
The cover of the Making of the Original Dungeons and Dragons.

There are still a few decisions to make. And there is a lot of work to do to prepare.

I have a relatively easy task to begin with, and that’s the reading of the OD&D books. I picked up the PDFs of these from Drivethru for a song. I do have them in a a slightly unwieldy printed form in “The Making of the Original Dungeons & Dragons” book that a friend kindly gifted me at Christmas, so I am happy not to need to empty my bank account to purchase a vintage copy of those books. I’ve quickly realised that I would also need the Greyhawk supplement since, otherwise, I would need to use the Chainmail medieval miniature war-game to run combat, and that was a bridge too far for me. The Greyhawk supplement included the first iteration of the D&D combat system that we might recognise today.

On top of that, we have to decide on what adventure modules to run for each edition. I would like to use vintage adventures that were made for the particular edition that we’ll be playing. For B/X, AD&D etc. there are tonnes of options, which means we’ll have to narrow them down somehow. But for OD&D, we have a very different problem. Adventure design appears to have been mainly the domain of the DM. The main books give you rules and tables, monsters, treasures etc, but mainly they encourage the DM to create their own stuff. Which is great! But it leaves me with the question, is that what I should do? Since that’s the intention? Or, should I use the one adventure I could find in any of the OD&D supplements, Blackmoor? The adventure is “The Temple of the Frog,” and I haven’t finished reading it yet. But it does strike me as the sort of scenario that could be quite lethal unless the PCs turn up with an army of hirelings. If that’s what’s intended, maybe that’s just what we should go for.

Conclusion

I don’t yet know which way I’ll go with that decision, dear reader. I would welcome feedback from anyone with more experience of OD&D or the Temple of the Frog than me.

In general, this challenge has got me quite excited about playing D&D for the first time in quite a while. I wrote a few posts about maybe getting back into playing AD&D back in 2024, specifically I wanted to play Dark Sun. The experience of even making a character put me off it. But I now think that, with other players involved, it could be not only of historical interest, but it could be really fun! I know some of our players in Tables & Tales really like a bit of crunch, while others love the OSR principles of rulings above rules that OD&D might bring.

One thing you can be assured of, dear reader, is that I’ll be taking you with me along the way. I hope to have some interesting things to write about reading, prepping and playing these games, so stick around!

The Bloggies 2026

It’s Bloggies time again! This year, I’m not nominated, mainly because I didn’t nominate myself, which is what I did last year. But there are lots of great blog posts involved. I recommend you go and treat yourself to some of them.

This year, it’s being run by Clayton Notestine, last years’ winner over on the Explorer’s Design blog. It’s a lot of work! The honour of winning is tempered by the commitment of time and effort it requires to run it the next year. But he’s doing a brilliant job so far.

Today, I’m going to highlight one of my favourite posts from each category. The categories are:

  • Advice
  • Critique
  • Gameable
  • Meta
  • Theory
  • Debut Blog
  • Blog Series

For voting purposes, the posts are all paired, so they’ll be pitted against each other in a brutal gladiatorial blog-off. There can be only one!

You can read them all using the links provided on this page. Or you can join me in listening to them via the We Read the Bloggies podcast, to which many members of the TTRPG/blogging community have so generously donated their time.

Advice

This is my pick from the Advice category:

Just Tell Them What They Need! by Nate Whittington of the Grinning Rat blog. It was published on December 9th 2025.

If you have ever read a TTRPG adventure and screamed at it to provide you with the relevant information on a dungeon room, an NPC or a situation, this one’s for you.

Critique

This review of Mausritter, and, more specifically, the campaign set, The Estate, for that game, is really interesting. Recently, Quinns was on the Dice Exploder podcast talking about his love of the tactile, chit-based inventory system Mausritter uses. But, in this review, although the author, Malmuria, likes the way the system works, they point out that it’s a lot of work just to keep track of all those little pieces.

Gameable

On the d4 Caltrops blog, we have a very short but incredibly useful post on the stocking of wilderness hexes in OSR games. The main resource here is a d66 table which identifies discoveries as:

  • Landmarks
  • Lairs
  • Resources
  • Special
  • Hazard

Or some combination of these. Mostly, it provides sparks of inspiration to allow a GM to come up with discoveries that make sense in their campaigns/worlds. Here’s an example:

Hazard/Resource: Consider a Hazard that renders the Resource invaluable or inaccessible in some way.

Doesn’t that get your little GM brain whirring?

Theory

I love this post about Making Hacking an OSR Style Problem from the goblin.zone blog. I don’t play a lot of cyberpunk games or even games set in the modern day so this is not a subject that comes up very often in my gaming life. I am, however, in my day job, responsible for system security and data protection so I particularly clicked with Part 2: Useful Real World Concepts

Meta

I write RPG reviews here on the dice pool dot com. Some are better than others, but I do always try to make them useful to the reader, the potential player/GM or the prospective buyer. I don’t often think about how I go about doing this. But, if I did, it would probably be encapsulated in this post from The Dodecahedron blog. It references another post from one of my go-to reviewers, Idle Cartulary, on the Playful Void blog, which also did a lot to lay out what reviews should do. I appreciate any writing that makes me consider what it is that I’m doing and both of these posts did that.

Best Debut Blog

My pick in this category is the Valeria Loves blog. Here’s the post that got me hooked. Valeria has a compelling and entertaining voice:

I am a priestess of Blorb. Just as the map is not the territory, the rules are not the fiction. You do not need a codified movement speed to permit player characters to move.

And there is a satisfying assortment of blog posts so you’re sure to find something to your liking.

Best Blog Series

It’s the Playful Void again. Over the Christmas/New Years period Idle Cartulary reviewed a truly staggering number of games/modules for Critique Navidad. It was one a day for thirty days. I wrote a blog a day during my first month on the dice pool dot com. I can tell you, that’s a lot of work! And I was only prattling away about the shit the occurred to me, not reading, critiquing and writing about the work of others in a thoughtful and fair manner. That’s what this series is. Go check it out.

The Sutra of Pale Leaves, The Fixer

Goodbye Carcosa

Dear reader, last week, we took a look at the final part of the Sutra of Pale Leaves campaign. Today, we’re looking at the Fixer, the final scenario in Carcosa Manifest, the second book in the series. Its part of the Sutra of Pale Leaves, but its not necessarily part of a campaign. You could play it as a stand-alone module, but you could also play it as a coda to your SoPL game. It makes as much sense as the very loose way the campaign is presented, if not the way you might actually find yourself playing it.

The Repairer of Reputations

The Fixer is based on the short story by Robert W Chambers, the Repairer of Reputations. I’ve just listened to it on Youtube. It’s a story of insanity, ambition and murder, which is told from the point of view of a man who has come under the influence of the King in Yellow and a deformed, yellow Repairer of Reputations named Mr Wilde. Go listen to it or read it here. It’s not very long and I think it’s worth reading. The story and the scenario share a few major scenes and themes, but the Fixer is resembles the Repairer of Reputations only loosely. For one thing, the original was set in a then future New York City, while the scenario is based in 1990s Tokyo. The main thing, of course, is that it’s an RPG scenario for a number of players, and that necessitates a few things. The PCs need to have something to do, there has to be room for all of them to be the “main character” and it has to have enough meat on its bones to keep them going for a few sessions of play. I think the Fixer is quite successful at doing these things.

Beginnings

There is an interesting conceit here, that the investigators are down on their luck. They are members of Tokyo’s growing homeless community and are lacking money and respect. It’s possible that they are the same investigators that played through the full Sutra of Pale Leaves campaign. In fact it’s suggested that that’s the reason for their current predicament. Perhaps the things they were forced to do to fight the Pale Prince got them arrested or sent to a psych ward. Maybe they became social outcasts due to their talk about mind viruses and Carcosa and faceless people. Whatever the reason, they have ended up on the streets.

But then they’re given an opportunity by Mr Nomura to make some good money and repair their reputations, restoring their lot in life. Nomura is a strange man with terrible disfigurements and an ever-increasing number of cats. He acts as a wakaresaseya, a breaker-upper, if you will. This is a real business in Japan, and it fits in the scenario perfectly. In fact, in the short story, we never discover what it is that Mr Wilde actually does to Repair Reputations and I’m not sure that such a job ever truly existed in history. So, I like this logical adaptation in the scenario. He calls on the PCs to target several “wrong-doers who have made it into his ledgers.” These include a politician, a dirty cop, a buddhist abbott, a yakuza gangster and a fashion CEO. These are known as the Strawmen. He doesn’t want them killed or physically harmed. Rather, he would like the investigators to humiliate and humble them in particular ways.

Episodic

The visual flow chart of the scenario features the five portraits of the strwmen from the scenario at each of the points of a pentagram with a portait of the Fixer, Nomura above them all.
The Fixer Flow Chart

This scenario bucks the trend when it comes to format. Rather than simply following leads from location to location as the other SoPL scenarios, the investigators need to deal with each of the Strawmen one by one. Now, these people are all assholes in one way or another, even the buddhist abbott is a drug-addict who tricked his way into inheriting his title from his father by convincing the old man that his brother was actually the junkie. So, the investigators are unlikely to feel too bad about bringing them down. In fact, each of the strawman sections details the exact kind of shitheel each one is, their background, their weaknesses and where they’re most likely to be found. For instance, the politician can usually be intercepted at the National Diet (Japanese parliament) or on the golf course. Most useful is the “possible approaches” part in each strawman section. Obviously, this is Keeper-facing information, but it can be used to confirm that the investigators are on the right track. Generally, they are going to have to overcome things like getting onto a golf course or into parliament buildings while being homeless person. But once they get there, they get to do fun things like blackmail, or just straight-up releasing blackmail material to destroy them.

I can see each of the strawmen maybe taking a single session, with an episodic, strawman of the week type game. This would be interspersed with the results of the investigators’ efforts. You see, the truth is that targeting these individuals is essential to the completion of a ritual that will succeed in bringing Carcosa into our world. Nomura wants to overwrite Akihabara with the home of the Prince of Pale Leaves. They will start to see changes such as the police station being turned into changed into a castle looming over the town market square of Carcosa, or the National Diet transforming into the Royal Ballroom. As the city changes, so too does Nomura himself. His simple silicone prosthetic fingers become a cybernetic arm, and eventually he wears a porcelain mask and he is completely subsumed in some sort of cloak of scales with odd protuberances. I really like the gradual change in this villain and in the world. The investigators must assume their actions have something to do with these changes. The become more extreme with each strawman they bring low. And yet, the scenario assumes they continue to do what they have been employed to do.

Endings

Nomura, the Fixer pictured with his cybernetic arms on the table in front of him. He is otherwise a normal enough looking Japanese man wearing a light coloured shirt. There are cats in both the foreground and the background.
Nomura, the Fixer

Once Carcosa has been fully unlocked by the actions of the PCs, Nomura will attempt to fulfil their bargain by offering them positions of authority in his new city. The scenario provides us with a number of lore sheets, which the Keeper can give to any investigators that agree to this. These include, the Rightful Crown Prince, the Royal Matchmaker and the Judge of the Star Chamber. These are to be assigned to particular investigators, not randomly. For instance, the Rightful Crown Prince is supposed to be given to a PC with a good reason to despise the politician strawman so that they can rightfully exceed his level of political power. Even if the PCs don’t want to take on these roles in Nomura’s new world, they might anyway, if they enter into a period of underlying insanity, or if their Exposure Points get high enough, which is fun.

As a truly standalone scenario, we are told that the Fixer is not proscriptive on how it might end. It provides a couple of potential climaxes but it could really go any way. It does, however, still have the numbered Endings common to all these scenarios. I don’t know how we square that circle, to be honest. Anyway, here are the Endings:

  1. Party Wipe (Failure)
  2. Carcosa Manifests (Bad Ending)
  3. Reality prevails (Good Ending)
  4. Split Decision (Umwelt Ending)

Conclusion

I like this scenario. It’s weird and contains some potentially amazing scenes and revelations for the players. The NPCs are well drawn and the events are memorable. I think it would be a perfect way to wrap up your time with the Sutra of Pale Leaves and would act as a fun epilogue to the campaign.

All in all, I’m happy I took this deep dive into these books. I haven’t all that much experience running Call of Cthulhu but I think I would run this full campaign because it resonates with me personally. I think the Prince of Pale Leaves is an insidious and threatening unbeatable villain. The setting is one that I think will fascinate many people and the themes revolving around elements of Japanese culture and society work really well. The variety in the scenarios would, I think, keep it compelling and interesting for both Keeper and players. But I don’t think I would take their advice on running the scenarios in any order other than the one they are presented in and I can’t imagine myself playing it more than once, as they suggest is possible in the intro.

The Sutra of Pale Leaves, The Bridge Maiden Part 2

The Sutra Ends?

Not quite. We’re almost there, dear reader. This post is about the scenario that’s designed to be the culmination of the Sutra of Pale Leaves campaign for Call of Cthulhu. But it’s not the last scenario. There is one more to go. It’s called the Fixer and I’ll deal with that one next time. If you’re interested in the rest of the posts on this subject, check them out here.

The Bridge Maiden, Part 2 is, guess what, the continuation of the Bridge Maiden, Part 1. You come here to the dice pool for all the hottest insights, dear reader. The intro section tells you that you should run this as the last scenario in your campaign also. As I mentioned in these posts before, you’re informed early on that you can run the scenarios of this campaign in any order, but obviously, if you try running the Bridge Maiden Part 2 before Part 1, it’s not going to make a whole lot of sense. I would contend that the only two scenarios you really have to play to make an, admittedly very short, campaign are these two. None of the events of the other scenarios are central to the main plot of the Sutra of Pale Leaves. Honestly, even the events of the first part are basically surplus to requirements. More on that later.

Make way for SPOILERS below!

Who and What is the Bridge Maiden?

“Who” is a relatively easy question to answer, thankfully. In a very real sense, the Hashihime or Bridge Maiden, is embodied by Umezono Kaho, the NPC from Part 1 who probably employed the investigators to find her brother. Unfortunately, her brother had been transformed by the power of the Sutra, into a pale, subterranean, tentacular creature, but he was basically an asshole so whatever. However, after the events of that scenario, Kaho disappeared. No matter what the PCs did, there was no way to find her. During that time, she had become more and more assimilated into the Association of Pale Leaves (APL.) Not only that, but she has become the vessel for the entity known as Hashihime, as had her ancient ancestor, the great warrior-woman, Gozen Tomoe.

“What” is a bit more difficult. As the Hashihime, Kaho will be the one to guide the Prince of Pale Leaves from his home in Carcosa, across a magical bridge to Earth. This is achieved through the performance of a ritual. It’s not fully clear to me how this all works, though. We know that Gozen was an adherent of the Prince but I don’t know why only she, or her ancestors, have the ability to act as escort. We are told that it’s part of the ritual, but not why. We don’t have many other details about the ritual either, to be honest. But that’s because the PCs will not be able to stop it from beginning. So, let’s move on.

Beginnings

It’s at least a year since the events of Part 1. The investigators might have forgotten that Kaho ghosted them after they found/killed/escaped the clutches of her brother. But something comes up that leads them back to her. As usual, you can use the investigators’ confidants to get them involved, but there are no explicit hooks provided in this scenario as there are in the others we’ve looked at so far. Instead, we have a few bullet points describing ways to bring in the PCs without the intervention of the confidants. Honestly, I’m not sure why that is. After a year, I think it would be great to have a solid narrative hook to utilise to re-introduce them to this case. Especially as it’s not really even the same case! Part 1 revolved around the disappearance of Kaho’s brother, Minoru. Her relation to the Bridge Maiden and the APL is entirely tangential to it.

Except for one important detail. The Mandala of the Divine Eye was the artwork/sign/magic that allowed the APL to identify Kaho, through the thoughts and memories of her brother. Minoru had taken it to his lair beneath Tokyo in Part 1. It’s quite possible the investigators found it when they tracked him there. If they didn’t manage to do that, never fear! It has plot armour, so they will have been given it by one of their ever useful confidants who got their hands on it after it washed out of a storm drain. Either way, the PCs will, hopefully, want to examine it. Otherwise the beginning section of the scenario, “Interval: Examine the Mandala,” will be rendered useless and their progress through the rest of Part 2 will be drastically stymied. Yes, that’s correct, we’re starting with an interval. A bold move indeed. In this interval they will, with any luck, learn a great deal about the plans of the APL through regular old studying. But, if they’re really lucky, they’ll also experience a vision of the future, the coming of the Prince of Pale Leaves himself to our world as its new sovereign. They will also learn about the robbery in which the Sutra was stolen and a lot more about the Sutra itself. This is potentially weeks of Library Use rolls and social skills to investigate. Don’t get me wrong, I think this sort of thing is important to a Call of Cthulhu scenario. In fact, I think a lot of other scenarios in this campaign do not allow for enough Library Use. But it’s not exactly an in media res beginning, is it?

Actual Beginnings

So, 9 pages into the scenario, we get to the actual start, with a section call “Start: Pedestrian Paradise.” In this section the PCs finally hit the streets and get out of the dusty libraries and backrooms. This is where we get back to one of the themes of the previous part, the fashion industry in 1980s Tokyo. In fact, this part is far more linked to fashion than the first part. Kaho has been using her designs to influence the youth of the city and the country by integrating elements of the Sutra into her designs. It uses flower motifs and the brand is called Blume. Its set in the evocative neighbourhood of Harajuku, which was coming into its own in the ‘80s as a hub for youth and fashion, the likes of which, its fair to say, Japan had never seen before.

As the investigators try to question the groups of young people in the streets, they realise that there is something wrong here. The various groups, all wearing Kaho’s designs, tend to move as one, even going so far as to surround some poor girl menacingly, and acting like some sort of crazed flash-mob. All she had done was dropped her ice-cream on one of them! The mob are almost dancing at first, as though choreographed, but if the PCs intervene in anyway, the whole crowd will turn on them and attack.

This is more like it! This is the way I like to start a scenario. But, unfortunately, it comes only after weeks of in-game time while the PCs hit the books.

Leads

The visual flow chart for this scenario starting from the conclusion of part 1 and ending with the epilogue
Bridge Maiden Part 2 – Flow Chart

Following the flash-mob frenzy, the investigators are expected to follow some bread-crumbs. These lead to locations such as the design studio, Blume, where they might encounter one of Kaho’s employees with some answers for them, and a hypnotic motivational poster that’s forcing the staff to work absurdly long hours to fulfil the company’s goals. If only tearing a poster off the wall were enough to cure that particular illness in Japanese society. One of the disappointments in this scenario is that it doesn’t lean further into this particular theme. I think Part 1 does so quite well, though with other themes, as does Wonderland and Fanfic. But this scenario has a more urgent feeling to it (except during the ponderous starting interval.) It’s trying to wrap things up. So let’s move on.

The Association of Pale Leaves

The page of the scenario that includes an image of the invitation to the event/ritual that will launch the new fashion brand and summon the Pale Prince.

They’ll eventually receive an invitation to the launch party of Kaho’s new brand. Her co-mastermind, according to the invitation, is a man named, simply, Prince. Nope, not the Purple One, the Pale one. And they’re having a big party in a warehouse on a wharf in the city. This is to be the location of the ritual during which they will summon a Bridge of Light linking our world to Carcosa, allowing the Prince to cross over. That, of course, is where the big finale will be.

But before then, they might just want to investigate the offices of their nemeses, the APL. Truly this could be an “into the belly of the beast” moment in this scenario. They might actually have been invited there by the leader of the APL, Ōhiro Kimitaka, who could have given them one of his business cards in an earlier and entirely optional encounter. In the text, this encounter is described as “dangerous.” In reality, it is nothing of the sort. The most dangerous thing that might come out of it is to push the plot forward. Which begs the question, “why make the encounter optional in the first place?” Of course, there’s always the possibility that the PCs might attack him. You never know what they might do, after all. But it’s unlikely and he is heavily guarded.

Speaking of Ōhiro, I am not convinced by this guy’s villainy at all. Only within the Keeper-facing backstory has he proven himself to be ruthless and single-minded in the pursuit of his goals, which include bringing the Pale Prince to Earth. He Is, if anything, a slightly tragic figure. He can never realise his other goal, which is to become one with the Prince like everyone else exposed to the Sutra. Due to some neurological damage he suffered in World War II, he is “unsuitable.” Obviously, what he wants is unfavourable to the rest of humanity, but we never get to see him do anything particularly heinous in the course of the campaign at all. However, in one potential ending for this scenario, he begs the Prince to take him with him back to Carcosa. In answer, the Prince picks him up, defying all logic and physics, folds him like origami and pops him in his pocket, while Ōhiro screams in either despair or ecstasy. And that’s good.

OK, back to the APL HQ. During their time in this location there is a chance they will not only encounter Kaho, finally, but also uncover a great many answers as to what the heck is going on. They might even be able to recover the original copy of the Sutra. All of this is great, but is also fraught with danger. Obviously there are many opportunities for the investigators to gain more Exposure Points, thus drawing them closer to being taken over by the Prince themselves. They could be discovered and detained until the ritual. They might even risk death if they go up against some of the Courtiers of the Pale Prince. Hopefully not though. If you had a TPK before getting to the finale, that would be a real shame.

Finale

The PAle Prince is a blonde guy with sunglasses on and a low cut top.

“Spectacle” is the word I would use to describe the ending of this scenario and, I suppose, the whole campaign. This feels appropriate. Most of the scenarios have ended that way, Fanfic on top of Tokyo Tower, Dream Eater in a fight to the death in the dreamscape, The Pallid Masks of Tokyo in the otherworldly Château Carcosa/psychaitric hospital. Also, this one involves, for the first time, the incursion of the Prince of Pale Leaves himself into our world. It should be huge. He doesn’t strike me as an understated kind of bloke.

So this is what we have. After the investigators have milled around in the warehouse party for a short while, it’ll be time for the event/ritual. Everyone goes out to the wharf where construction has begun on the real-life Port of Tokyo Connector Bridge, aka the Rainbow Bridge. I like this intersection of the mundane and the mythical in the real-world, crossed with the events in this campaign. This is a really good example of it. Anyway, As everyone arrives, a great, winding bridge of solid light appears at the end of the unfinished, physical bridge as fireworks burst and fall above. Beyond, Tokyo disappears and Carcosa appears.

What a vision, what a reveal. This feels like a proper culmination to this long series of scenarios. The way is open and the Prince appears in a parade led by Kaho, now in her role as Hashihime, the Bridge Maiden. Carcosa threatens to overlay itself on Tokyo, and, eventually, the whole of the Earth. Only the investigators stand between their world and utter erasure. Big stakes! Surely they’ll throw everything they have at this threat!

There are several options to do this. They can take out Kaho in one way or another. Without her, the ritual will fail and the Prince will be forced back into Carcosa, closing the portal behind him. They could try ramming the Prince’s car off the bridge (there are lots of large construction vehicles handy), they could even do a suicide run on the bridge with a helicopter.

Endings

We have three potential endings this time. The worst is really the worst.

  1. Symphony in Yellow (Failure) – If they don’t defeat the Prince, the Bridge Maiden or disrupt the ritual, the entire world will fall to the Prince and will merge with Carcosa.
  2. Pre-emptive Strike (Best Defense Ending) – Its possible the PCs did some questionable, “the ends justify the means” type shit to disrupt the ritual. So, they might just end up in prison, safe in the knowledge that it was in a worthy cause.
  3. The Once and Future King (Triumphant Ending) – The investigators come out completely on top, having disrupted the ritual and destroyed the Bridge of Light. The APL might rise again, but, for now, it has been defeated.

Conclusion

There are things I like about this scenario. I like the actual start with the Pedestrian Paradise. I like the thematic elements like the mandala making the workers work harder and longer. I love the finale. It’s over the top and you might even argue that it is less than fitting for a Cthulhu game, but it works for me, especially as the culmination of the entire campaign.

On the other hand, I am not a fan of the interval to begin the scenario. I also don’t like the lack of additional thematic elements or the lack of action from one of the main villains of the piece.

But, as with all of my reviews of these Sutra of Pale Leaves scenarios, I haven’t played them. I don’t know how they might work at the table. I make a lot of suppositions and assumptions. They are educated guesses really. So, please do bear that in mind when you read them.

As I mentioned at the start, there is actually one last scenario in Carcosa Manifest. It is somewhat different in flavour, format and content, but it is related, nonetheless. If you have been following along, dear reader, you probably have a good idea of my overall impression of these books, the scenarios and the campaign. But I will go into it in more depth at the end of the next post.

Jailbreak – A Spire One-shot

Break Time

Our Blades in the Dark campaign is going well. We’ve only had three sessions but the players are moving the plot forward all on their own and are developing their characters in unusual and gratifying ways. But, for reasons, we’ve had to move our recent sessions to the weekend. So that has left us with a Wednesday gap. I grew bored of wasting my Wednesday evenings on housework, dog-walking and reading so I cooked up a plan to go back to Spire. But, since the change to our Blades schedule is only temporary, I wanted to make this a short one. To be certain we could wrap up our game, I decided to make it a one-shot. A city-break, if you will.

Shadow Operations

Cover of Shadow Operations - the city in red and black
Shadow Operations

A few years ago, Rowan Rook and Decard published a book called Shadow Operations. It’s a collection of eleven scenarios meant to be played in a single sitting, and it’s great.

It does a couple of things cleverly and well. The first thing is that it presents a template for a Spire one-shot and then has every scenario in the book stick to it. Not only does this make the reading and digestion of the scenarios easy for the GM, it also provides them with the basis for creating their own one-shots. You can see this Scenario Breakdown in the image below.

Scenario Breakdown
Scenario Breakdown

The other thing I really like about this book is the Iconic NPCs it provides. These are a list of statted out archetypes. They have titles such as “the Enforcer,” “the Queen,” and “the Vizier.” Then, throughout the book, each of the major NPCs presented in the scenarios fit into one of these archetypes. You don’t need stats for each NPC that way, you just use those iconic cookie cutters and refer to the handy reference page in the front if you need some stats for them. For a game like Spire, where there really isn’t anything like a bestiary or monster manual, and the enemies are just different types of people, this is a game changer. You can see the Iconic NPC stats in the image below.

Iconic NPCs
Iconic NPCs

Other than these introductory sections, there is a page of advice on Running One-shots in the back. This is pretty bare-bones, to be honest. It does tell you its best to “be up-front with your players.” Which is a great advice. You won’t have time for hidden agendas, secrets and mysteries that require deep investigations to reveal. Just lay it all out for them or you will leave them frustrated and the scenario unfinished. I couldn’t agree with this more. But the main piece of advice is to use index cards to write down the various locations, NPCs, PCs and props on. Once you have done that, you can group them appropriately, kind of like a game of Cluedo (or Clue for my dear readers from across the Pond.) There is nothing wrong with this advice. As much as I could, I went with it, insofar as I could playing on Roll20. But, as it turned out, we never really used my virtual index cards. The players had no real problem remembering where their characters or any other NPCs were at any given time or where any particular location was in relation to any other. So, I can’t help but feel that this advice only scrapes the surface of what the prospective one-shot GM needs to know. So much better is the advice in Heart. In Heart we are told to pay particular attention to pacing, to start fast and keep the pace up as much as possible. A one-shot is a sprint, not a marathon. Provide necessary information in flashback or in summary and get the PCs started right in the middle of the action. Give them an achievable goal. I wrote a whole blogpost on this a while ago. You can check it out here. One thing I’ll say, however, is that much of the need for this advice is obviated by the structure of the scenarios in the book and the directions within each one on how, where and when to start, and what the PCs’ aim is.

Running One-shots - advice page from the back of Shadow Operations
Running One-shots – advice page from the back of Shadow Operations

Speaking of the individual scenarios, I found it quite tough to choose the one I wanted to run, especially as I only left myself about three days to decide on it and prepare it.

Here are a few that I considered:

  • Life and Soul – Go kill Mr Winters, one of Spire’s most prominent gangsters, at his own birthday party
  • The Last Train – Get aboard the Last Train travelling the Vermissian and steal it or the tech that powers it
  • These Feral Saints – Find and recruit a newly reincarnated Hallow (drow saint) in Pilgrim’s Walk before some other cult does

But the one I went with was Jailbreak, a mission to infiltrate the Hive, Spire’s most notorious and terrifying prison, and, once there, ensure the aelfir can’t execute their prize prisoner, the Gnoll Warlord, Brakesh Gold-Tongue.

Jailbreak

There will be SPOILERS ahead, so, if you care about that sort of thing, look away now.

If you’re still here, welcome to the Hive. I’m going to discuss, briefly, my experience with Jailbreak as a scenario, playing Spire as a one-shot and whether or not I would recommend it.

I had four players for this one-shot and exactly three hours to complete it in. I like having time-constraints like this in some ways, as it gives me a very clear idea of how long I can spend in the various sections of the session. I was able to wrap it up within the time, although it was tight. We played online for convenience and because there was a gale-force wind and torrential rain that evening. We used Roll20, as I alluded to above. We found the Spire character sheets on that platform to be quite user-friendly and easy to navigate once you got used to them. It helps that Spire is a relatively rules-light game, certainly. There is a button you use to make rolls when necessary, which is handy as it combines your dice pool automatically. However, I will say that in instances where you have to apply a Difficulty to a roll you are forced to roll each d10 individually, because you can only see the highest die roll if you use the button. If an opponent has a Difficulty of 2, it means you have to take away your top two die rolls from the dice pool and go with the third highest. It’s a small thing but it did come a up a couple of times during play.

Suggested Classes

Character Sheet for the pregenerated Bound character, Sansel from the Spire Quickstart Guide.

Another piece of advice that I feel should be central to running a one-shot of Spire, much like my advice for a Heart one-shot, is to make sure you have pregenerated PCs. When time is of the essence, you can’t be spending an hour creating a set of custom characters. One of the most useful parts of the scenario structure provided is the Suggested Classes. For Jailbreak, these were Bound, Carrion Priest, Lajhan, Midwife and Shadow Agent. So I stole and tweaked a number of pregens from other Spire products such as the Quickstart and the campaign frame, Eidolon Sky. The only one I had to create from scratch was the Shadow Agent as I couldn’t find one already made in any of the Spire books I own. The most time-consuming element of this was just copying and pasting a bunch of stuff into the Roll20 character sheets. But there is no doubt about how much time it saved on the night. I could have done a better job with some of the characters to be honest, but when they are only in the spotlight for such a short period of time, a long and complicated backstory can be a hindrance, actually.

Finally we get down to the scenario itself. As I mentioned above, the central goal is to infiltrate the Hive and get Brackesh Gold-Tongue out. But, the Intro actually asks you to start the PCs already inside the prison. You then just ask them how they managed it! I loved this as it got them started right in the action and removed all the time-consuming planning that such an undertaking would usually require. My players went straight in the front door in disguise, in a meat cart or as a sort of chaplain for the drow guards and prisoners.

Intro

The Cover of Sin showing two drow looking out over a dark city in flames.
The Cover of Sin

You are then asked to describe the Hive. Now, there is minimal description of the prison in the main Spire book. It introduces it as a jail built into the living walls of Spire itself. It has rows of hexagonal cells which can be dropped individually from the wall in the event of an escape attempt. The unfortunate inmate would fall inside their cell all the way through the central abyss of the city, possibly all the way down to the Heart beneath. This is a terrifying prospect but, as I said, the description of the building, its inmates and staff etc, is brief. I was happy I had a copy of Sin. That book contains a much more evocative section on the Hive that was written, as it so happens, by Basheer Ghouse, the author of Jailbreak. It provides juicy tidbits like the way there are lots of walkways spanning the chasm below the prison, but they don’t have any handholds. Gulp. It also provides some great examples of the types of poor mutated experiments of creatures that are resident in the Menagerie. The Menagerie a part of the Hive where the aelfir send their old pets, experiments and art projects when they’re done with them. One of the main NPCs in Jailbreak is Dawn-Upon-Ice, a hobbling former aelfir who now acts as an information broker of sorts and can produce all sorts of nasty poisons in her guts for a price.

NPCs

Speaking of NPCs, Jailbreak has five, which is an easily manageable number. I will say, we didn’t interact with all of them, we skipped Qadiv Love-Fool, a sort of gnoll collaborator, purely due to the fact that the PCs did not pursue the information they gained about him. Brakesh Gold-Tongue, himself and Dew-In-Shattered-Mountains, the aelfir poet-interrogator, were my favourite to play. Neither lasted long against the PCs.

Suggested Scenes

After the NPCs section, there’s the suggested scenes. With the sort of structure you’ve got in these scenarios, this is really useful. Essentially, all you’re given to work with is a starting situation. The PCs are expected to push everything on from there. The suggested scenes allow the GM to pepper their descriptions of the infiltrators’ journey through the prison with interesting moments and opportunities to introduce the major NPCs. Here’s an example of one that I found particularly useful:

Smiling Kas spots the characters as she escorts Dew about the Deep Cells. She asks precisely no questions and accepts any excuse or alibi, no matter how ridiculous. If the characters have not threatened her and seem new to the Hive, she warns them not to stay in the Deep Cells too long.

I made liberal use of these suggested scenes.

Locations and Props

The next section describes the major Locations. I gave each one of these a little box drawn on the map on Roll20, thinking I would move the players’ tokens around from one to the next as their PCs moved. But, in practice, I didn’t really use them at all. Each of the Locations, which included the Menagerie, the Offices, the Guard Quarters, Watch Posts and The Deep Cells contain a brief description of the place, where it is in relation to at least one other place and the sorts of people and props that might be there. They are all short and to the point. Very easy to use on the fly. This section is supported by the prop section, which comes next. Props include unnamed NPCs like patrolling guards and menagerie experiments, by the way.

Twist

Each scenario has a Twist. Jailbreak’s twist is that Brakesh is a real asshole and has been going around the Hive murdering people, guards and prisoners alike. He was betrayed by his own side and left for dead before he was captured because he was kind of a psycho. He won’t leave with the PCs unless they either help him to kill each of the other named NPCs or offer him a shot at Snow-On-Stone, the aelfir commander who captured him. My players only encountered him about ten minutes before the end of the session. This worked out fine because their attempts to convince him to come with them failed so miserably that he attacked them and they were forced to kill him before escaping through an exploded front door to the prison. This worked out fine for them, as it happened. The Ministry wanted things to get messy to gain the attention of the papers and they were happy as long as the aelfir no longer had Brakesh as a source of information and didn’t get the opportunity to execute him publicly.

Conclusion

I love the way Shadow Operations is presented and it has a great variety of one-shot scenarios with an eclectic variety of settings and characters. Each of the scenarios is presented in only four pages, including one full page illustration. They are tight and easy to use because of the format. I do think it could do with some better advice on running a one-shot but, as I said above, if you follow the scenario structure, you’ll be alright.

Jailbreak was fun. It had a great setting. I loved describing a scene where the guards dropped one of the cells out of the wall and the PCs watched it plummet and the moment when they discovered one of Brakesh’s murder victims stuffed under the stairs was good too. But I found we had not enough time for the characters to shine as much as I would like. Maybe this is just one-shots in general, or maybe it’s how I handled it, but I would have liked a bit more room for the PCs’ characters to breathe.

I will definitely be going back to mine that rich seam of Shadow Operations in the future. It was so easy to pick up Jailbreak and run it with minimal prep. I would recommend it!

The Sutra of Pale Leaves, Wonderland

The Sutra Continues

This is the sixth in a series of posts on the Sutra of Pale Leaves, the Call of Cthulhu campaign set in 1980s Japan. Go check out my previous posts on the subject here.

Cyberspace, Sort Of

As usual, SPOILERS AHEAD! If you want to take part in Wonderland as a player, go read another post! I’ve got loads. If, however, you want to play as Keeper, stick around. You might find this useful.

Wonderland is probably the most old-fashioned horrific scenario presented as part of the Sutra of Pale Leaves so far. It’s got body horror, mutilation, mutation and teens in danger. And that’s just what happens in the real world. But this scenario centres around a computer game that is more addictive than World of Warcraft (just speaking from personal experience there.) Of course, that’s because it connects the real world to an aspect of the Pale Prince in the form of 不思議の国 or Wonderland, as in Alice in… The background section explains how Charles Lutwidge Dodgson, aka Lewis Carroll, came in contact with the Sutra while out of his gourd on opium, causing him to pen the Alice books, which gained a fanatical following in Japan. So much so, that, decades later, a talented computer scientist, named Nishikado Kazunori came up with a new game, named Wonderland, a MUD in which players could reimagine themselves as whatever they wanted and interact with each-other and the White Rabbit, the Cheshire Cat, Tweedledum and Tweedledee and all the other characters from Carroll’s novels. Of course, the longer they spent there, the more they would be consumed by the Prince himself, leaving nothing but a shell of a body behind in the real world for the Prince to inhabit and do with whatever he pleased.

There are a few other weirdnesses here. Like, if you have spent enough time in Wonderland by accessing it through the game, you don’t even need a computer to access it anymore. Instead, you just need to stare into a mirror and you will be transported. Also, if you’re juiced enough by Wonderland and the Prince, the physical persona you take on in the game can become real, in a most disturbing way. As well, the location of the studio where the game is being made is important, in a spiritual, and occult sense to the power behind the game, as it occupies the same spot where an old, blasphemous sect had their temple before it was burned down by some heroic monks.

Anyway, this is all just the setup to this lengthy scenario. Wonderland takes up about 43 pages and provides a plethora of new NPCs, locations, and rules. There’s a lot to take in, but if you understand the opening situation, you should be good. It’s worth noting that much like The Pallid Masks of Tokyo, this scenario would prefer if the investigators had a particular type of occupation. In Pallid Masks, it was cops, in Wonderland, its teachers. This makes sense when you consider the inciting incident.

Face-off

So, as I mentioned above, this one’s properly horrific. Just to prove it, author of Wonderland, Andrew Logan Montgomery, starts us off with a high school kid carving his own face off with a piece of broken mirror in the school toilets. If the PCs are teachers, they will be among the first on the scene when the screams ring out across the campus. Immediate sanity rolls. Now, that’s the way to start a Call of Cthulhu scenario! This is the first of the hooks provided. In fact, it’s a well thought out section to play, rather than just some read-aloud text to set the PCs on the case. We also get a couple of Lore Sheets here, one on Japanese Schools in general and one on this school in particular. The general one was clearly written by someone who has spent significant amounts of time in both the classroom and the teachers’ room in a Japanese high-school. It all rings true and jibes with my own experiences as an ALT on the JET programme. The one on the Kagaminuma High School is short but provides a good overview of the type of school it is and the students that attend it.

If the players are not playing teachers, they only find out about this bloody example of self-mutilation after the fact, probably from their confidant, such as the Fed, the Abbott, or the Heiress, all described in the Campaign Background chapter at the start of both this book and the previous one. Hook Four: “An Electronic Opium…” brings back Madam Inaba, the fortune teller from the first scenario in the campaign, Dream Eater, which is cool.

Pixelated images of four Japanese high-school teachers accompanied by descriptions of each of them across two pages of the book.
The matrix like background reads Aokuchiba, or the Sutra of Plae Leaves over and over again.

I can’t emphasise enough how much easier this scenario is if your PCs are teachers. The author, Mr Montgomery, even provides us with a number of well-drawn teacher NPCs that can double as PCs to get you started quickly and easily. But what I really mean is that in many instances, where other investigators would need to make some sort of social roll just to get past the door in many sections, a teacher need not roll at all. This checks out to me. The role of a teacher in Japanese students’ lives is much greater than in other countries. It is not unusual for them to make home visits to talk to parents, in fact, it’s part of the job. The homeroom teacher is very familiar with all of their students and is there to support them in all sorts of ways. There is also a level of automatic respect attributed in the culture to a teacher, which allows them a little more leeway than the average citizen, although I think that’s taken to extremes in some instances in this scenario.

Anyway, back to the plot. This kid is sent to hospital and this is where the mystery begins. It is assumed by everyone that this is Uchida Kenji, since he was wearing that boy’s uniform. However, it’s actually Hosoda Riki, his “friend.” Kenji convinced Riki to swap uniforms and then to mutilate himself, with a little help from the Pale Prince and the Wonderland game, which has turned his mind to Swiss cheese. With this cover, Kenji disappears fully into the game, himself, becoming his own avatar, a sort of big wolf. Meanwhile, his body is occupied by the Pale Prince, who hangs out in the offices of White King Studios, the makers of Wonderland.

White Rabbit

The visual flow diagram of the scenarion starting with the Boy in the Bed and ending with Endgame
Wonderland Flow Diagram

This is the investigators’ white rabbit. They’ll follow the trail from the incident in the school to the other missing boy, eventually figuring out that everybody has them mixed up. They are very likely to figure out that Kenji, quite apart from his current supernatural status, was a psychopath all along, and that he tricked his friends into playing the game until they were largely subsumed by the Prince. Not to mention the old face-carving shenanigans.

Another of Kenji’s friends, Yamauchi Kenichi, (I’m not sure why it was decided to give this kid a name that was so close to Kenji. It confused me while reading the scenario, constantly. You just know it’s going to get mixed up in players’ heads too) has become a shut-in, so addicted has he become to Wonderland. In fact, he no longer needs the computer to access it. Instead he can just stare into a mirror and lose himself for hours. We get another Lore Sheet here. This one’s about Hikikomori, the ever deepening phenomenon in Japanese society of people withdrawing entirely from it to occupy a single room and interact with no-one, often playing video games addictively. This lore sheet admits the slight anachronism here, as the term was not coined until the 1990s. Still, the phenomenon was present even in the ‘80s. Obviously, most instances of it were not caused by the encroaching influence of some elder god in the form of a memetic virus, however, as it was in Kenichi’s case. Kenichi is a very tragic case. The investigators are likely to learn that he feels he’s lost most of himself to the Prince. His story is likely to end with him taking his own life. It was something a of a shock for me to read that this is likely to happen, no matter what the investigators do. I don’t believe I would run it this way. To be fair, though, there is an optional section near the end of the scenario, “The White Wolf.” In it, a brave investigator can enter Wonderland to rescue Kenichi and, hopefully, bring him back to the real world.

Montgomery is really delving into some of the darkest social phenomena in Japan here. We also discover, as the investigators follow the trail, that Riki’s father has a crippling gambling addiction, which he satisfies by playing pachinko. I only ever entered a pachinko parlour once, out of curiosity. Sensory overload is the best way to describe the experience. All those tiny little metal balls being propelled around the insides of hundreds of machines makes an almighty clangour, the lights flash and the faux silver of the interiors gleam, the stink of tobacco smoke and old coffee. I couldn’t get out fast enough. But many people are hooked on it and they often go into debt with some unsavoury characters to feed their demon. That’s where Mr Goto, the local yakuza oyabun comes in in this scenario. He likes to consider himself a servant of the people in Tokyo’s Adachi Ward. If the PCs are teachers, he sees them as fellow public servants, and so treats them as colleagues. He’s one of my favourite characters in this scenario. He’s well-drawn and can be manipulated if the investigators recognise how to push his buttons.

Through the Looking Glass

Eventually, one of the investigators is likely to log into Wonderland. Obviously, this being the mid-eighties, this is easier said than done. You need a compatible computer with a modem and internet connection. Such things were few and far between back then. But eventually, they’ll probably find a way, maybe even in Kenji’s house where it’s all set up and ready to go. However, it is unlikely that more than one of the PCs will be able to do this at a time, unless they manage to find a number of internet-capable machines to log into at once. The scenario is written with the assumption that only one investigator is taking the delve. I think I would run it differently, however. This is a lengthy portion of the scenario and probably the most fascinating aspect of it, why not involve any and all players who want to get in on it? There are already several minor anachronisms in this scenario, so why not?

Although Wonderland is a text based game, they soon find themselves sucked into another world, which they can experience through their own senses. They will find themselves on the other side of the looking glass and interacting with the honest-to-goodness White Rabbit. When they realise they are using their own skills to make checks, even in the game-world, they will be confronted with a sanity-defying fact… They, themselves, are fully immersed in Wonderland. They will be able to conjure items and effect changes to their surroundings similar to the way they were able to in Dream Eater. But there are, of course, negative consequences to Wonderland exposure, on top of the effects of Exposure points, even. The game will begin to seep into their real lives and eventually they will be utterly consumed by it, leaving their body a shell in the real world. I’m honestly not sure that this campaign needed yet another set of exposure/infection/insanity rules for the Keeper to keep track of. I feel like all of this could be dealt with by the existing sanity rules, with a little creativity.

The trip through Wonderland will lead them inexorably to an audience with the White King himself. Little do they know it, at this point, but this is Nishikado Kazunori himself. After this, they get ejected from Wonderland.

The "map" of Wonderland is a more-or-less rectangular area separated into rectangles of different sizes and clours with the anmes of each are on them
Map of Wonderland

I generally like this section of the scenario. It’s well described and I feel like it would be fun to see the players’ reactions to it. But I do have an issue. You are provided with a bare-bones “map” of the world that includes whimsical locations like the Cave of Woe, the Moaning Woods, etc. But you can only interact with a few of them. The experience is quite railroaded from the Chess Board Fields to the Court of the King allowing for no deviation. Those other areas are not even described in the text.

Of course, it’s always possible the PCs won’t play Wonderland, considering what they have discovered about the game so far. In that case, we are provided with a short section on what the Keeper should do… We’re given the option of simply going with it. The scenario will lose something if no-one decides to enter the game, but it can still be brought to a satisfying end. The other option is to kind of… force them in. This is supposed to work only if a PC has accrued a number of Exposure Points already, maybe in the course of other scenarios. In that case, simple proximity to a computer running the game will affect them, sucking them in in their dreams.

Checkmate

The White King is illustrated here as a chess piece with a skeletal head, arms and torso in front of a background of a mountain with twin moons rising behind it.
The White King

The finale comes down to a physical confrontation between the investigators and the White King/Pale Prince who has taken over Nishikado’s body. White King Studios is the venue for this showdown. In all likelihood, the PCs will be there to burn the place to the ground, in a fairly predictable mirroring of the events surrounding the temple that once stood on the same ground hundreds of years before. The White King begins as a diseased, but human looking man (although, he’s missing his genitals, according to the text. Not sure why we needed to know that, since it is a detail only the Keeper is likely to ever discover.) But during the final encounter, he will transform into a horrific, real-life chess-piece. He will speak like Lewis Carroll might write him, with lots of alliteration and self-satisfied word-play. Sounds difficult to play for the Keeper, if I’m honest. They’ll also find Kenji here, or, at least, his body, occupied by the Pale Prince, who acts as the mouthpiece for the White King.

Endings

Only three potential endings in this one:

  1. Party Wipe
  2. Just a Game (they solve the mystery but fail to destroy all copies of the game before its released)
  3. Twisted Firestarter (they defeat the White King and burn the place to the ground with all the copies of Wonderland inside.)

Conclusion

This was a long write-up dear reader, but it is one of the longer scenarios in the Sutra of Pale Leaves campaign. It is a complex scenario with a lot of NPCs, a number of events and locations and even a trip to another dimension, sort of. I have some issues with it, which I enumerated throughout. My main problems are the introduction of yet more Exposure-based mechanics to what is already a slightly bloated system and a slightly rail-roady tendency in a few places. But, in general, I’d be excited to run Wonderland, with a few tweaks.

We are closing in on the end of this campaign, now, dear reader. Only two scenarios to go! Next time, we catch up again with Umezono Kaho for the Bridge Maiden, Part Two.

The Sutra of Pale Leaves, The Bridge Maiden, Part One

Carcosa Manifest

We have left Twin Suns Rising in the past, dear reader. Things can only get darker from here. Today, we move onto the second and final book in the Sutra of Pale Leaves campaign for Call of Cthulhu. We’re still in Japan in the ‘80s, but the plans of the Association of Pale Leaves are moving to the next level. For my thoughts on the previous book and its scenarios, click here.

This is the book that attracted me to this campaign in the first place. I’m not too proud to say that I saw the cover on the shelf in my local game store, Replay, and realised I had to have it. It was only later that I discovered how it formed the perfect intersection of some of my own interests, namely Japan, and nameless horrors.

The book starts with a campaign background chapter that is very similar to the one in the first book, but with less detail. I guess this is needed because you’re supposed to be able to run any of the scenarios in the campaign in any order or even to run them as independent adventures. So you need that info in both books. Anyway, if you want more on the contents of that, check this post out.

Then we move swiftly on to the first of four scenarios in the book. As usual: SPOILER WARNINGS! Don’t read past this point if you want to be a player in this scenario or campaign.

The Bridge Maiden, Part One

This is a short scenario compared to the others I’ve looked at in this campaign so far, only 26 pages long. However, it is only part one of a two-parter. Part Two is the third scenario in this book and, ostensibly takes place about a year after the events of this one.

The intro to Part One tells us this is a suitable place for inexperienced investigators to begin their adventures with the Sutra of Pale Leaves, which is interesting. I have repeatedly come back to the fact that you are encouraged to run these scenarios in any order, despite the chronology of events laid out in the campaign background chapters. You can also skip scenarios you don’t want to include. And all of that is fair enough. Any of them would work well stand-alone. But, I think you would be missing out if you skipped ahead to this point.

Beginnings

The visual scenario flow diagram for the Bridge Maiden Part 1

Once again, we’re given a number of hooks to get our investigators involved; no fewer than six hooks, in fact. All of them involve the PCs hearing about the disappearance of a man named Umezono Minoru. In some instances, this will come from one of their confidants and NPCs from other adventures such as Nagatsuki Kaede of Fanfic fame. In others, they will be approached directly by his sister, Umezono Kaho. She thinks he has gotten in trouble with the yakuza since he’s got bad habits and money troubles. Honestly, everything we learn about this guy during the course of the scenario would lead you to think he’s a bit of an asshole and deserves everything he gets. This is one of the reasons that there is a reward for finding him, I think. No one wants him found because they love him. Even his sister only does so out of some sort of obligation to their parents, it seems. The scenario even suggests one or more of the Investigators might have known the Umezonos when they were younger, just so they have some extra insight into the personalities of the two and more of a reason to help them out.

What’s interesting about the Umezono family is that they are proud to be related to one of Japan’s foremost historical warrior women, Tomoe Gozen. The APL is convinced that she was the Hashihime, or Bridge Maiden. She was integral to a ritual used in the past to summon the Prince of Pale Leaves to Kyoto during a time of war. Although the ritual failed due to the fighting, the APL knows that, if they could just find a likely candidate to fulfil the role, they could still make it work. Enter Kaho and Minoru. The APL used an artefact, the Mandala of the Divine Eye to search the minds and memories of passersby in Tokyo, searching for any sign of a suitable host. In this way, they discover the debt-ridden and beleaguered Minoru, and through him, his sister, Kaho. They determine that she would be perfect, but, in the meantime, due to his exposure to the Mandala, Minoru gives himself up to the Prince, only to be transformed into a subterranean monster of a man, a tentacled mockery of his former self. And, he, dear reader, is the subject of this scenario.

A Model Mystery

The whole scenario has a theme of fashion and modelling to it. Kaho is a small-scale fashion designer garnering some interest in Tokyo and her brother runs a modelling agency in his spare time. But Minoru is a dirtbag, as has been stated. His inappropriate behaviour has caused most of his models to take off and his receptionist to spend all her time looking for new jobs. There is a parallel to be drawn between the way the fashion industry used women for its own ends and the use of Tomoe Gozen and, in the future, Kaho herself, for nefarious purposes.

Some of the locations the investigation takes the PCs are related to the industry. The main one is Minoru’s model-dispatch office, where they will encounter the job-hunting receptionist. She will just confirm what they probably already know: that he is an asshole, a womaniser and is in debt to the yakuza.

Of course, this might lead them to talk to their local yakuza businessmen, and from there, we start to see a seedier side to “modelling” in Tokyo for young women. Its not overt, to be honest, but in the “Somewhere with Payphones” section, they will find the spot where the mandala had been placed by the APL, pasted to a wall by a line of phones, somewhere public and busy like Shinjuku Station. On the walls around that spot are pinned flyers and little cards for illegal brothels and entertainments. The mandala itself has been removed but it has left a hole, a spatial anomaly of sorts known as the Eye Socket, which makes the witness feel like they are being pulled into darkness where the Prince of Pale Leaves waits. This feels appropriate to the themes. It portrays the seedier, darker side of the industry and its discovery may eventually lead them to Minoru, formerly a monster of a man who abused women and now a true monster who attacks them.

The film industry gets a look in here too. A well-known documentary film-maker has become obsessed with filming the place where the mandala once spied on the city. He and his staff have all been exposed to the sutra in this way, though not to the extent that Minoru has. The staff, convinced the film they made is possessed of some unspeakable evil try to burn down their production offices. The investigators will need to prevent this if they want to see what they filmed. Of course, watching the film will endanger their sanity because this is Call of Cthulhu.

Seedy Underworld

Minoru's true form. A man dressed in a grey coat and hat, with pale skin and unnaturally long arms.
Minoru

Our investigators will follow some more leads until they find Minoru’s hiding place in an old culvert beneath the city, where once a canal flowed. He can’t stand the light anymore. His skin has gone pale and his eyes only work in the shadows now. He looks terrible and his arms are long and snaking tentacles. In their exploration of this place, they will discover his little shrine of objects taken from the various women he’s attacked since his monstrous transformation. That’s when he will attack them. There is not going to be a non-violent end to this one. The investigators can defend themselves, they can die or they can run. Those are the three potential endings we get here. Afterwards, if they don’t defeat Minoru, he and all his creepy mementoes will get washed out of the culvert and into the river after a big storm, putting an end to him. But he’s not the only one gone, when the investigators go looking for their reward or just to tell Kaho about her brother, she will be missing. And this is what leads to the Bridge Maiden Part 2.

Conclusion

Upon my first reading of this scenario, I was underwhelmed. I thought the monster was not particularly scary, the plot was thin and I thought we should be focusing more on the Bridge Maiden herself. It was only while writing this post that I began to see how well the themes are represented in this scenario and how satisfying it might prove to be to put an end to Minoru. If the investigation progresses in the way the scenario wants it to, it should feel like a spiral from the relatively normal world of fashion and modelling, down to the darker side, the street-level prostitution controlled by gangsters and the violence that’s part of that life for many women.

It makes me interested to see what they pull out of the bag for part 2. I should get to that in a couple of weeks, dear reader. Next time, though, we are entering the computerised world of Wonderland.

The Sutra of Pale Leaves, The Pallid Masks of Tokyo

The Sutra Continues

This is the fourth in a series of posts on the Sutra of Pale Leaves, the Call of Cthulhu campaign set in 1980s Japan. Go check out my previous posts on the subject here.

Insanity

This is the third scenario in Twin Suns Rising, the first of two books that make up the Sutra of Pale Leaves Rising campaign for Call of Cthulhu. Its written by Jason Sheets.

This scenario is somewhat shorter than Fanfic, coming in at only 32 pages. Its format more-or-less matches the other adventures in this book. It has a scenario flow diagram, although it is less easily identifiable in theme this time. We get a larger number of NPCs introduced near the start than in previous scenarios. The plot feels like it’s quite reliant on the actions and reactions of these NPCs and some of them act as redundancies should the more important ones meet their end prematurely. Some of them can also be used as fill-in PCs, in case the worst should happen.

Graphical display of the flow of the scenario
Scenario flowchart

WARNING! Spoilers ahead! If you want to take part in the Sutra of Pale Leaves campaign or even just this scenario as a player, you might want to refrain from reading further. I’m going to write about stuff you would rather was revealed during the course of play.

Appropriately for a Call of Cthulhu scenario, The Pallid Masks of Tokyo partially takes place in a psychiatric facility. It also involves that perennial favourite of Japanese 1980s stories, the Yakuza. Crime and insanity seem to be the two main themes of this scenario, which also makes a lot of assumptions regarding the PCs occupations. It really wants them to be cops or cop-adjacent, at the very least. We are told this in the “Involving the investigators” section, which presents three hooks. Only the first one assumes your PCs are police and we are told, if you don’t use this one it will make, “dealing with officialdom considerably more difficult.” The Campaign Background section at the start of the book told us that it was not necessary to play the same investigators the whole way through, and the Pallid Masks of Tokyo seem to actively encourage your players to switch their old PCs out for a more law-enforcement based character. Perhaps the authors did not expect any of the investigators from earlier scenarios to survive, or expected them to be assimilated by the Prince by now. After all, one of the notes presented in the opening pages of this one suggests switching out the main villain of the piece, a psychiatric patient called Yamamoto Minoru for a PC that had been taken by the Prince of Pale Leaves in an earlier scenario. I love this idea. If anything, I think it would be far preferable to using Yamamoto, but, of course, there’s no guarantee that you’ve lost an investigator in this manner so its good to have the NPC instead.

Beginnings

Like I stated above, it’ll be a lot easier to involve the investigators if they’re cops in this instance, because it starts with a murder scene. A body with no face has been found in a Tokyo back-alley, so, obviously, if they have badges, it’ll be a cinch to go there and inspect body and crime-scene. But there are ways around this if they are just librarians or salary-men or whatever.

Anyway, one of the beat cops will immediately tell the PCs he thinks the body is that of a Noppera-bō, a type of mythical Japanese monster with no face.

And, he’s not wrong. Yamamoto and his pal, Crazy Kazu (a member of the Yakuza) have been tattooing gangsters with part of the Tale of Pale Leaves (The manga from Fanfic.) This allows the Prince to take them over completely and all in one go. These lads have all been turned into these Noppera-bō. Kazu was the first, and he has gone rogue from his clan, conducting business of his own. Thematically, this is all great. It retains the relationship to Japanese mythology while tying it to the Mythos and the Yakuza and the loss of self and sanity.

Anyway, I love this as a starting point. It’s iconic and designed to draw the investigators in immediately.

Leads

This scenario has a very investigatory nature. Most of the rolls that are called for are in that vein and involve interrogation or detecting in one way or another. While this is true for many Call of Cthulhu adventures, the format, the theme and the major NPCs in this one add up to give it the feeling of a police procedural or an episode of the X-Files.

A medical examiner stands by a body in a morgue freezer. The doctor has not face but wears glasses.
Noppera-bo ME

So, from the crime scene, leads can take the investigators to the morgue where they will encounter a medical examiner who is being repeatedly exposed to the sutra via the tattoos of the dead Yakuza, or to the headquarters of the the Umezawa-gumi clan, where they can question the head of the Yakuza group. There is even a scene in the nightclub, Xanadu, run by Crazy Kazu, where my former profession gets a shout-out.

…the clubbers, who include a mix of subcultures, from college students and Japan Exchange Teachers (JET) to newly minted salarymen.

Much later than the time this adventure is set, I was in the Japan Exchange Teachers (JET) program. And it’s quite true to say that we partied a lot in places, if not exactly like the club, Xanadu, then very much like it, every weekend. (Those in the know will also remember a night-club in my hometown of Sligo in the 90s called Xanadu, in another surprising cross-contamination with my own life!) The nightclub scene, of course, is a classic staple of ’80s detective and action fiction, and this one is special. A dance troupe of Noppera-bō ladies take to the stage, constantly changing their faces, sometimes appearing without any features at all, moving to the backing track of “the Litany of Wearing the Empty Mask,” thus exposing the club-goers to the Sutra.

Four faceless dancers in short dresses dance on a nightclub stage while one woman freaks out in the front.
Noppera-bo dancers

But eventually, they will be led to the central location of the scenario, the Tokyo Metropolitan Psychiatric Hospital Secure Unit. Here they will encounter Yamamoto or or that former PC who was over-exposed to the Sutra. In either case, if an investigator has sufficient EP themselves, they will see this person as an embodiment of the Pale Prince, on a throne, surrounded by his Yojimbo warriors, rather than the shaven-headed psychiatric patient on a hospital chair looked over by orderlies. I love this vignette, especially if only some of the investigators see the Prince in this instant. It’s possible, in this instant that those PCs might be overcome by devotion to the Prince. They could even give themselves over to become a Noppera-Bō themselves.

The Shadow

This is a special scene for the Keeper to drop into the scenario at an appropriate point. Essentially, it should act as the retelling of the classic Noppera-bō story from legends, with the PCs as the victims. Essentially, this would involve them interacting with someone who reveals themselves to have no face, only to run, looking for help from someone like a police officer who then reveals themselves to also have no face.

The Keeper would have to take notes and do some prep to make this encounter work in the context of their game. I also think that, if it were perpetrated on a full team of investigators, it would be unlikely to work the way the text wants it to. An individual confronted by this would be far more likely to run and look for help. But if you can pull it off it would be be awesome.

The scenario does give you some advice on how to run it and provides a table of Nopper-bō encounter locations and individuals who could fulfil the necessary roles. So, it’s definitely doable!

Château Carcosa

The psychiatric hospital transformed into Chateau Carcosa. It is a scary blak edifice. There is a stylised red sky above and a yellow ground below, representing Carcosa
Chateau Carcosa

This is the location for the finale of our scenario. It’s actually the same psychiatric facility the investigators visited earlier, but transformed. Now, it’s the residence of the Prince of Pale Leaves, transplanted from Carcosa. The Royal Palace is very different from the building the PCs will remember:

The floor is polished rosewood. The scent of spring blossom fills the air, but the sweet scent occasionally shifts to that of rotting leaves. Yellow-furred bats roost in the angles of ancient roof-beams. Plaintive music, played on traditional stringed instruments, wafts through doorways, while the faint sound of laughter, and then a scream, can sometimes be heard.

From what I know of the second book of this campaign, Carcosa Manifest, this section is an appropriate pre-cursor to some of the events in the scenarios contained within that. The investigators can get a glimpse at the alien world of Carcosa through the windows of Château Carcosa, while two of the later scenarios, the Bridge Maiden, Parts 1 and 2, involve the cult building a literal bridge between our world and that dark one.

Endings

The investigators are likely to end up in three different situations:

  1. Defeated completely by the Noppera-bō, by whom they are utterly out-numbered in the palace. Even PCs who die in the final confrontation may, however, awaken later, as patients in the hospital themselves and might even see action in later scenarios!
  2. Some of them will become Noppera-bō themselves, unbeknownst to the other players, and will attempt a Noppera-bō scare (as described in The Shadow section above) on their fellow investigators in later sessions. Love this one.
  3. They defeat Yamamoto somehow, killing him or stopping him in some other way. In this case, the hospital immediately reverts, as do the people who had been transformed by his tattoos.

Conclusion

The Pallid Masks of Tokyo is probably my favourite of the three scenarios presented in this book. It has some great locations, fascinating and horrifying monsters and well-realised themes and motifs. I do feel like Yamamoto/The Pale Prince, could be better drawn, though. Even the final confrontation with him in the Château seems hastily wrapped up. I was expecting more from the scene in the throne room than we’re given here.

I think this is a great concluding scenario for the Twin Suns Rising portion of the campaign and a great bridge into the next part, which I will discuss in coming posts about the scenarios contained in Carcosa Manifest.